


This should take overall.

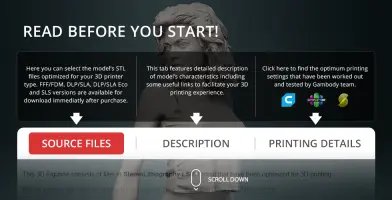
This 3D printing design of Ripley Underwear consists of files in StereoLithography (.Stl) format that is optimized for 3D printing.
Before printing the files, we strongly recommend reading the PRINTING DETAILS section.
WHAT WILL YOU GET AFTER PURCHASE?
Detailed information about these 3D printer STL files is available in the DESCRIPTION section.

|
|||||
|---|---|---|---|---|---|
| File Name | File Size | Time / Filament | Object Size (x/y/z mm) |
||
|
1_head_FDM(repaired).stl |
21.45 MiB | 4 h 11 min 2 m | 35 x 39 x 49 | Download | |
|
2_body_FDM(repaired).stl |
26.33 MiB | 6 h 38 min 4 m | 46 x 52 x 67 | Download | |
|
3_legs_FDM(repaired).stl |
22.75 MiB | 4 h 44 min 3 m | 61 x 46 x 109 | Download | |
|
4_arm_R_FDM(repaired).stl |
16.75 MiB | 1 h 38 min 1 m | 23 x 34 x 76 | Download | |
|
5_arm_L_FDM(repaired).stl |
15.25 MiB | 1 h 25 min 1 m | 18 x 27 x 81 | Download | |
|
6_hand_R_FDM(repaired).st l |
17.45 MiB | 34 min <1 m | 30 x 26 x 25 | Download | |
|
7_hand_L_FDM(repaired).st l |
14.96 MiB | 43 min <1 m | 33 x 20 x 25 | Download | |
|
8_overalls_FDM(repaired). stl |
30.30 MiB | 16 h 55 min 10 m | 125 x 57 x 77 | Download | |
|
9_glove_R_FDM(repaired).s tl |
13.92 MiB | 51 min <1 m | 26 x 16 x 39 | Download | |
|
10_glove_L_FDM(repaired). stl |
14.20 MiB | 54 min <1 m | 16 x 26 x 39 | Download | |
|
11_foot_L_FDM(repaired).s tl |
12.08 MiB | 28 min <1 m | 15 x 36 x 22 | Download | |
|
12_boot_R_FDM(repaired).s tl |
13.61 MiB | 1 h 29 min 1 m | 23 x 35 x 41 | Download | |
|
13_boot_L_FDM(repaired).s tl |
13.99 MiB | 1 h 11 min 1 m | 28 x 40 x 28 | Download | |
|
14_connector_1_FDM(repair ed).stl |
1.57 MiB | 6 min <1 m | 5 x 7 x 10 | Download | |
|
15_connector_2_FDM(repair ed).stl |
1.57 MiB | 6 min <1 m | 5 x 7 x 10 | Download | |
|
1_head_v2_FDM(repaired).s tl |
25.43 MiB | 4 h 14 min 2 m | 38 x 35 x 51 | Download | |
|
Keychain (repaired).stl |
0.35 MiB | 23 min <1 m | 30 x 30 x 2 | Download | |
|
Tag (repaired).stl |
1.70 MiB | 1 h 16 min 1 m | 150 x 18 x 5 | Download | |
|
16_platform_FDM(repaired) .stl |
10.82 MiB | 22 h 52 min 13 m | 155 x 155 x 12 | Download | |
| ... | |||||
This should take overall.
ABOUT THIS 3D MODEL
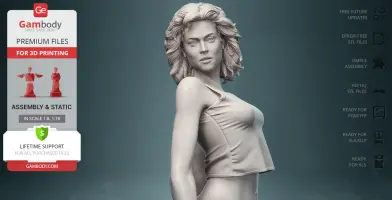
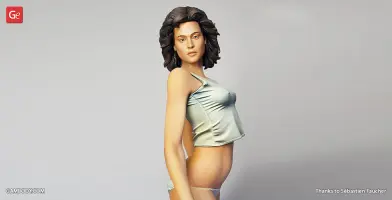
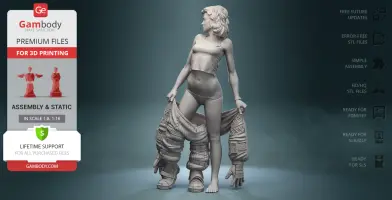
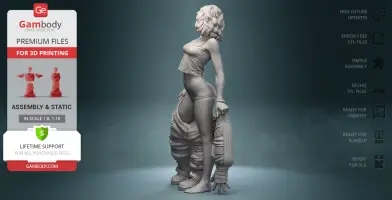
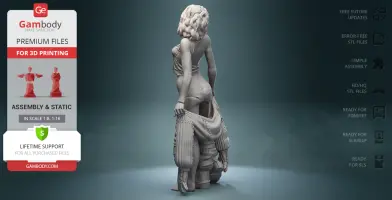
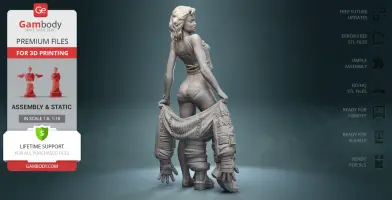
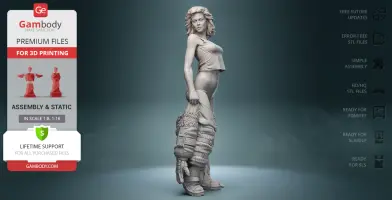
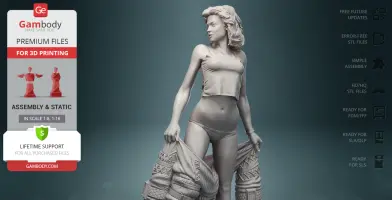
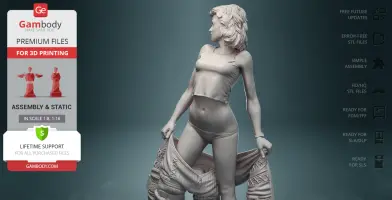
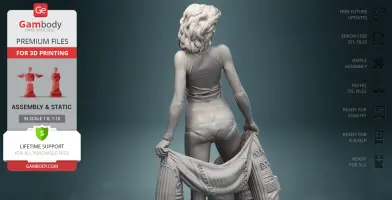
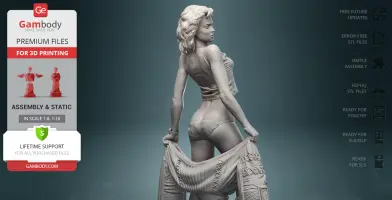
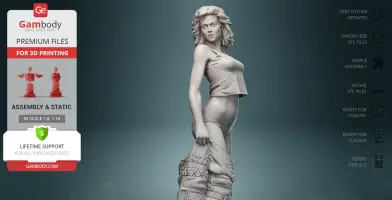
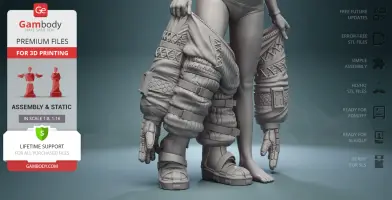
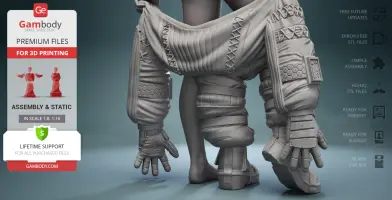
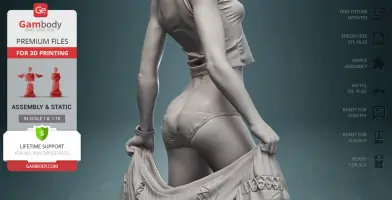
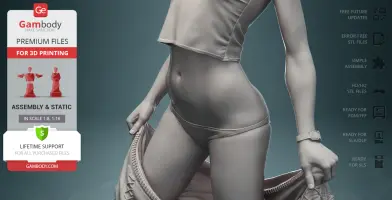
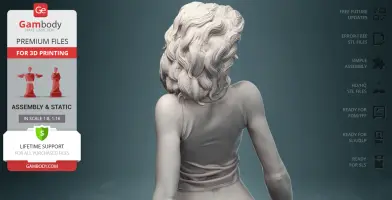
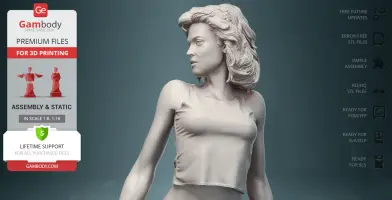
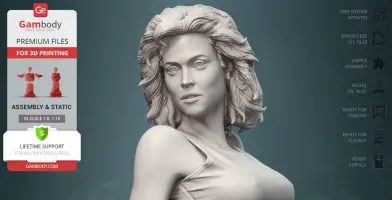
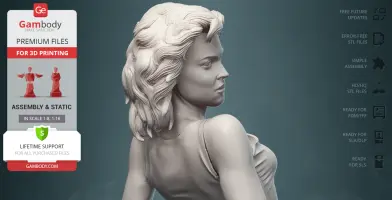
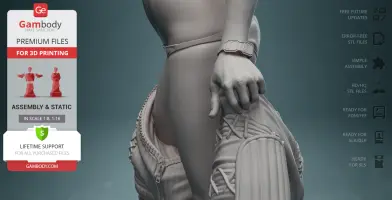
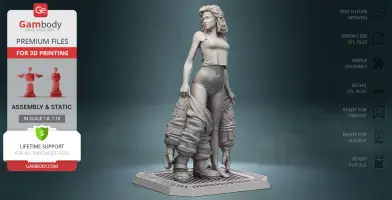
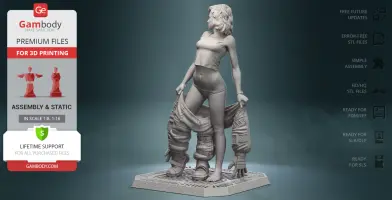
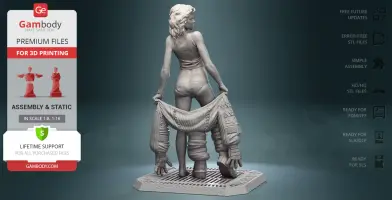
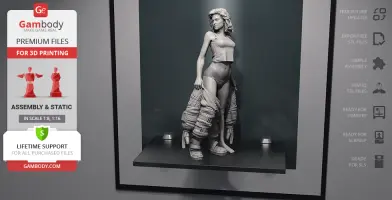
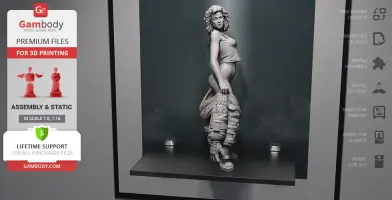
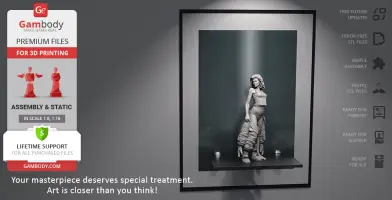
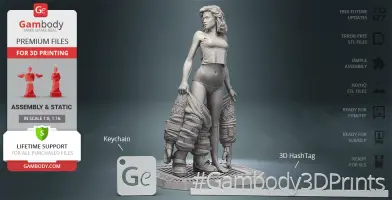
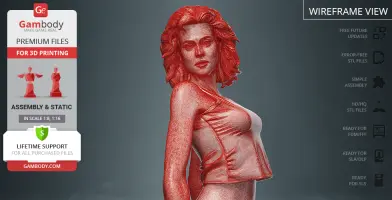
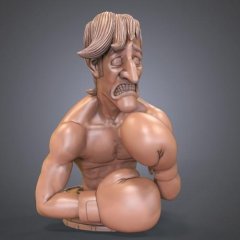
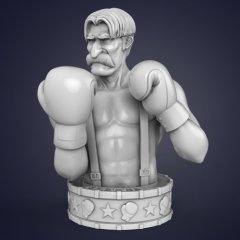
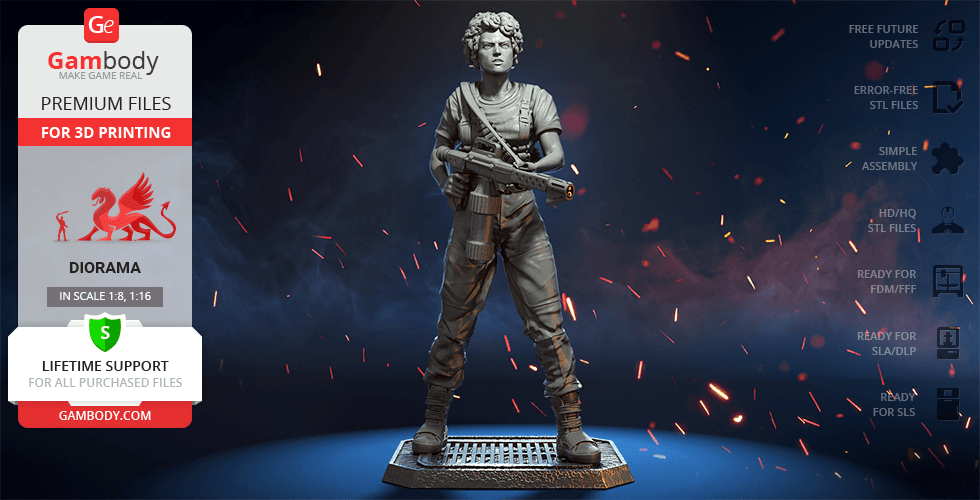
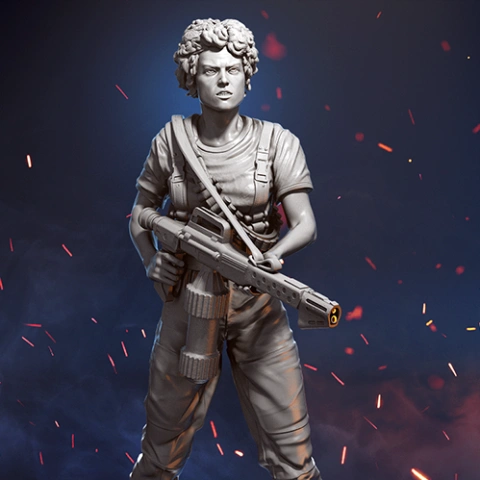
Ellen Ripley is the generally acknowledged first female action hero whose internal drive and ferocity displayed in the Alien franchise films broke all stereotypes. Some may argue that the iconic Alien scene aboard the escape shuttle Narcissus is a classic example of a body objectification, others would say that it perfectly conveys the vulnerability of the human form especially when trapped in such an abnormal situation. The 3D artist decided to depict the resourceful and brave heroine at her most vulnerable, dropping her gear after the horrors the warrant office faced minutes before. The project took the author 135 hours to complete and now all Alien fans have a chance to enrich their 3D printed collections with a strong, intelligent and beautiful protagonist of the extraterrestrial universe. As expected, the Ellen Ripley 3D model is depicted with her trademark wavy hair, in a thin tank top and ill-fitting underwear. The lady is captured amid shedding her battle-worn flight suit—something that she was definitely relieved to do after several days of fighting for life. Ellen Ripley is immensely tired but she collects her strength to prepare the shuttle for her journey home to Earth. The heroine doesn’t yet know what lay in store for her but thankfully this very moment of serenity can be immortalised by means of 3D printing!
ADAPTATION FOR 3D PRINTING
Ripley 3D printing design is a static assembly model and its moderation and adaptation for different types of 3D printers took Gambody team 39 hours in total. The model's anatomy and proportions were thoroughly reviewed during the moderation process for the brave lady to be depicted harmoniously in the intended pose.
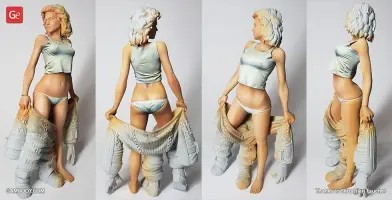
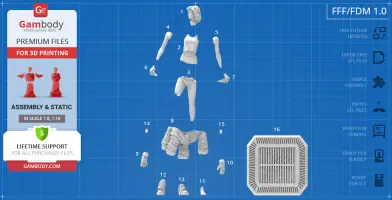
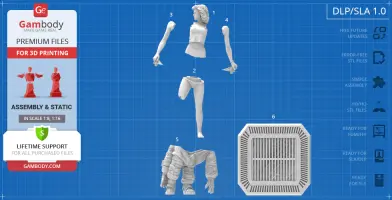
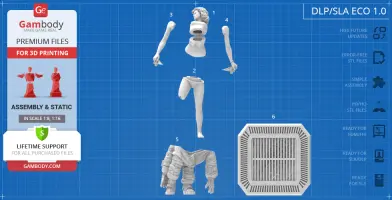
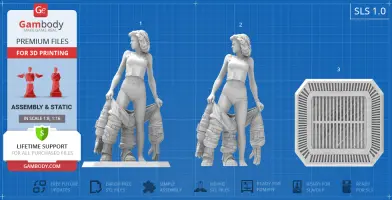
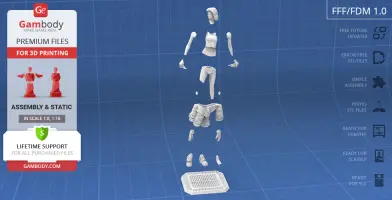
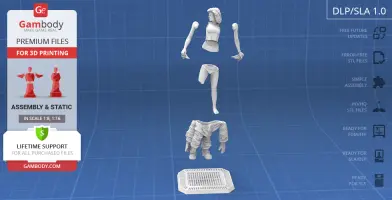
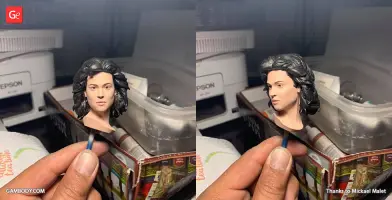
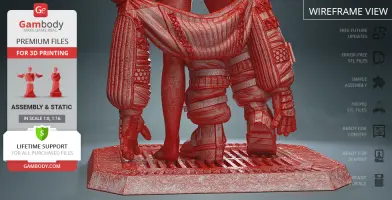
The model's cutting was chosen by our team to minimise the amount of filament needed for generated support and some of the parts were hollowed out for you to save resin in the model's Eco version. Moreover, in order to conceal the places where assembly parts of the model must be connected, the model was cut along the contour of Ripley’s clothes seams. In order to make sure your 3D printing will run easily, the hands that are holding the flight suit were separated and are to be assembled with the help of special connectors. For you to receive the cleanest result possible, model's boots, foot, gloves, hands etc. are provided as separate assembly pieces.
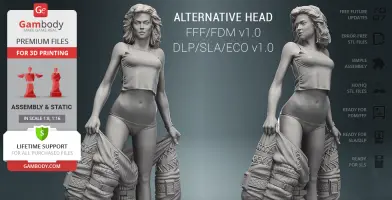
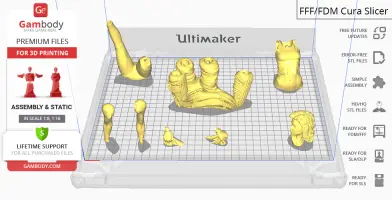
All assembly parts are provided in STL files in recommended positions that were worked out in order to ensure the smoothness of the details’ surfaces after printing and that the 3D printing beginners won't face difficulties when placing the parts on a build plate. When downloading any model's file you will also receive "Assembly Manual" for FFF/FDM 1.0 and DLP/SLA 1.0 versions in PDF format.
The design is saved in STL files, a format supported by most 3D printers. All STL files for 3D printing have been checked in Netfabb and no errors were shown.
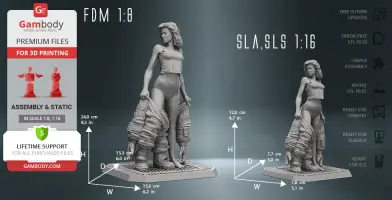
The model's scale was calculated from Ellen Ripley's actual height that is 1750 mm. The 3D printing design's chosen scale is 1/8 for the FFF/FDM version and 1/16 for the DLP/SLA/SLS versions.
VERSIONS' SPECIFICATIONS
1.0 FFF/FDM version features:
1.0 DLP/SLA version features:
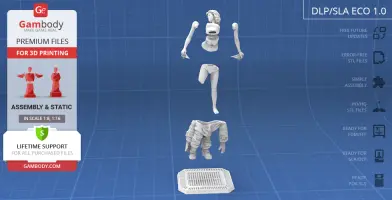
1.0 DLP/SLA Eco version features:
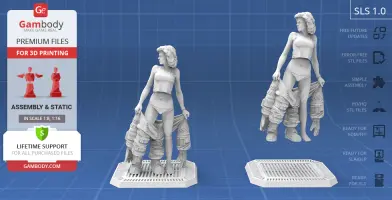
1.0 SLS version features:
You can get the STL files of Ripley Underwear model immediately after the purchase! Just click the green Buy button in the top-right corner of the model’s page. You can pay with PayPal or your credit card.
Watch the tutorial on how to assemble the 3D Printed Ripley Underwear model from the provided 3D Print Files at Gambody YouTube channel.
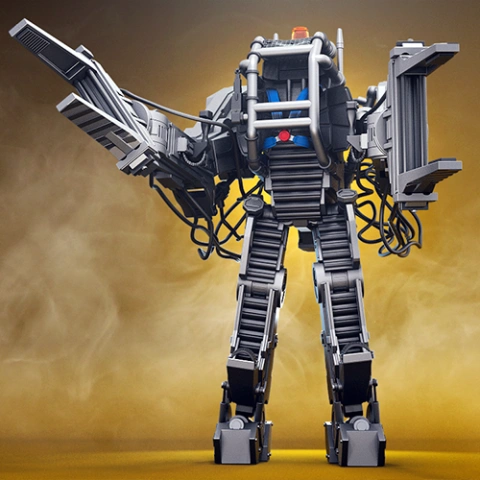
Also, you may like another Ellen Ripley 3D Print Model, her Power Loader 3D Printing Design as well as other Alien vs Predator 3D Printer Models.
_______
FAQ:
Below you can find printing recommendations for Cura, Bambu Studio, Simplify3D, Slic3r and PrusaSlicer software.
Disclaimer: The following printing settings are a recommendation, not an obligation. The parameters can vary depending on the peculiarities of your 3D printer, the material you use, and especially the particular assembly part you are working with. Each part that any model comprises often needs preliminary review, and you are free to tweak the settings the way you find suitable.
Note:
You can scale up the model (downscaling for FFF/FDM 3D printers is not recommended!);
All connectors should be printed at 100% Infill.
These basic 3D printing settings recommendations for beginners were tested in Bambu Studio 1.9.1. Test models were printed on the Bambu Lab A1, Bambu Lab A1 Mini, Creality Ender 3 S1, Anycubic Kobra 2, and Anycubic Vyper using PLA and PETG filaments.
To avoid printing problems, we recommend the following settings: download
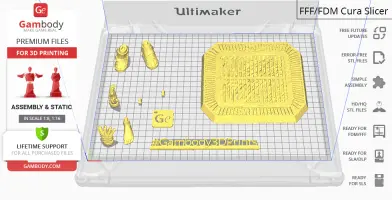
These are averaged settings which were tested in the Cura 5.2.1 slicer. Test models were printed on Anycubic Vyper, Creality Ender 3 Pro with PLA filament.
To avoid printing problems, we recommend the following settings: download
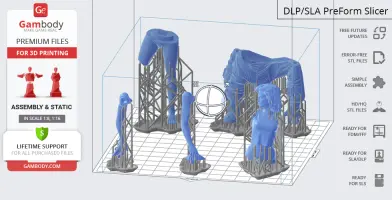
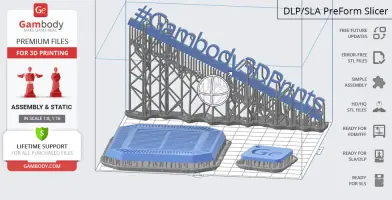
These are averaged settings which were tested in the Simplify3D 5.0.0 slicer. Test models were printed on Anycubic Vyper, FLSUN v400, Ender3 S1 with PLA filament.
To avoid printing problems, we recommend the following settings: download
These basic 3D printing settings recommendations for beginners were tested in Slic3r 1.3.0 software. Test models were printed on Ultimaker 2, Creality Ender 3, Creality Cr-10S pro v2, Anycubic I3 Mega, Anycubic I3 MegaS, Anycubic Vyper with PLA and PetG filaments.
To avoid printing problems, we recommend the following settings: download
These basic 3D printing settings recommendations for beginners were tested in PrusaSlicer 2.3.1. Test models were printed on Ultimaker 2, Creality Ender 3, Creality Cr-10S pro v2, Anycubic I3 Mega, Anycubic I3 MegaS, Anycubic Vyper with PLA and PETG filaments.
To avoid printing problems, we recommend the following settings: download
diorama, hero, horror, monster, cinema, space, bestseller, alien, xenomorph, scifi, extraterrestrial, avp, ellen-ripley, queen, uscss-nostromo, james-cameron, alien-vs-predator, alien-queen, nostromo, ripley, flamethrower, science-fiction, sulaco, uss-sulaco, sigourney-weaver, cameron, power-loader, loader, warrant-officer
You are about to report Ripley Underwear 3D Printer Files | Assembly for violating our Terms and Conditions. Please take a few moments to fill in the following information.
Comments