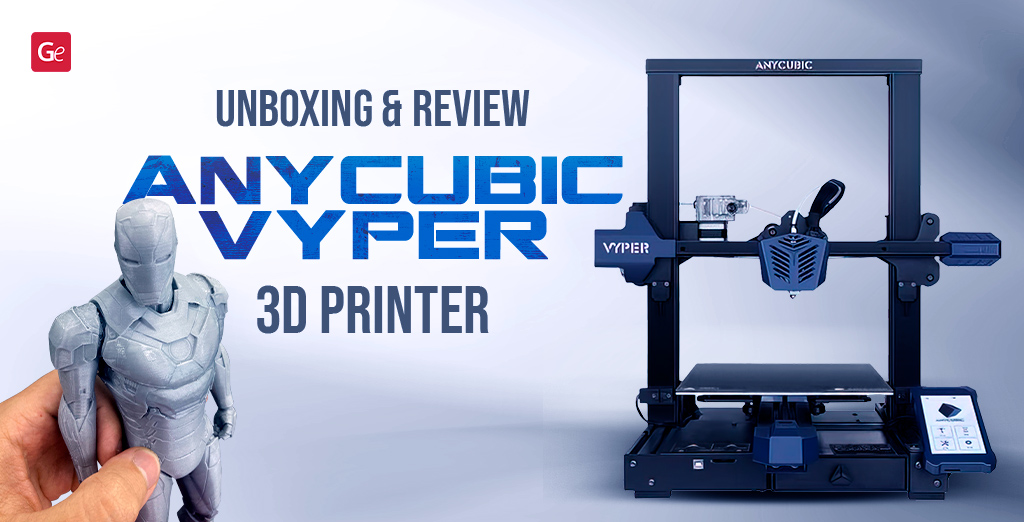
Fast assembly, super-convenient auto-levelling system and some top features make the Anycubic Vyper 3D printer sound like one of the best 3D printers under $400 and a great alternative to Creality CR-6 SE. But a closer look at this FDM machine reveals its pros and cons and sets a question whether it is designed for newbies or meant for advanced users only.
Gambody has received another home 3D printer for testing. This time, we will review the Anycubic Vyper 3D printer with a fantastic auto-levelling system. Many 3D printing enthusiasts have heard about this latest machine offered by Anycubic, and many of those who have tested it praise it. Thus, it becomes interesting to look at the Vyper specs, compare its price and run test prints of demo and premium quality 3D printing models.
Besides, the upcoming partnership between Anycubic and Gambody promises many fantastic 3D printing bundles for enthusiasts who love working with highly detailed STL files and the best 3D printers.
The official website offers the latest Anycubic Vyper 3D printer at $359 as of September 2021. It is more expensive than the price of Longer LK5 Pro ($297 when on sale), Creality Ender-3 V2 ($279), ELEGOO Neptune 2 ($179) or Voxelab Aquila ($169) (you can read the Voxelab Aquila review in our blog). Yet, it is cheaper than Creality CR-6 SE ($379-$399) or Anycubic Mega Pro ($399 when on sale). So, is it indeed the best 3D printer for the money or not?
Anycubic 3D Printer Review
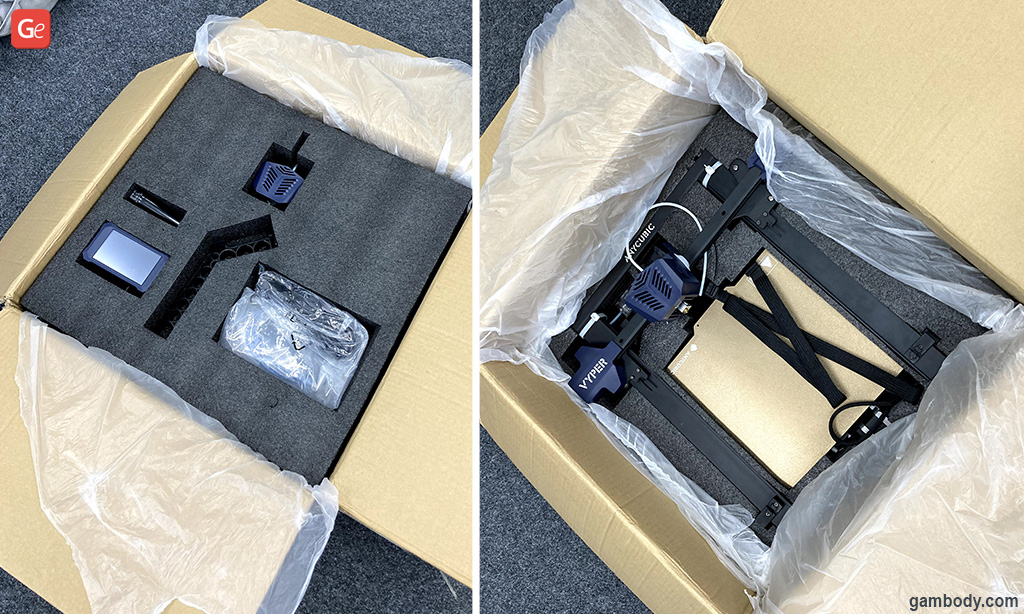
The quick shipping time amazes many users. This home FDM 3D printer arrives in a rather large box. Its weight is about 10 kg (22 lbs).
The product is packed very securely. Even if the box falls, we believe that nothing will happen to the Vyper 3D printer or its parts.
What’s Inside
The printer kit is standard. Inside the box, you will find:
- Power cord;
- Filament holder;
- Filament;
- Spatula tool;
- Screws;
- Display screen;
- Two nozzles;
- Pre-assembled printer frame;
- Pre-assembled base with electronics and movable bed;
- SD card and SD card reader;
- A small drawer with pliers, a needle and wrenches;
- USB cable for tethering printing;
- User manual.
The integrated toolbox under the bottom base is very convenient! Of course, these days, you can find various modifications of this accessory on the Internet. Still, its standard form offered by Anycubic is very comfortable.
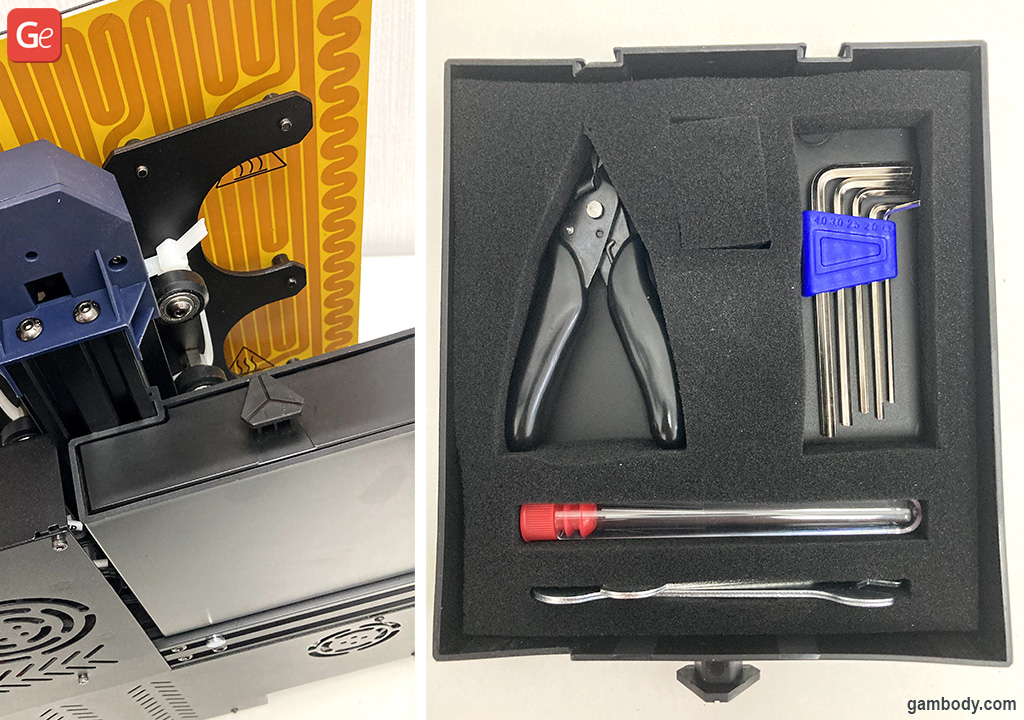
We want to thank the company for including two extra nozzles with the Vyper 3D printer. It is always good to have some extras. Besides, the included card reader looks sufficient and of high quality at first glance.
Vyper 3D Printer Assembly
This FDM desktop machine consists of two main parts: the bottom base and the upper frame (X/Z gantry).
It takes only 5 minutes, and seven screws to assemble the Anycubic Vyper 3D printer – the four screws are used for assembling the gantry, and the three hold the display screen. All the parts fit very well together, and the user manual is straightforward and user-friendly.
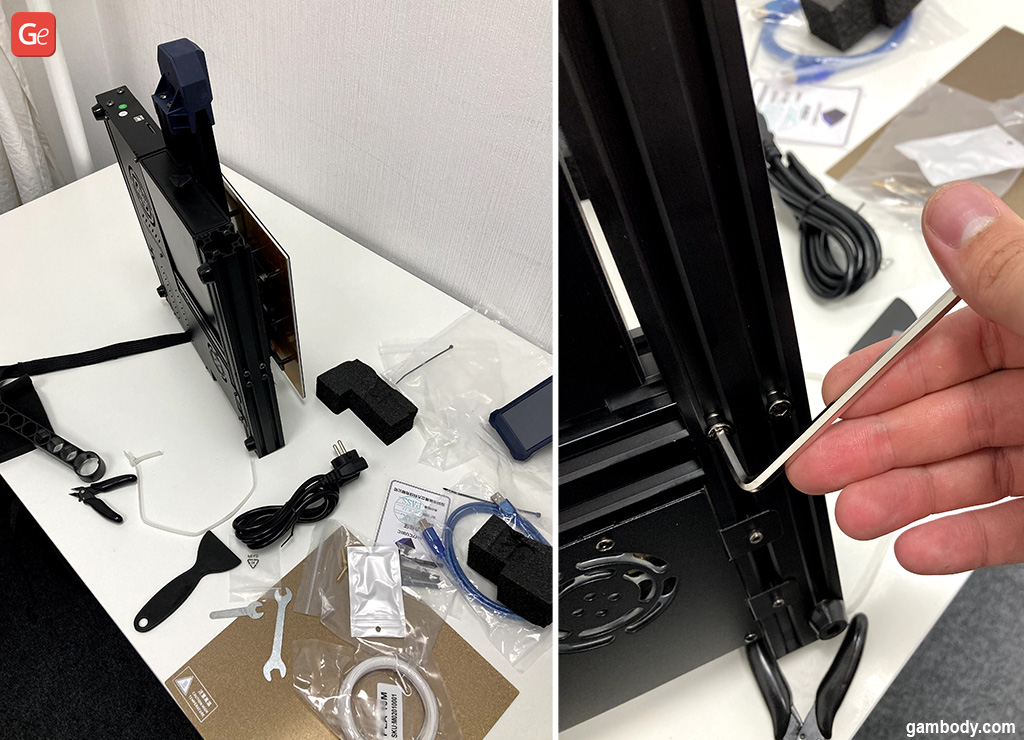
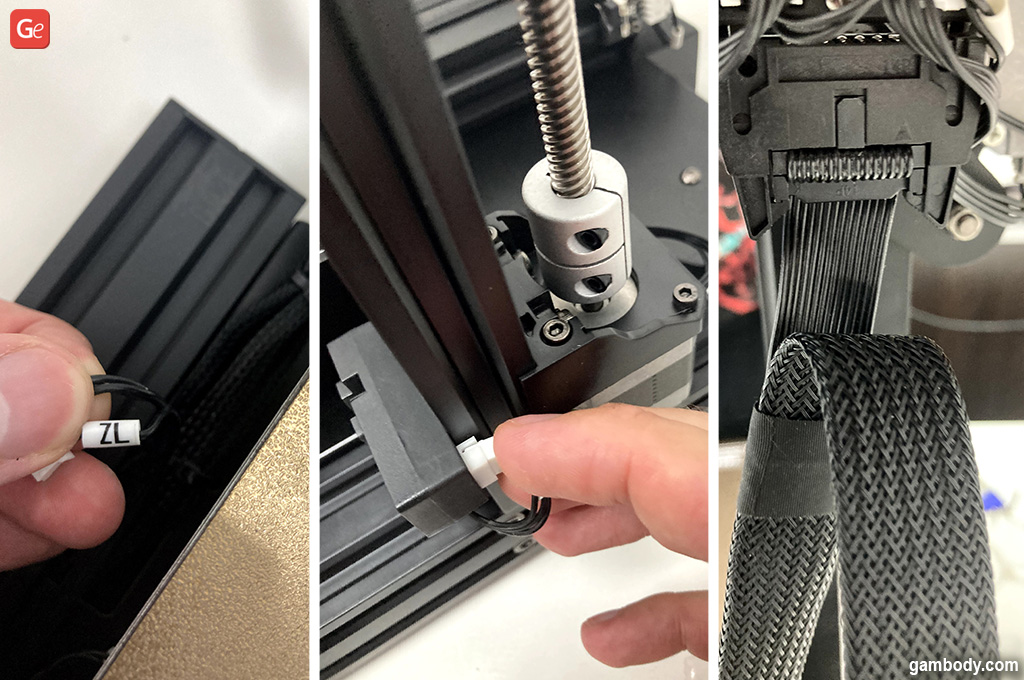
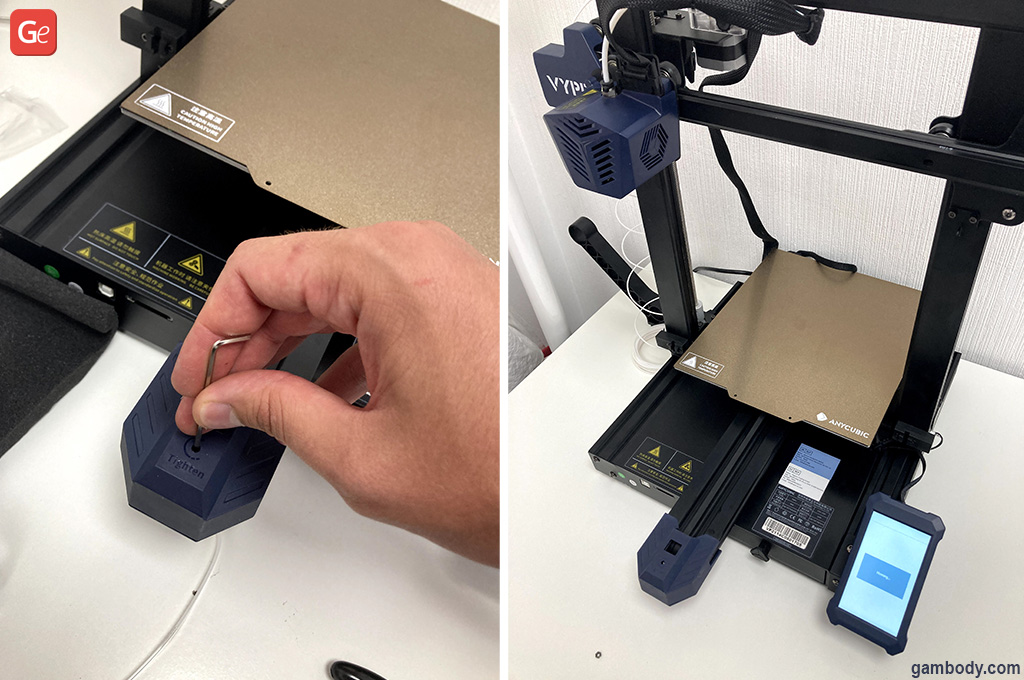
It is then necessary to install the 4.3-inch touch screen LCD, connect the motor wires and mechanical limit switches. All cables are well-labelled and securely fixed with end stoppers.
First Run
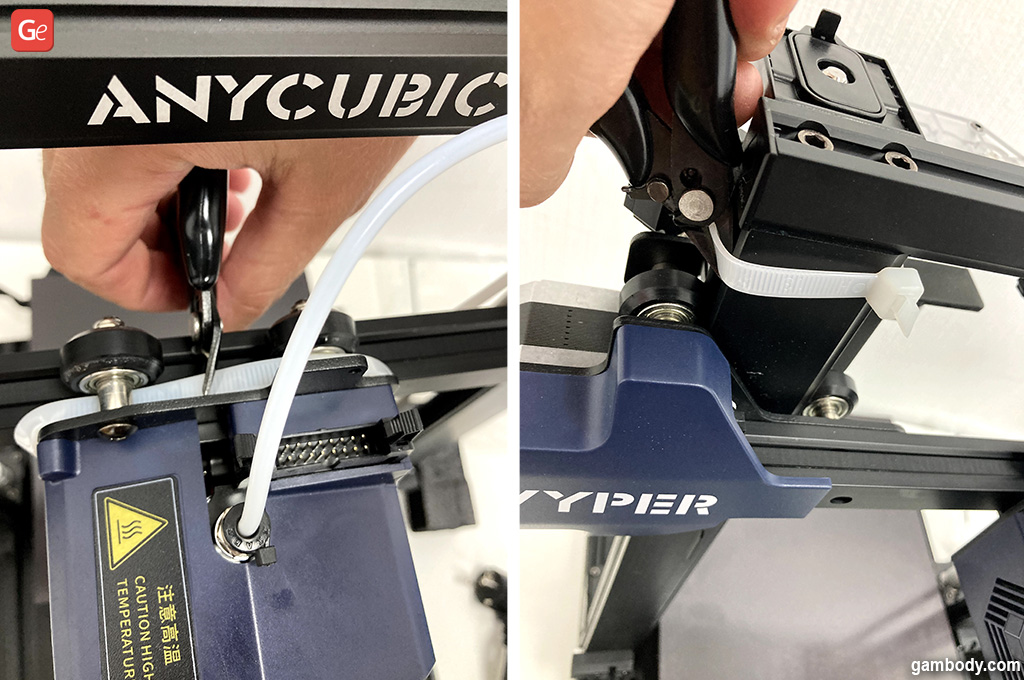
Before turning on the Anycubic Vyper 3D printer with an auto-levelling option, it is necessary to remove all the zip-ties. These fasteners ensure that the platform and gantry don’t move around while shipping. You can easily cut them with the pliers from the set of tools included with the machine. So convenient!
It is necessary to adjust the eccentric nuts by slightly tightening them. As we did so, we were pleased to see that nothing wobbled and everything looked very reliable. Then tighten the X-axis and Z-axis belts, load the filament, and your home-use 3D printer is ready to print.
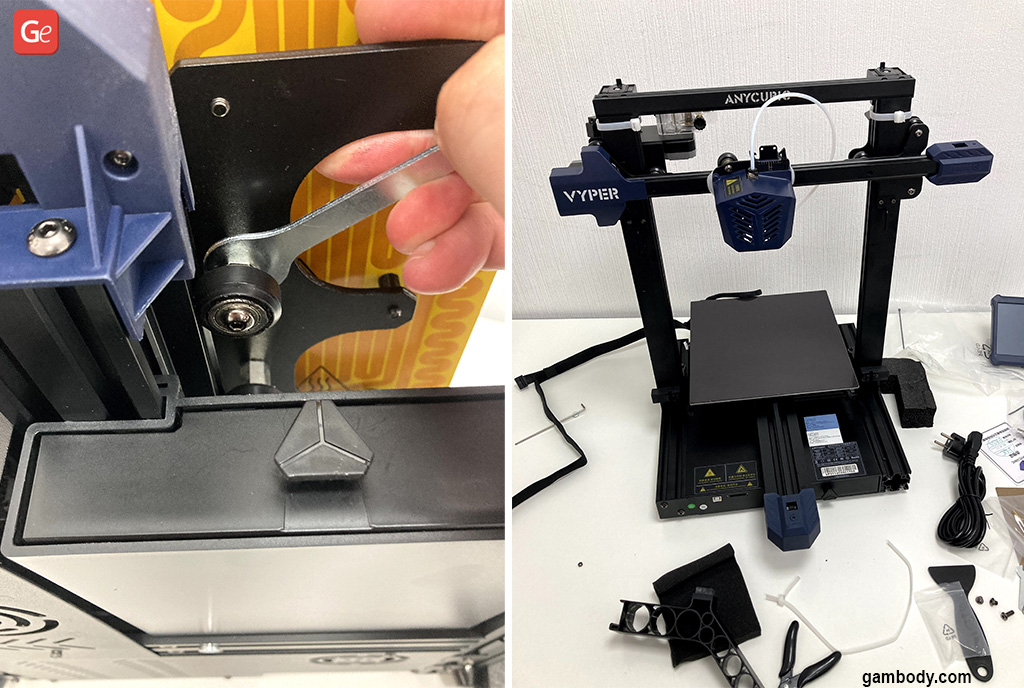
We are happy with the final Vyper look. Nothing sticks out, all parts look harmoniously connected, and we love the beautiful combination of a golden build plate, black frame and navy blue component accents. This desktop 3D printer is elegant and stylish, even more stylish than Creality CR-6 SE.
Tests
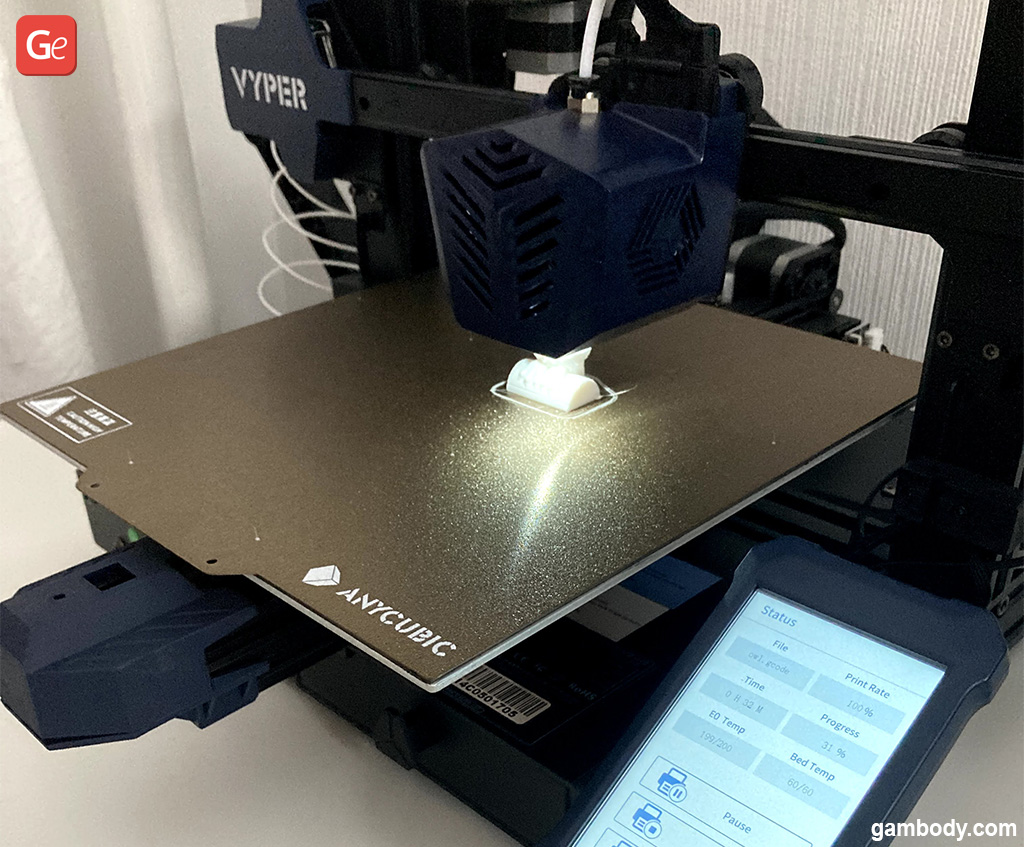
Let us print the demo model with the filament included with the Vyper 3D printer kit. Anycubic offers an owl 3D printing figurine file (owl.gcode) saved on the SD card. It is an excellent example of a one-piece model meant for 3D printing without supports.
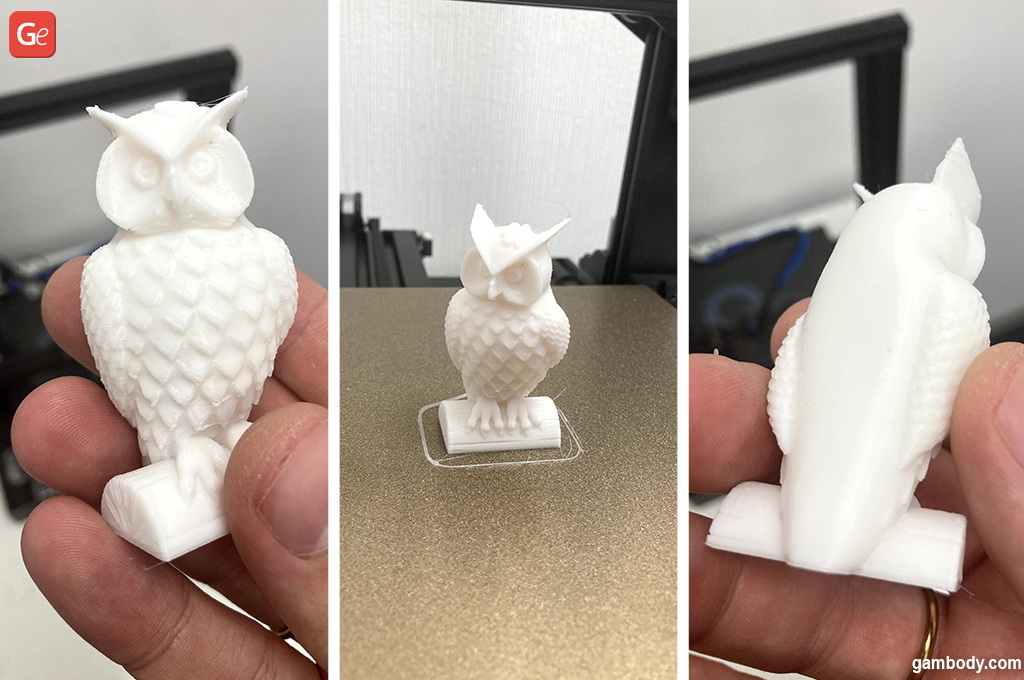
The project 3D prints smoothly and looks great. We are happy with this demo test!
However, the white filament is not the best choice for identifying any possible defects. So, it is better to use any branded 3D printing filament, for example, colorFabb blue-grey PLA filament that suits the colours of the Vyper desktop 3D printer so much!
Anycubic Vyper Cura Profile
To start 3D printing, you should create an Anycubic Vyper Cura profile in Cura slicer. Then load the filament and start testing.
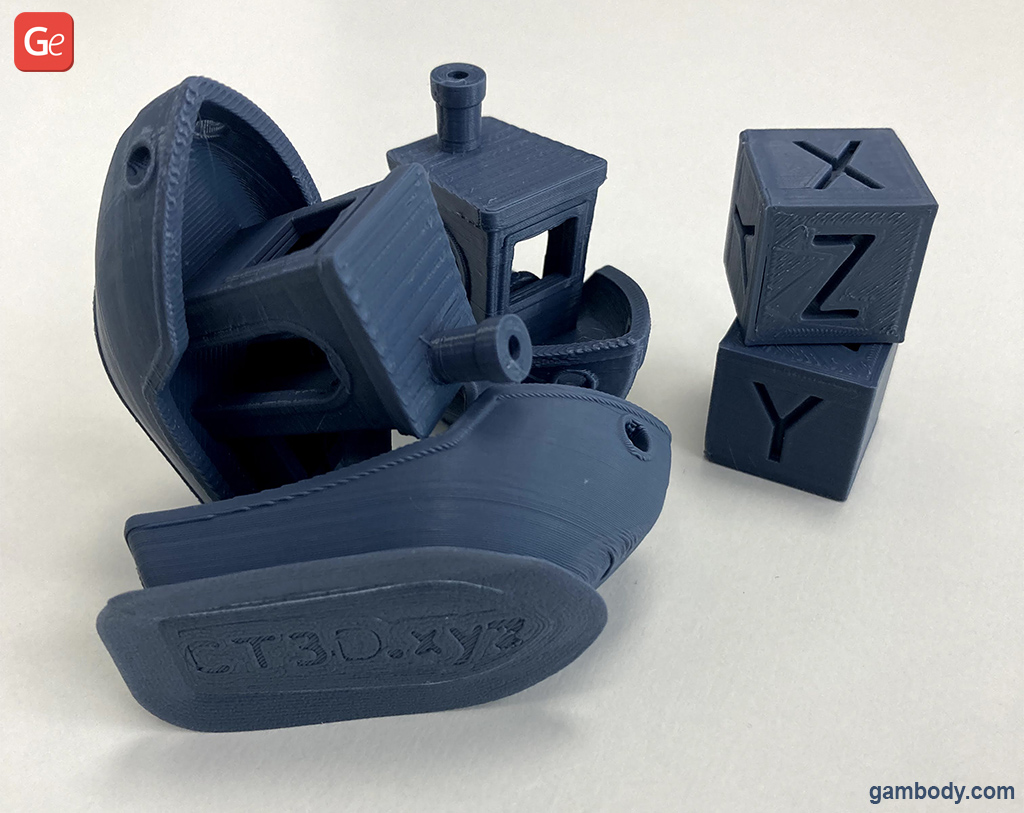
Gambody decided to print the calibration cubes and the famous #3DBenchy boat. What can we say? This top 3D printer for the money did a good job extruding perfectly aligned layers and creating a smooth 3D print. There are no Z wobbles or other apparent issues other than filament sagging at a large angle due to the filament quality or high printing speed.
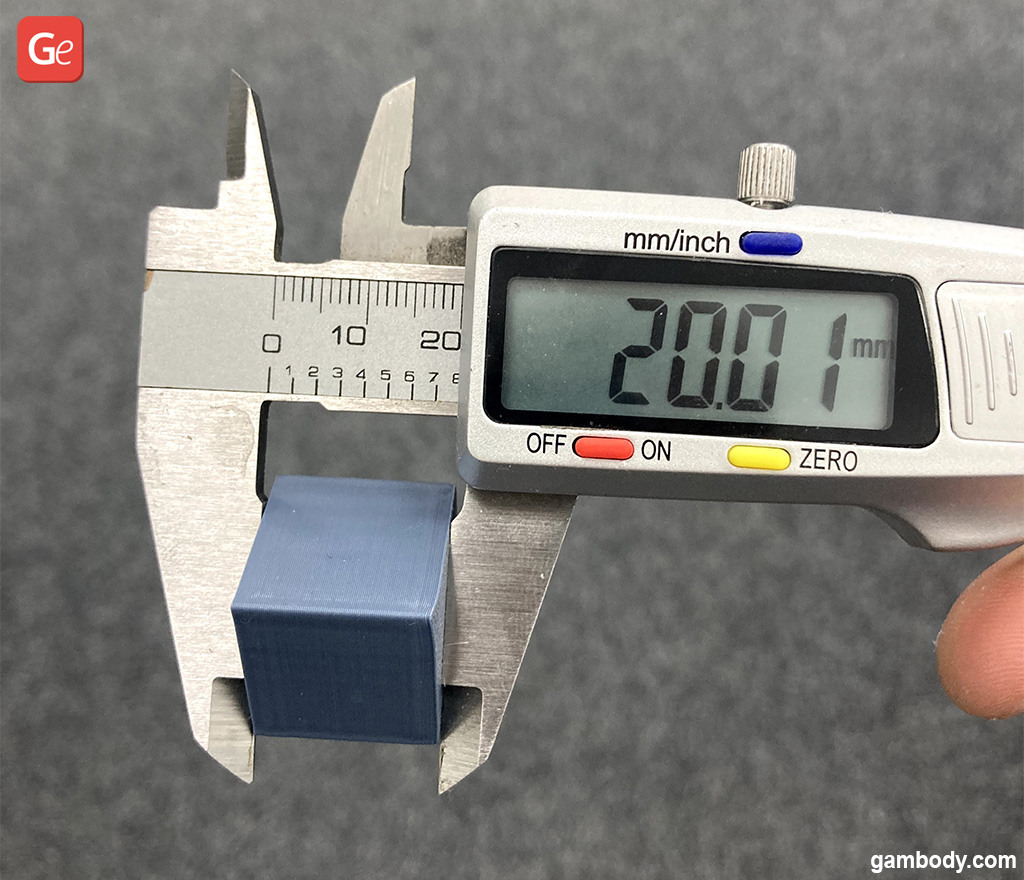
The 3D printed XYZ 20mm calibration cube proved that the Z-axis height calibration was fantastic! The height of the cube was 20.01mm, which is close to the required 20mm and sounds nearly perfect.
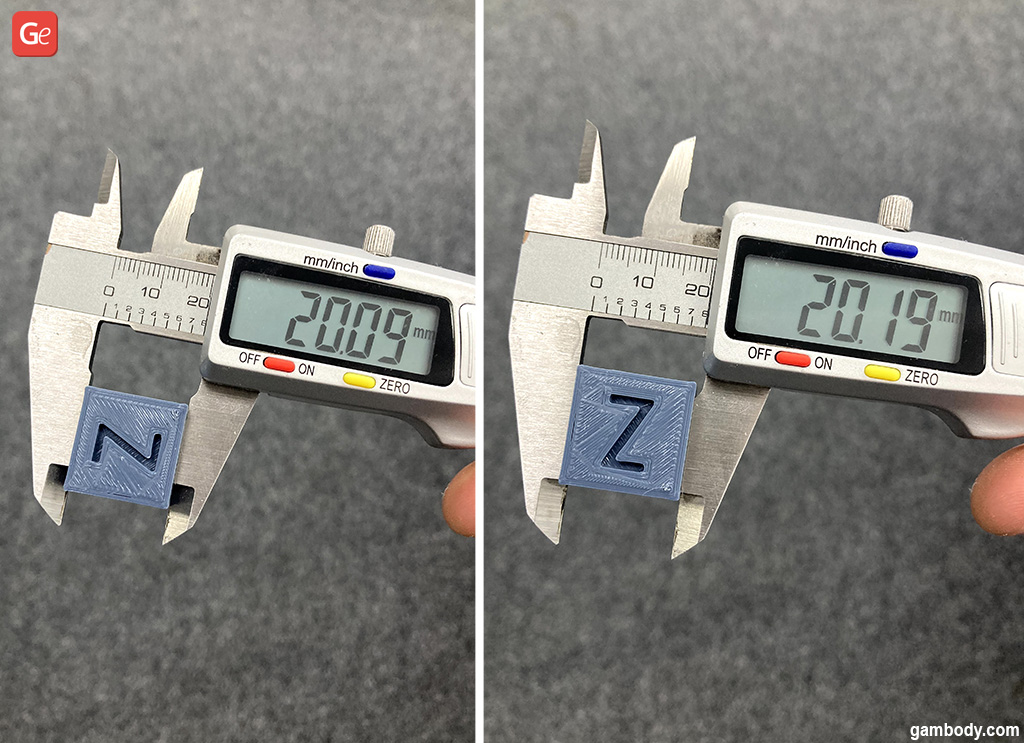
The X- and Y-axis height needed correction through the firmware settings because the result showed 20.09mm and 20.19mm correspondingly.
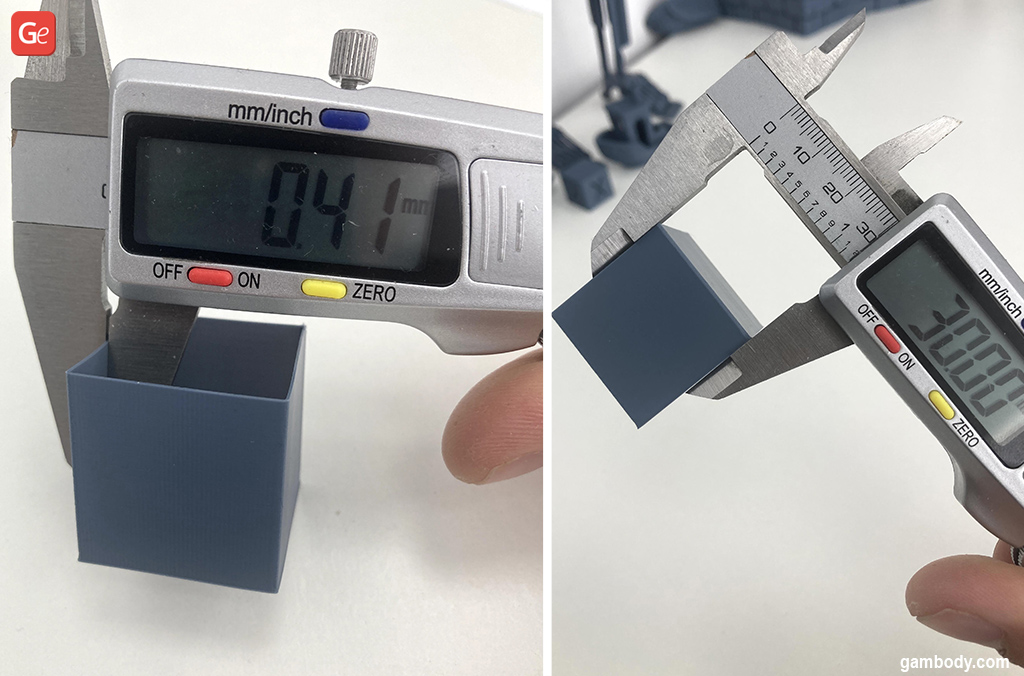
In the 3D printed 30mm extrusion test cube with zero infill density, without top or bottom, the wall thickness was 0.41mm, which was a rather good result.
Problems
We 3D printed the test cubes without glue, relying on the build plate adhesion setting “Skirt”. We noticed that the cube edges rose slightly, but this problem lessened at lower speeds. It means that a slight over-extrusion occurs when the Vyper 3D printer extrudes too much material, and the nozzle slightly lifts the previous layer. You could address this issue in your Cura profile settings. However, the problem could appear due to the lack of the HotEnd silicone socks (it is easy to order this extra layer of protection for the HotEnd yourself).
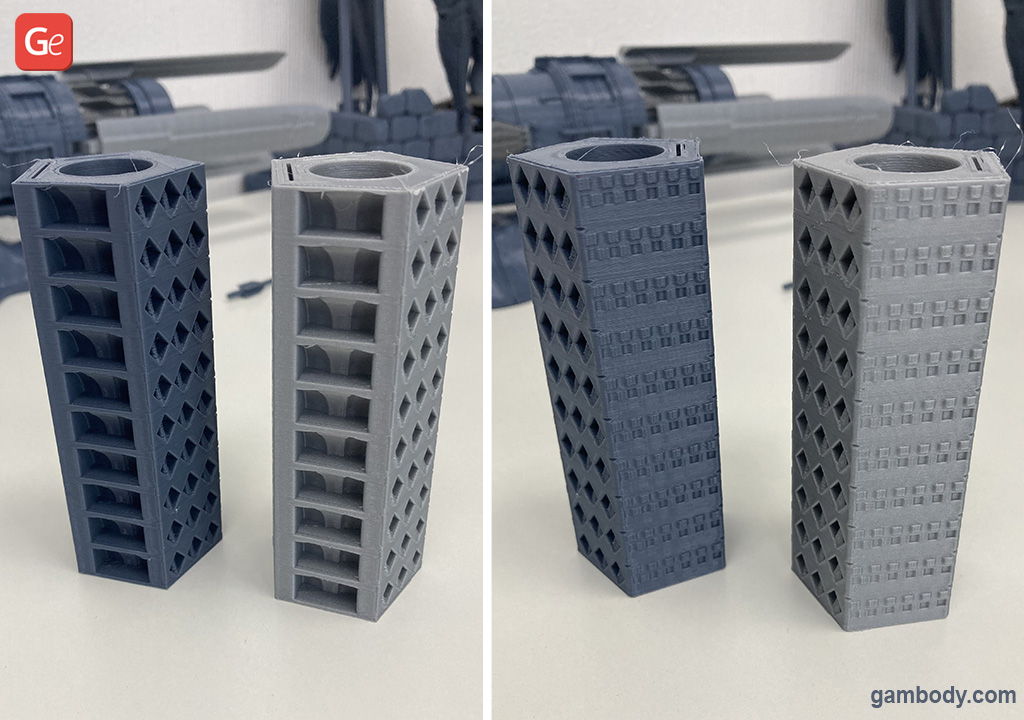
3D printing a temp tower test with PLA of two different brands showed nice results for bridges and cylinders. Our temperature tower printed 10mm layers at one temperature, then lowered by 5 degrees and repeated until complete (the temperature went down from 220 °C to 175 °C).
Looking closer and evaluating the print, we recommend you print PLA at 195-205 °C for a perfect outcome.
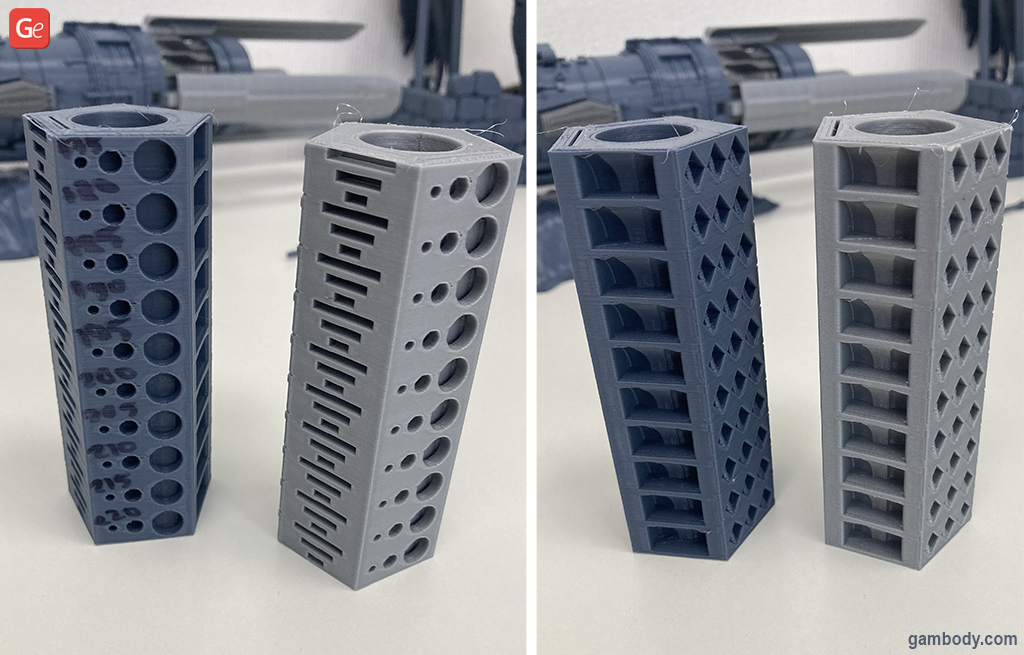
Our advice. Turn the printing bed over and use glue or choose the build plate adhesion setting “Brim” in Cura profile for better grip. Also, calibrate stepper motors by configuring firmware settings, and your Anycubic Vyper home 3D printer will amaze you!
3D Printing Lord Voldemort Figurine
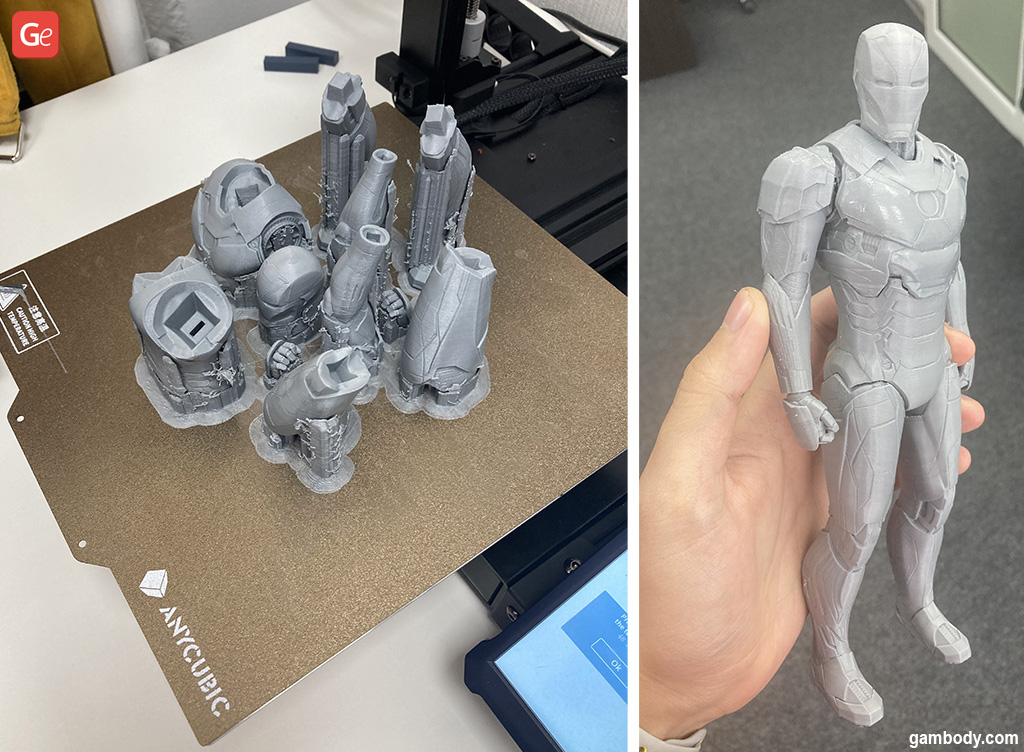
Finally, it is time to print a highly detailed, premium quality 3D printing model of Lord Voldemort. This Dark Lord is an iconic character in the Harry Potter universe. And you will find Voldemort’s STL files on Gambody marketplace.
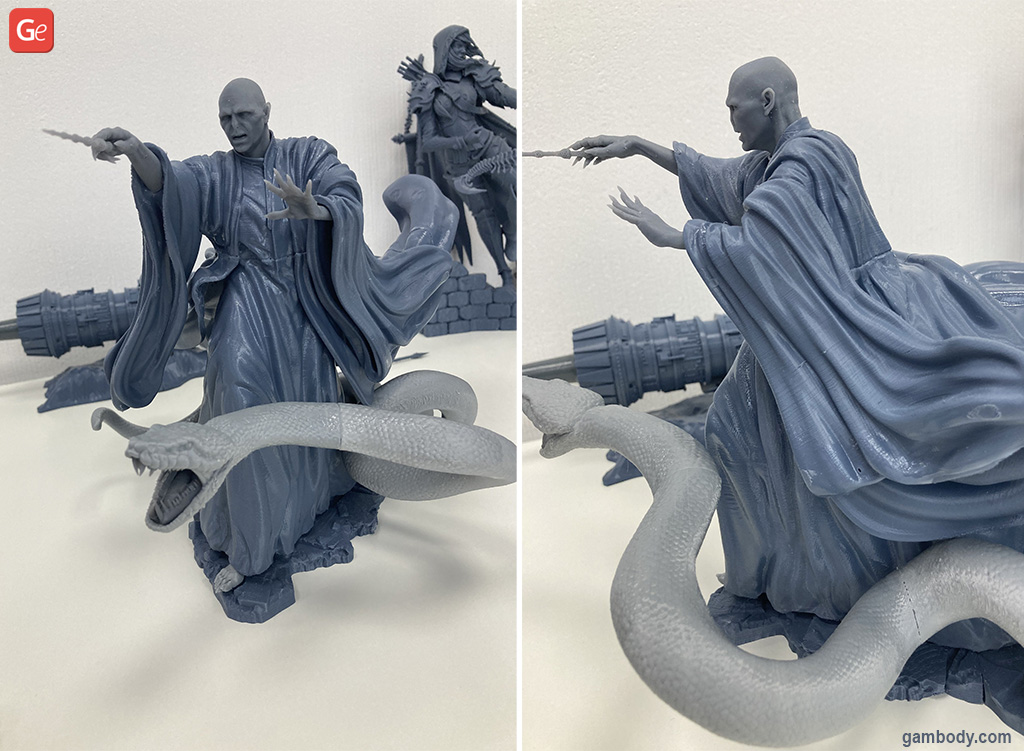
This project has many details (fingers, head, wavy coat) and complex geometry. Besides, there is Nagini coiled around her master. So, it is interesting to observe how the snake scales will be printed and how the Anycubic Vyper 3D printer will cope overall with this task.
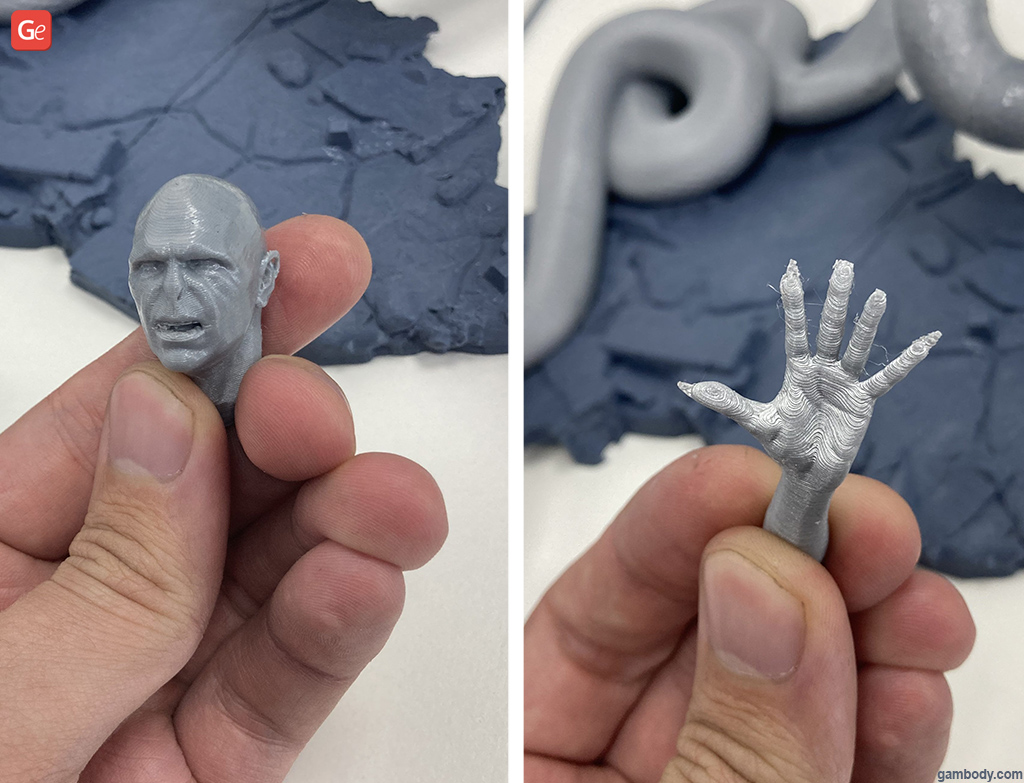
These are the parameters used for recreating the Lord Voldemort 3D print:
- Layer height: 0.1mm;
- Build plate adhesion: Brim (but you can also use glue);
- Z offset: -0.1mm (we lowered Z-axis by 0.1mm to “smudge” the first layer into the bed surface).
Gambody wants to note that the Anycubic Vyper 3D printer prints quickly. However, no one cancels the laws of physics, and lower speeds always result in better quality. So, we advise you to reduce the recommended rate by 10-15%.
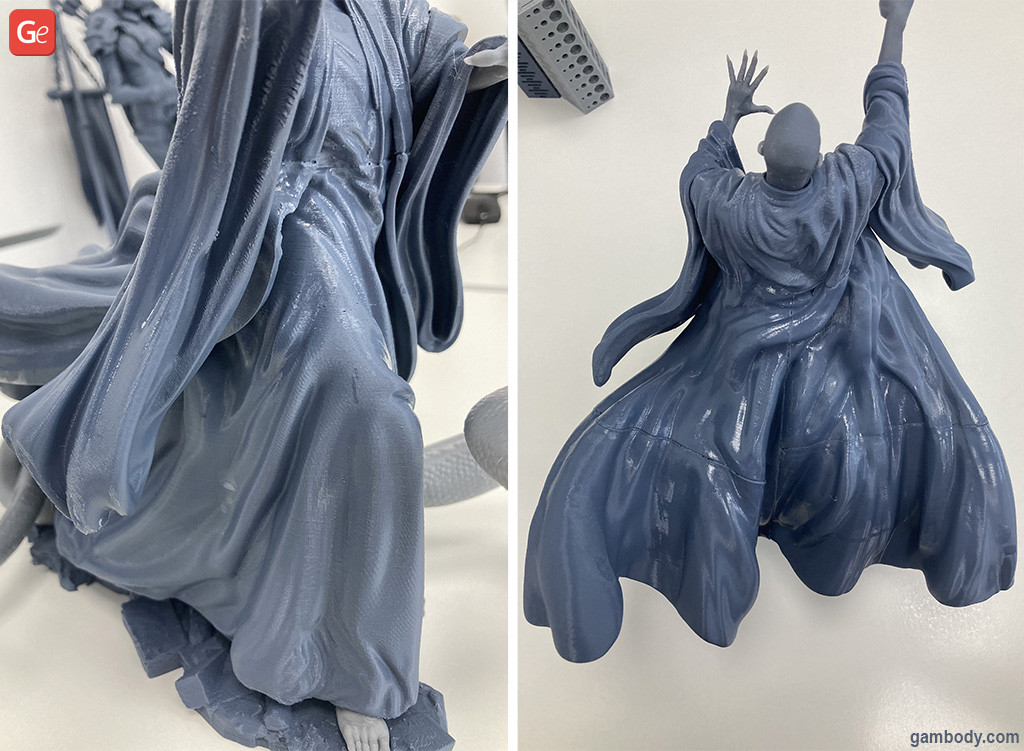
The 3D printed Lord Voldemort figurine looks very pleasing. The Vyper did a top job of bringing it to life.
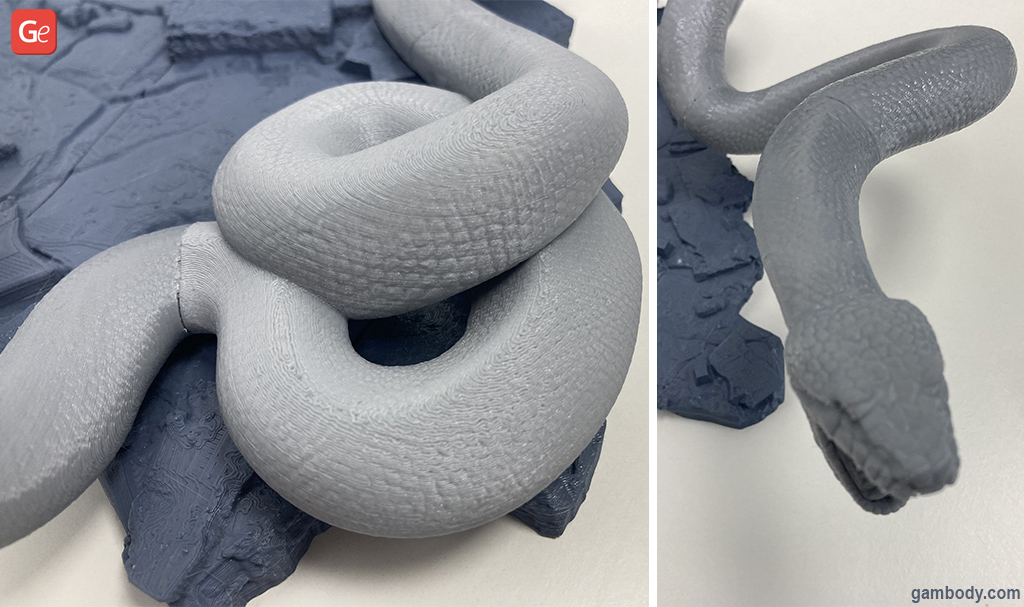
PS. We must note that we printed Voldemort’s teeth on an Anycubic Photon 3D printer. But if you choose to make this tiny part on an FDM machine, reduce the speed and layer height to achieve a good result.
Anycubic Vyper Specs
The quick Anycubic 3D printer specs review suggests that this machine is pretty similar to the Creality CR-6 SE. However, there are several improvements to look at.
The set of components and printer functionality offered by Anycubic look very promising. It is clear that the manufacturer did its best to deliver a high-quality 3D printer for home use that is easy to set up, calibrate and run.
Bed Size
The big print area immediately catches the eye. The Vyper bed size is 245 x 245 x 260mm (9.6 x 9.6 x 10.2 inches).
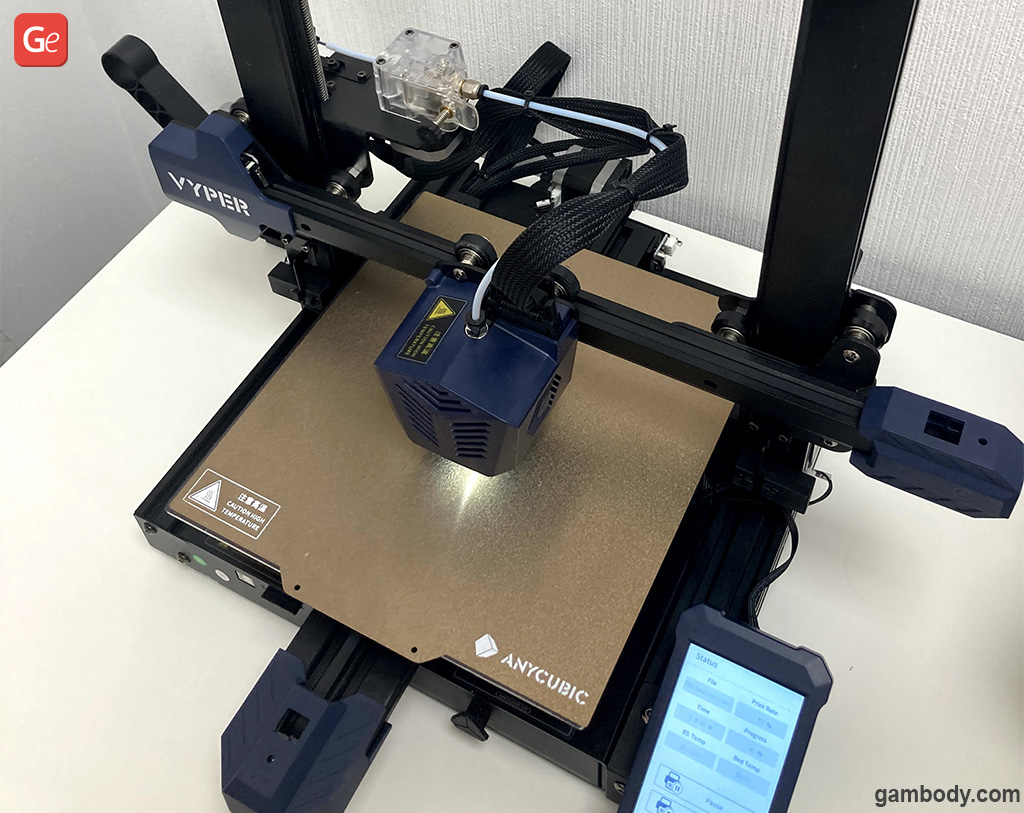
Competitors with similar specs cannot boast such a large bed size and offer the print bed of 220 x 220 x 250mm (8.6 x 8.6 x 9.8 inches) at most. In comparison, the level-free Creality CR-6 SE comes with a smaller printing size of 235 x 235 x 250mm (9.2 x 9.2 x 9.8 inches).
So, if you are looking for more printing space to express your creativity, print large-scale and life-size objects, pay attention to the latest Vyper 3D printer. Also, read about other large 3D printers for home use.
3D Printer with Auto-Levelling
Suppose you are looking for the best 3D printers with an auto-levelling system under $400. In that case, this Anycubic machine could impress you as much as the first levelling-free 3D printer Creality CR-6 SE.
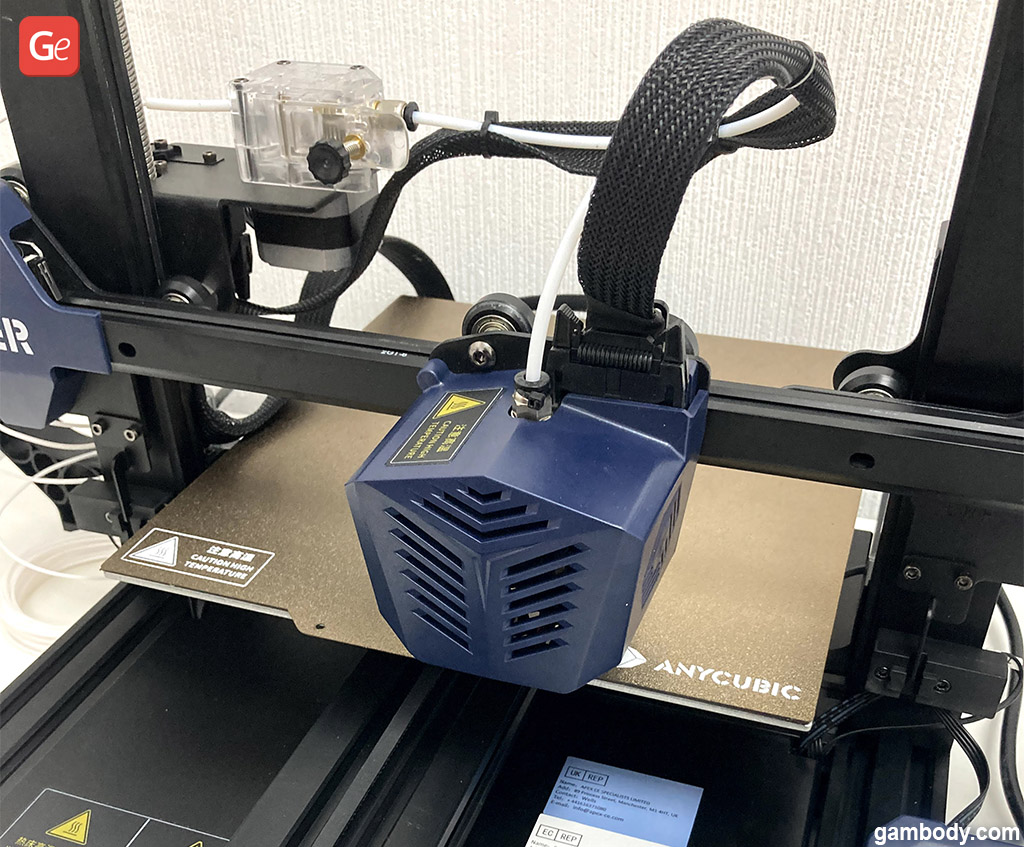
The Anycubic auto-levelling function is incredible. It automatically calibrates the hotbed at 16 points, relying on the nozzle because a strain gauge pressure sensor is installed on the HotEnd board. Thus, it needs no BLtouch or similar sensor, and its platform needs no clamping nuts.
The machine’s parts are fixed rigidly, which is a big plus!
Magnetic Platform
The spring steel magnetic platform is a modern solution offered by Anycubic. Its grip is as perfect as in the Anycubic Ultrabase. Still, the new coating is scratch-resisting and makes model removal super easy and comfortable even if you use no adhesive material.
We love this innovation a lot!
Latest Core
The good home 3D printer Anycubic Vyper is equipped with a new 32-bit motherboard Trigorilla and GigaDevice GD32F103 ARM chip, similar to STM32. It allows this popular 3D printer to print quickly and efficiently.
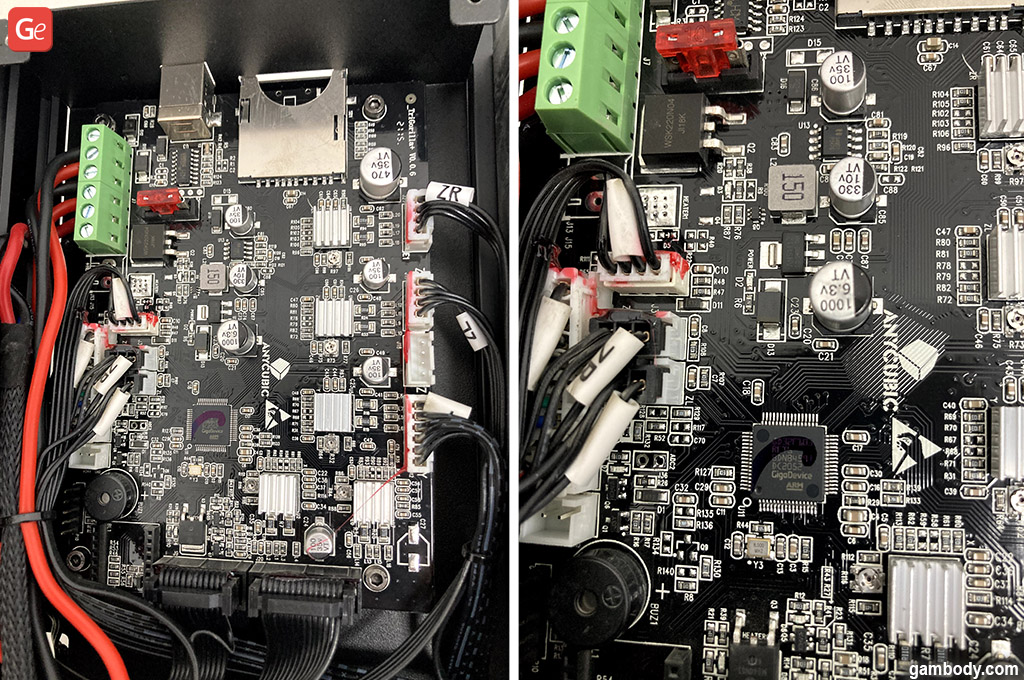
The integration of silent TMC2209 stepper motor drivers allows the machine to print silently and accurately.
Awesome Z-axis
The Z-axis boasts two stepper motors to eliminate the X-axis shifts.
The double screw runs synchronously, preventing the Z-axis from falling down when out of power. Also, it leads to a more stable operation and prevents Z-axis zeroing errors.
You will love the double photoelectric limit offered in one of the latest 3D printers by Anycubic. The Vyper compensates the difference of the hotbed in automatic mode. Thus, Z-axis zeroing becomes relatively accurate.
Both X- and Y-axis are equipped with belt tensioners. You can adjust the tension with the hexagon, which prevents accidental loosening of the belts. Such a great solution!
Printing Head
The Vyper desktop 3D printer comes with three coolers, two of which blow down the nozzle and cool down the models faster.
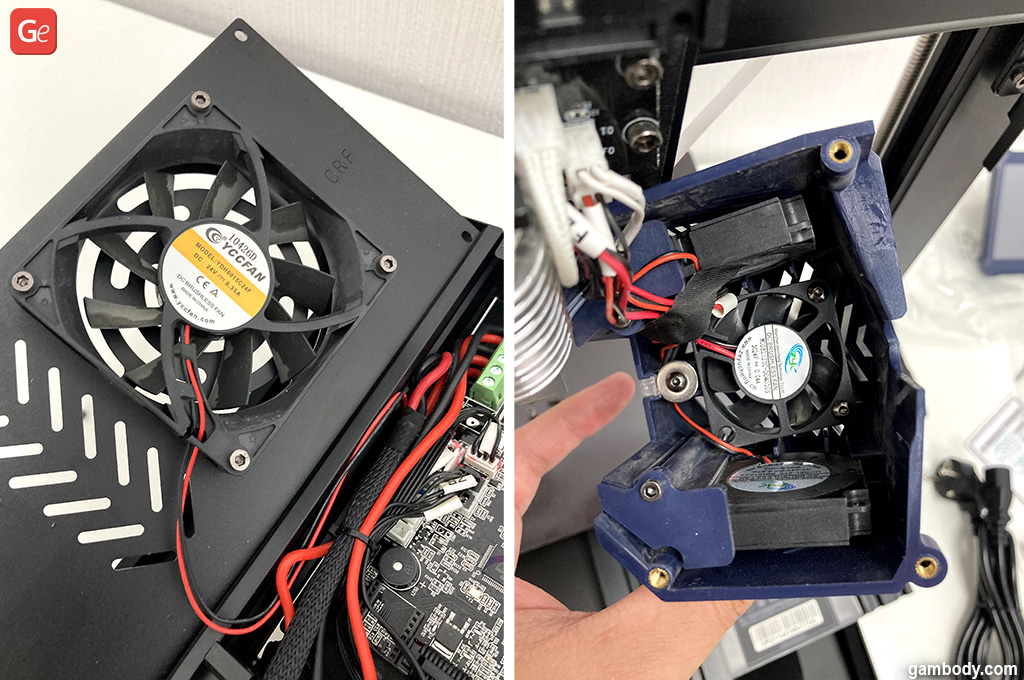
The double fan two-way heat dissipation system is good news. It will help you print small elements and enjoy high-quality prints.
Besides, the nozzle has a built-in LED light. This cool printing head light allows you to see small elements in all details.
HotEnd
The E3D Volcano HotEnd enables you to print at high speeds.
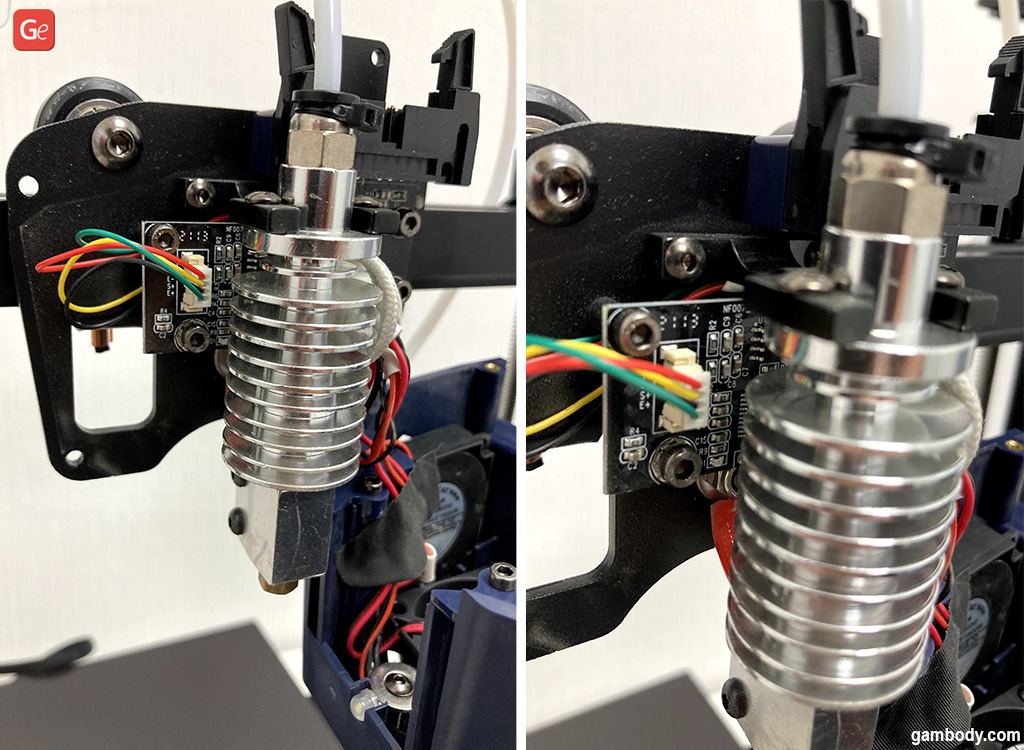
A strain gauge pressure sensor located on the HotEnd board boasts an impressive accuracy of up to a few microns. Thus, when you 3D print on the Anycubic Vyper machine, you will get the perfect first layer across the entire build surface.
Forget about manual calibration once and forever! Your best 3D printer with auto-levelling will map the bed and store this data in its firmware.
Extrusion System
The double-gear extrusion system makes this high-quality desktop 3D printer even better. The BMG extruder (or rather its clone) with double filament compression is a top solution. It improves feeding accuracy and eliminates filament tangles and rippling.
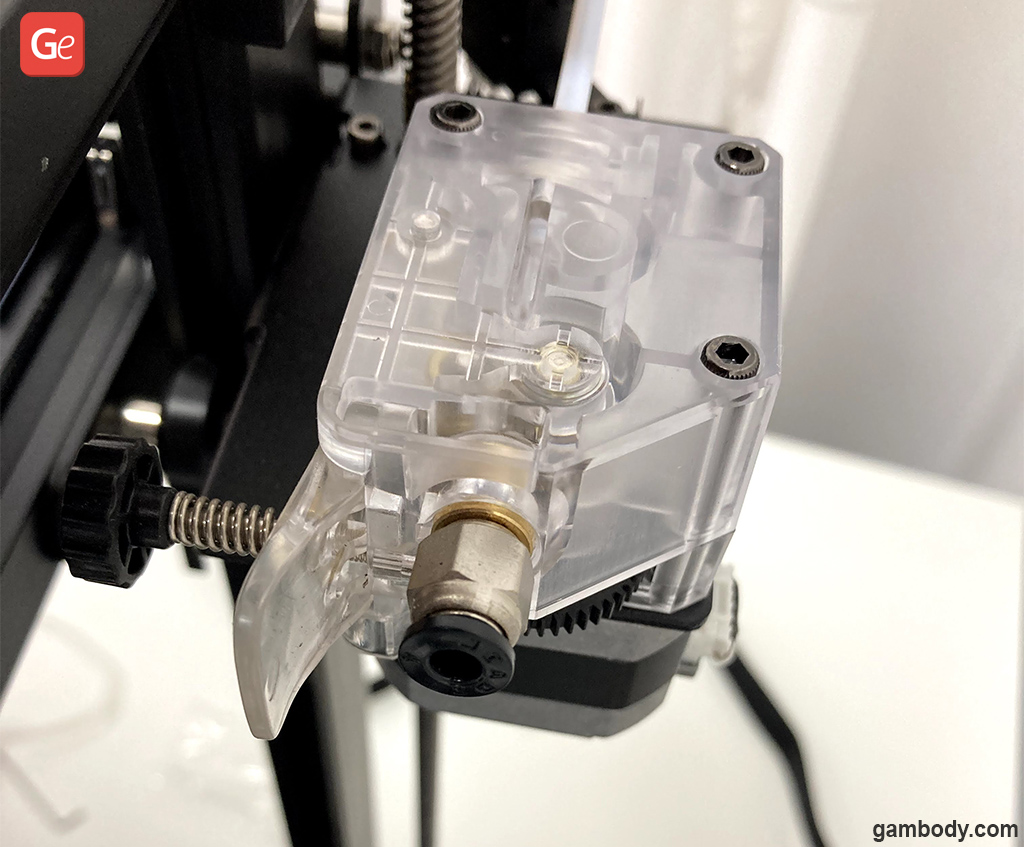
The Vyper extrusion system comes with solid extrusion force and offers path optimization.
4.3-inch Display
The desktop 3D printer features a large 4.3-inch touch screen with a new UI interface.
You can switch between English and Chinese and enjoy smooth and straightforward controls.
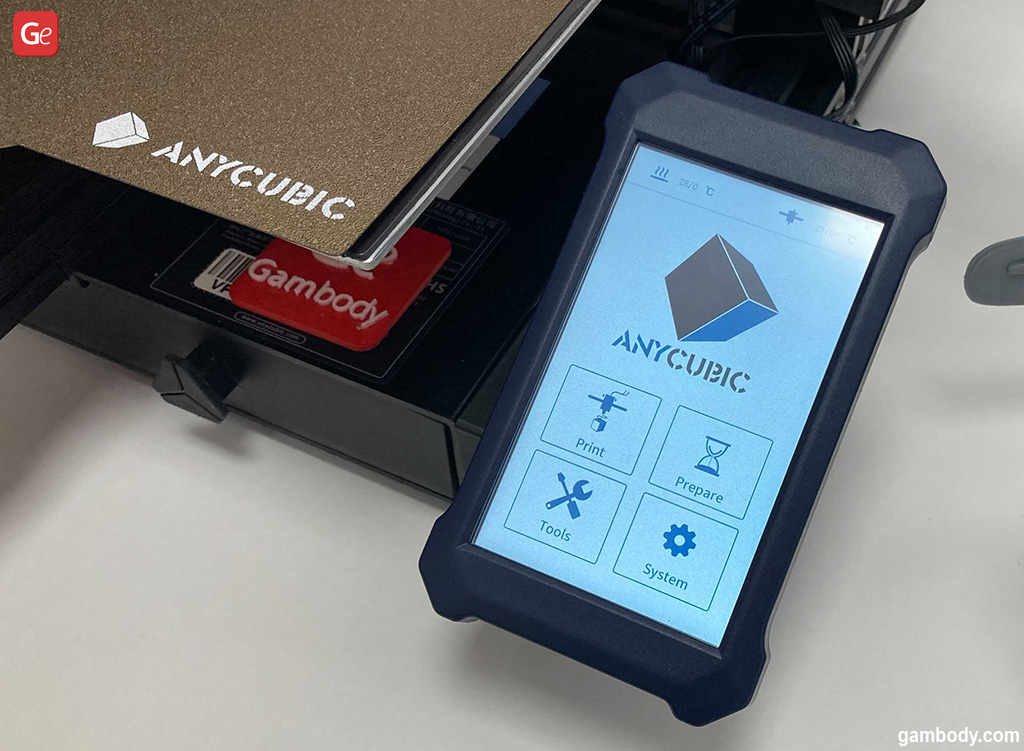
The menu is new and way more convenient than it used to be in previous Anycubic 3D printers. You can replace filament, switch on preheating, control motion, speed, backlight, temperature, turn off motor, sound effects, learn more about the Vyper 3D printer, etc.
Unfortunately, as in previous firmware releases, we miss the menu settings for extruder steps and motor steps. Since the manufacturer positions the Anycubic Vyper home 3D printer as the best for beginners and great for advanced users, lacking these settings upsets.
We believe that the company took care of and calibrated the machine in advance, but we cannot be sure of this. But in any case, all the essential data is stored in the printer firmware, and we can access it by connecting the machine to a computer.
Anycubic Vyper vs Creality CR-6 SE Comparison
When you have $400 in your pocket to spend on your hobby equipment, you must find the best 3D printer for the money. Should it be Anycubic Vyper or Creality CR-6 SE? Both sound good if you are looking for a top machine with an auto-levelling system, big touch screen and some of the latest FDM features.
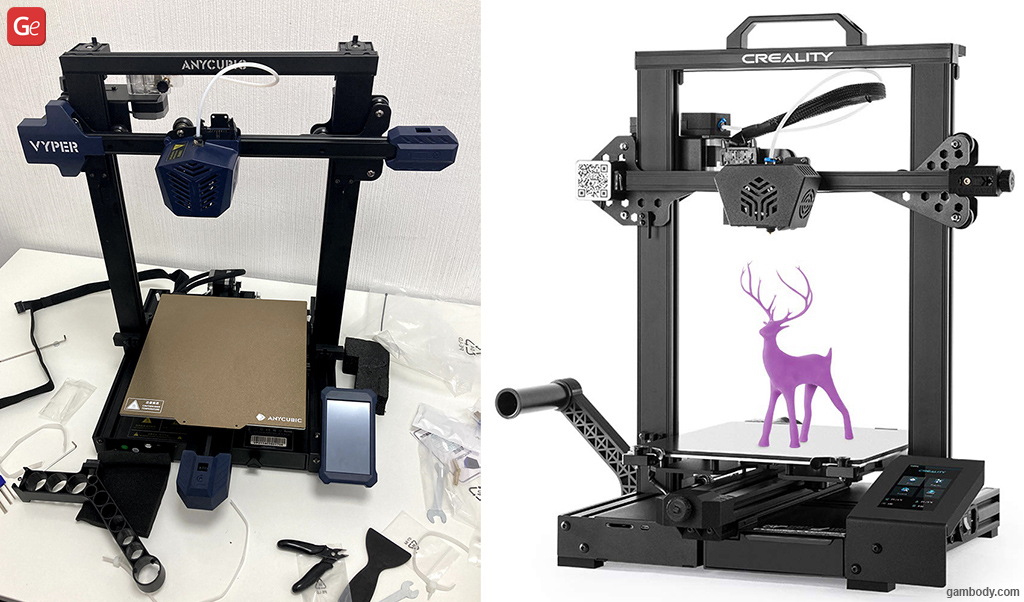
The two machines indeed share many similar features and specs. They provide better value than cheaper 3D printers, but they still differ in some ways.
Users who need a large print bed, hassle-free automatic bed-levelling, elegant design would love the Anycubic Vyper 3D printer. It has an improved cooling system, HotEnd, extruder and exceptional print surface adhesion. All these upgraded elements make Vyper look way better than CR-6 SE.
If you are a fan of Creality products and need a collapsible spool holder along with a top handle, give advantage to the CR-6 SE. But this machine costs a bit more than its competitor.
Is Vyper the Best Mid-Range 3D Printer 2021?
After running all the tests and reviewing the Anycubic Vyper 3D printer specs and features, we can conclude that this mid-range 3D printer is one of the best for the money. It has many cool modern solutions and various improvements. But along with pros, there are cons to consider.
Advantages:
- Cool design;
- Vyper requires no improvements;
- Fantastic auto-levelling system;
- Dual fan nozzle;
- BMG extruder;
- Large 4.3-inch touch screen with user-friendly interface;
- Magnetic platform;
- Integrated toolbox;
- Other top solutions.
Disadvantages:
- No stepper motors calibration menu;
- Lack of HotEnd silicone socks;
- At high speeds, Z-axis movements produce mechanical noise (you can fix this vibration noise by 3D printing two small dampers);
- You must reduce the print speed for better results.
There are more pros than cons, and you can fix all the disadvantages without problems. So, the Anycubic Vyper 3D printer with an auto-levelling system is a great machine that delivers high-quality results. Gambody believes that this machine is one of the best home-use 3D printers for making premium quality models and figures offered on gambody.com marketplace. And while advanced users could enjoy it at once, newbies might need to learn how to adjust the Cura Profile settings after setting up the printer.
