Enthusiasts and hobbyists know how crucial 3D printing infills are to making their models strong, well-structured, and of the ideal weight. Learn about the infill basics to achieve optimal results while working on your next 3D print.
In this post, Gambody covers the infill density and patterns. We also answer the most common questions to help you choose the best infill percentage settings for any 3D print to look fantastic and have a long life.
Jump to a section:
- What is infill in 3D printing?
- Infill Density
- 3D Printing Patterns
- Infilling Example
- Other 3D Printing Infill Settings
- FAQ
3D Printing Infills
What is infill in 3D printing? As a hobbyist, you can control your 3D printer settings and apply different adjustments to ensure the best experience and outcome. You can turn any 3D model into a G-code for a 3D printer via slicer software, which allows you to control such things as perimeters (also called exterior walls) and infill.
And if you depend on the wall thickness to ensure a sturdy object, it is way easier to control your 3D printing infills because the infill is what is there within your model walls.
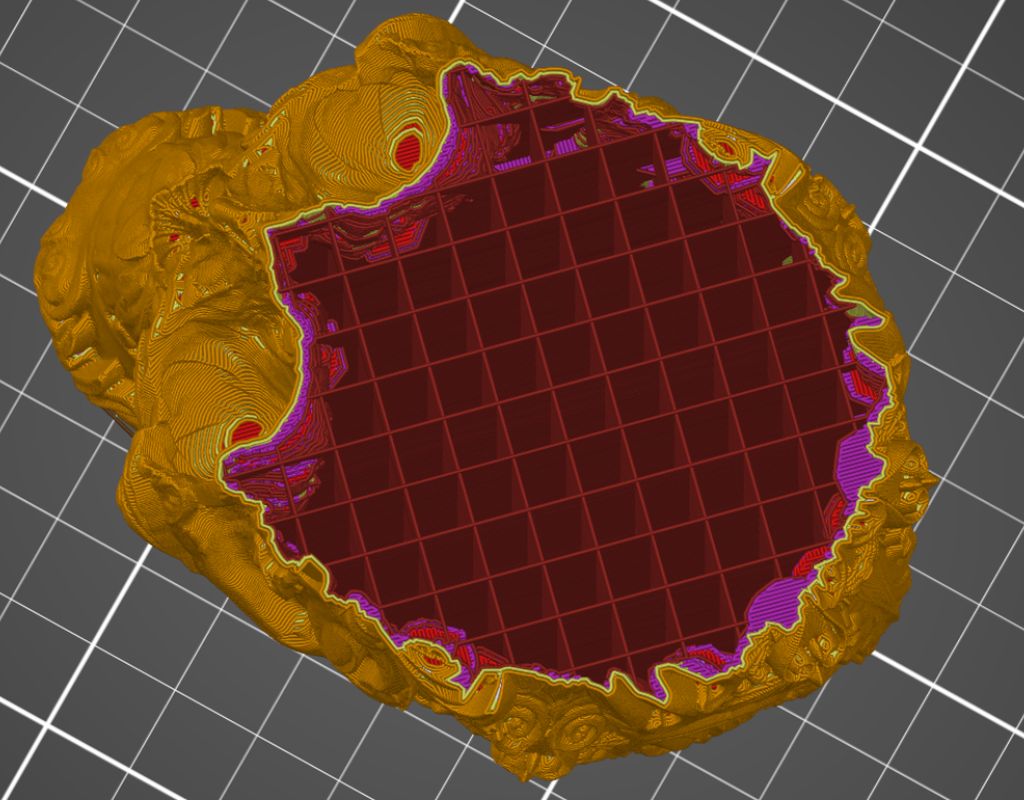
The two basic adjustments you can make are infill patterns and infill density.
Read also: Best Free STL Files for 3D Printing
Infill Density
Adjusting your infill 3D printing settings allows you to control the object’s weight, solidity, and inner construction.
Infill density is the percentage you can regulate in a slicer. It goes from 0 to 100, when 0 means a hollow 3D printing part and 100 means a solid object. The lower this percentage is, the lighter your 3D print weighs.
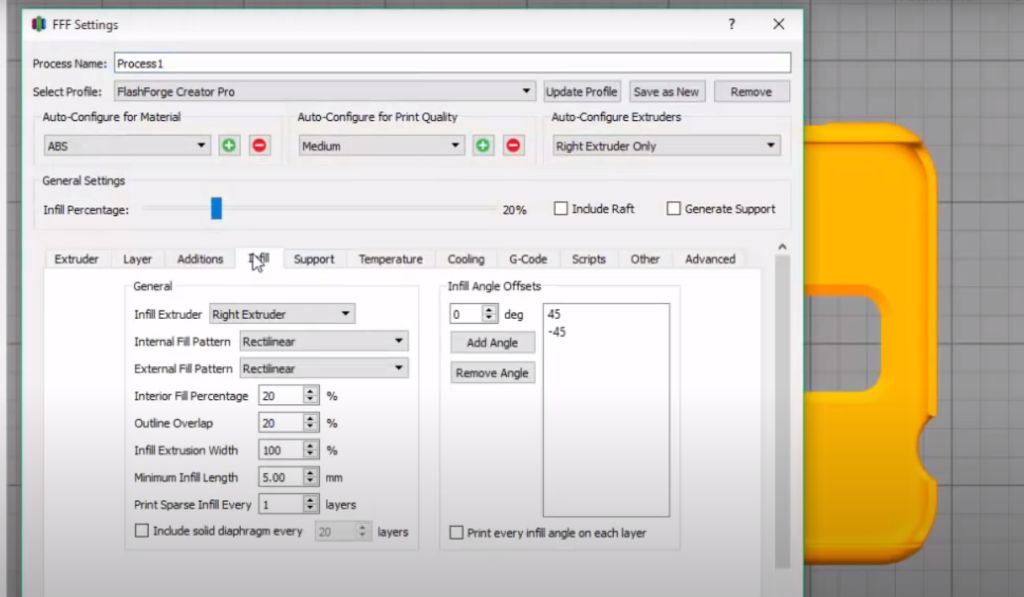
Correct infill percentage can improve the strength of your model, make it lighter or heavier, ensure its shorter or longer print time, etc. Users commonly choose to use the infill density of between 15 and 50 percent because it helps to use less material and time while strengthening the object.
However, everyone working on a solid functional 3D print should choose an infill density between 50 and 100 percent. Please remember that if you work on a flexible model, it won’t be too flexible if you select the 100 percent infill setting.
Infill percentage (best 3D printing settings):
0-15 % – ideal parameters for light miniatures;
15-50% – good settings for more significant objects;
50-100% – the best settings for solid and heavy things.
Read also: Free STL Editor 2022: How to Edit and Repair STL Files
3D Printing Patterns
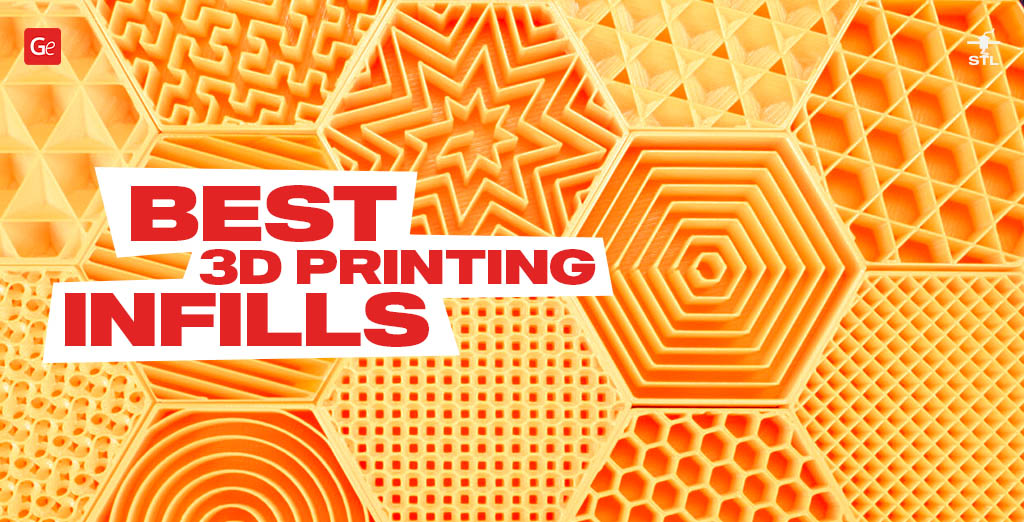
In 3D printing, the infill pattern reflects the inner structure between the object’s walls. It can be just lines or complex shapes which influence the 3D print’s flexibility, solidity, and time needed to complete your project.
It is hard to name the best infill pattern since each option serves its goals and can be perfect for various 3D prints. Choose your parameters based on time, material, and desired two-dimensional or three-dimensional strength.
Lines
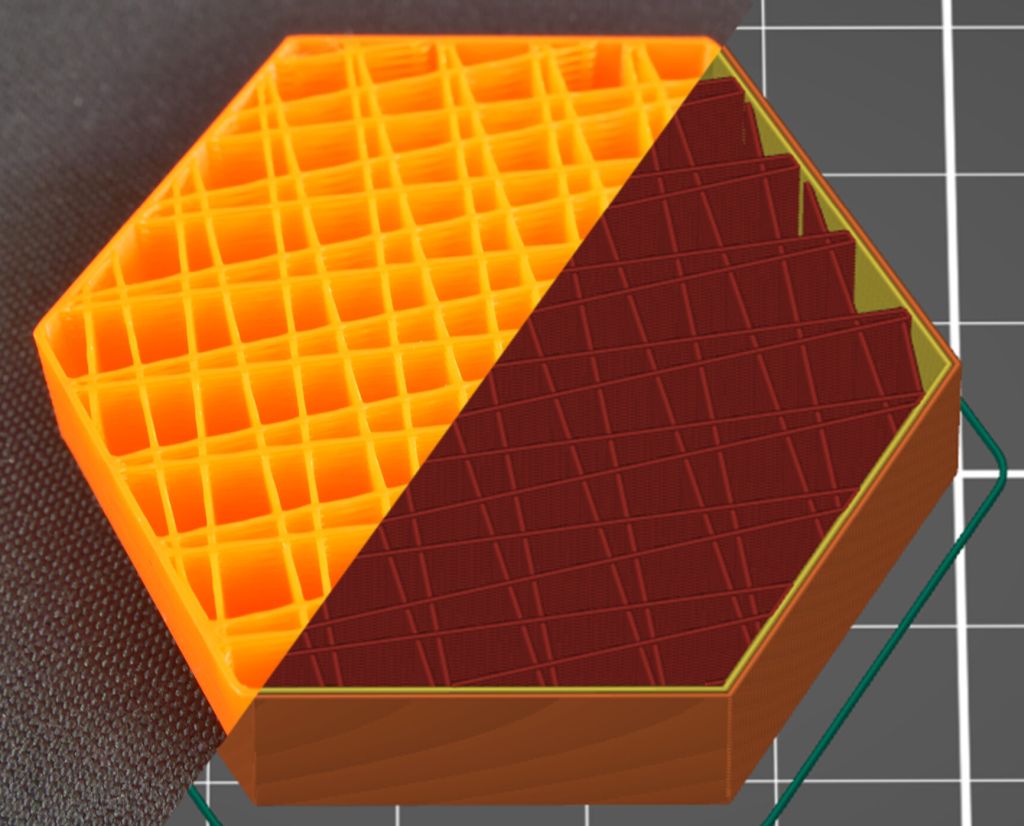
It is the most recognized infill in 3D printing. Lines (Line) mean what the word says; straight lines 3D printed along the Y- or X-axis for every layer of your project.
Such 3D printing infills are great for speeding up your print time and saving a lot of material. As a result, your model won’t weigh too much, but its inner strength will be in two dimensions.
Zig Zag
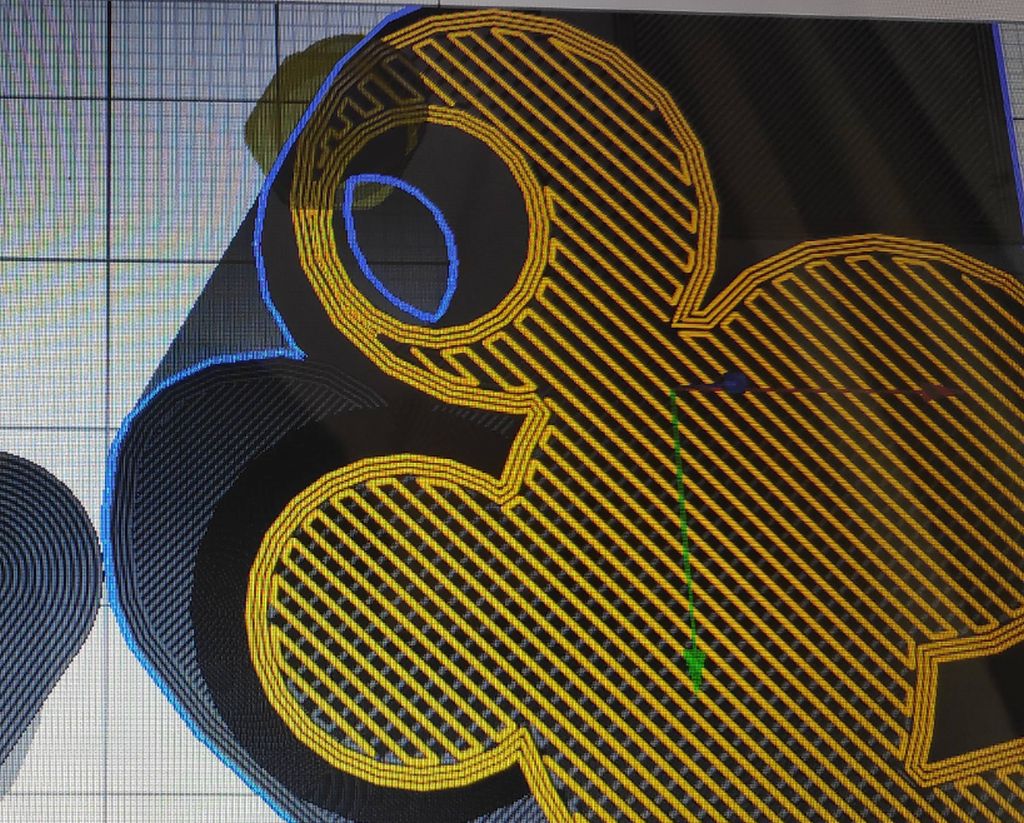
This infill pattern is pretty similar to Lines, which are connected in a single long line. Usually, this option is excellent for support structures.
Lightning
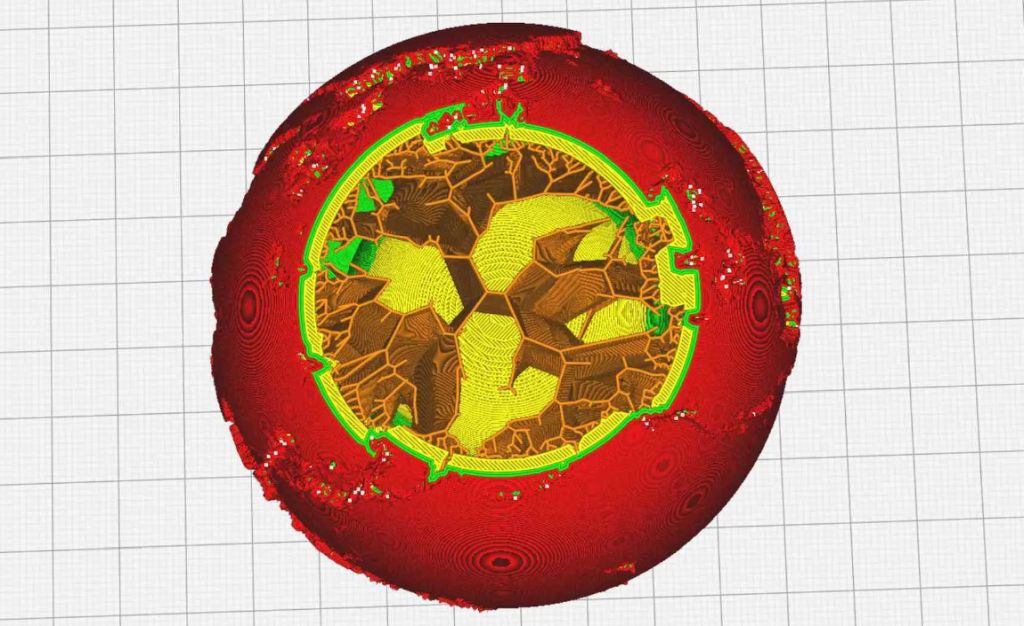
Unlike other 3D print infill patterns, Lightning can identify which parts of the model need more internal support than the others. It reminds us of a tree-like structure that becomes denser closer to walls and top surfaces.
Rectilinear
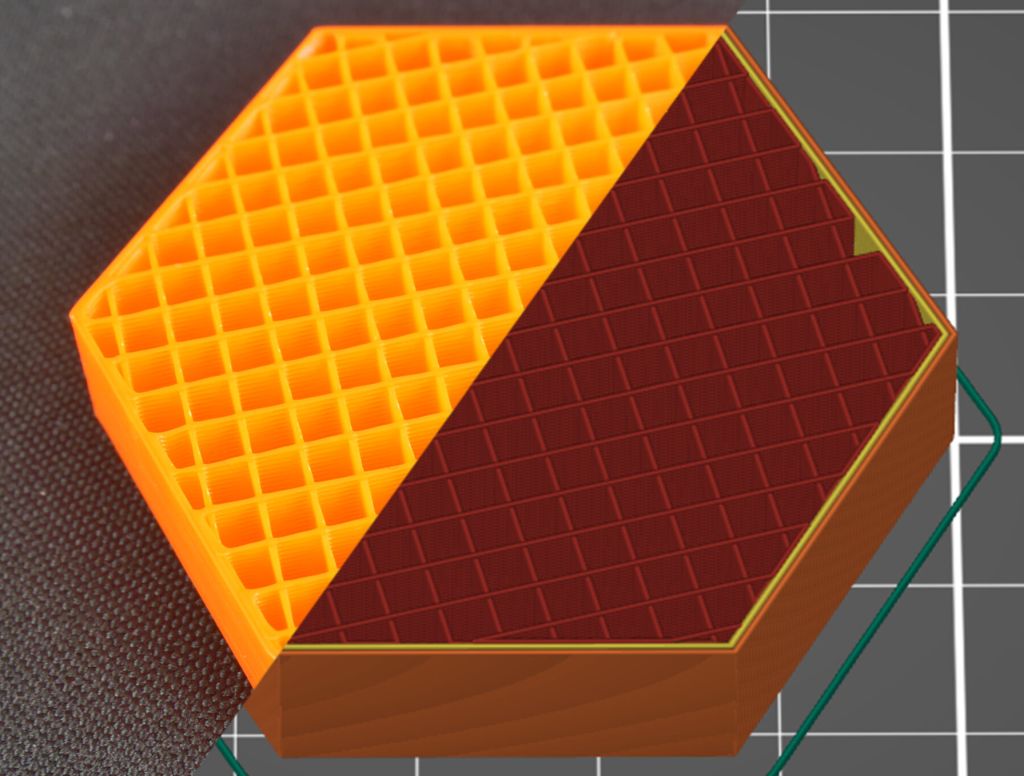
This pattern belongs to the basic 3D printing infills. Rectilinear builds rectilinear grids in one direction for one layer and 90-degree-rotation for the next layer. There are no grid-like crossings, so the option saves you some material and time.
Grid
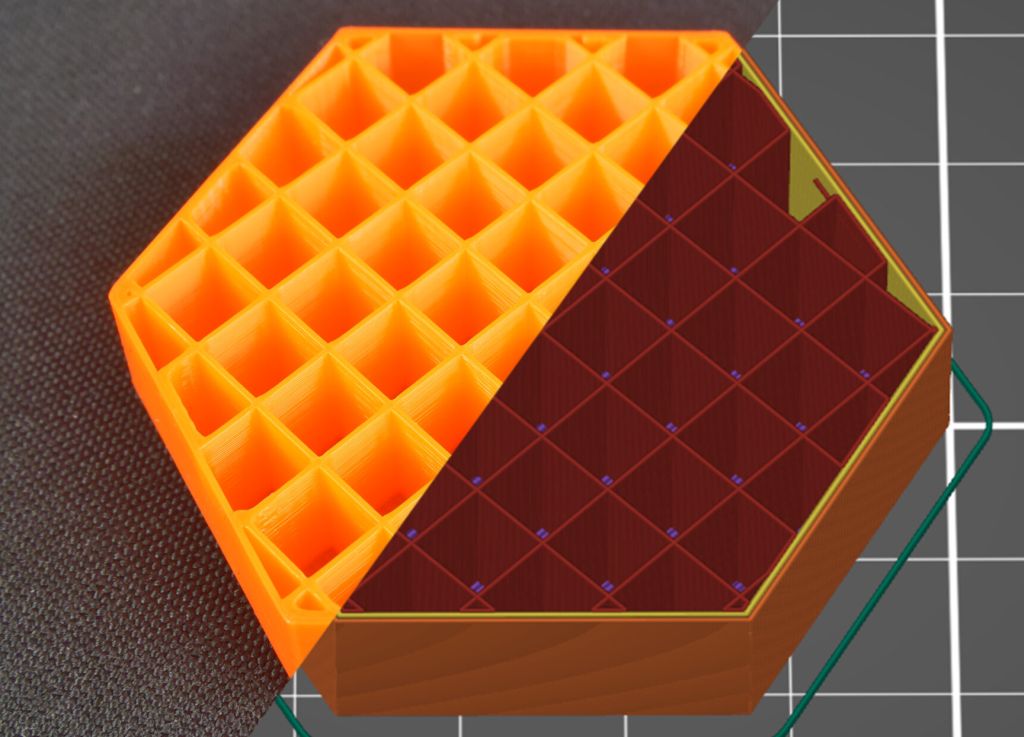
Fans of Lines infill might like using a Grid pattern. It also uses two-dimensional lines for every layer, but the space between them doubles. The result is more potent than that offered by Line patterns. Still, the printing time is longer, and you will consume more 3D printing material.
Honeycomb
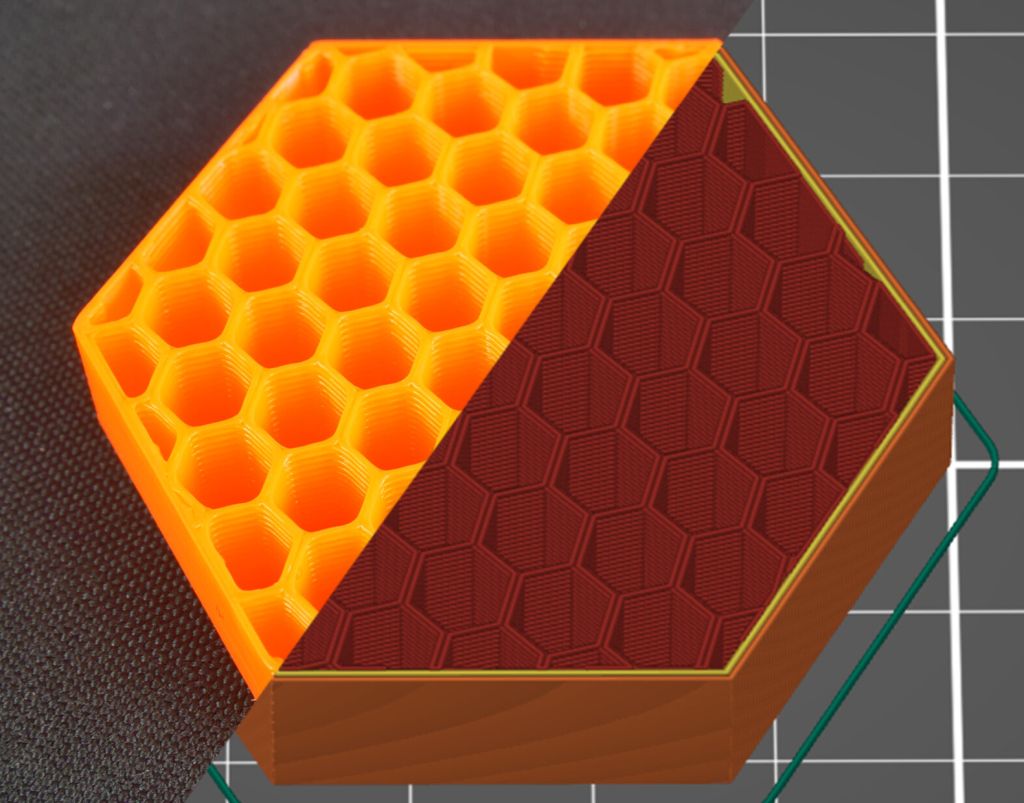
This type of 3D print infill pattern looks like a honeycomb without bees. Just like Lines, it does not require a lot of filament but offers moderate strength to your object and has a lovely appearance. You can choose it for figurines when you need to work fast.
Tri-hexagon
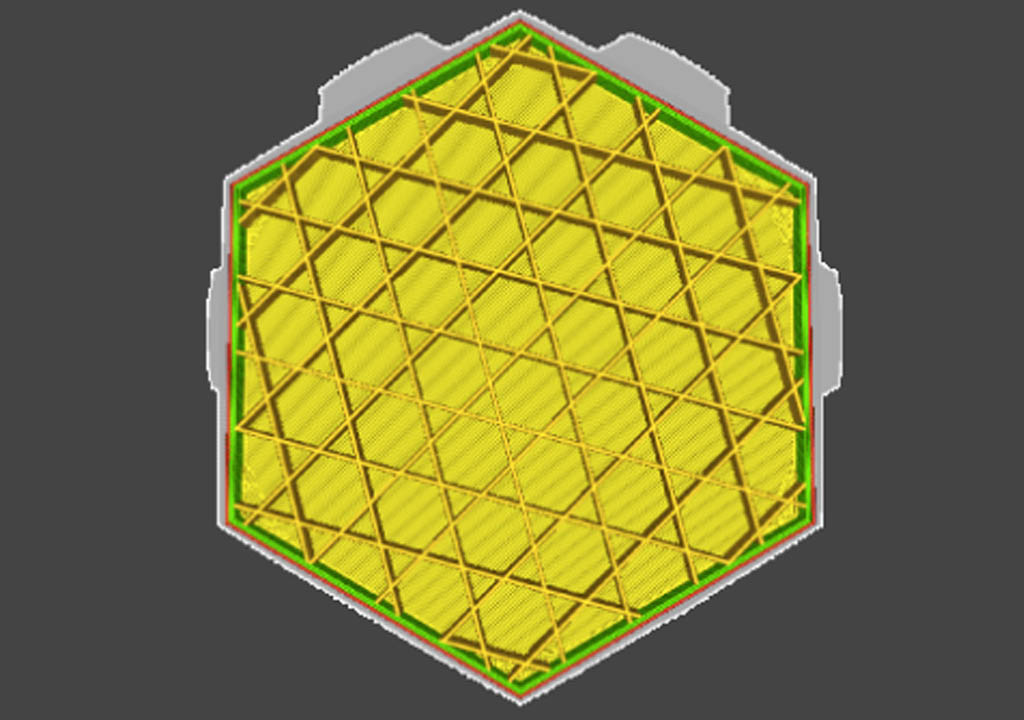
This 3D printer infill pattern is excellent for users who wish to print substantial projects. Tri-hexagon is a set of lines printed in 3 directions in the plane containing the X- and Y-axes that lead to hexagon shapes with triangles. Such models have proper two-dimensional strength.
Triangles
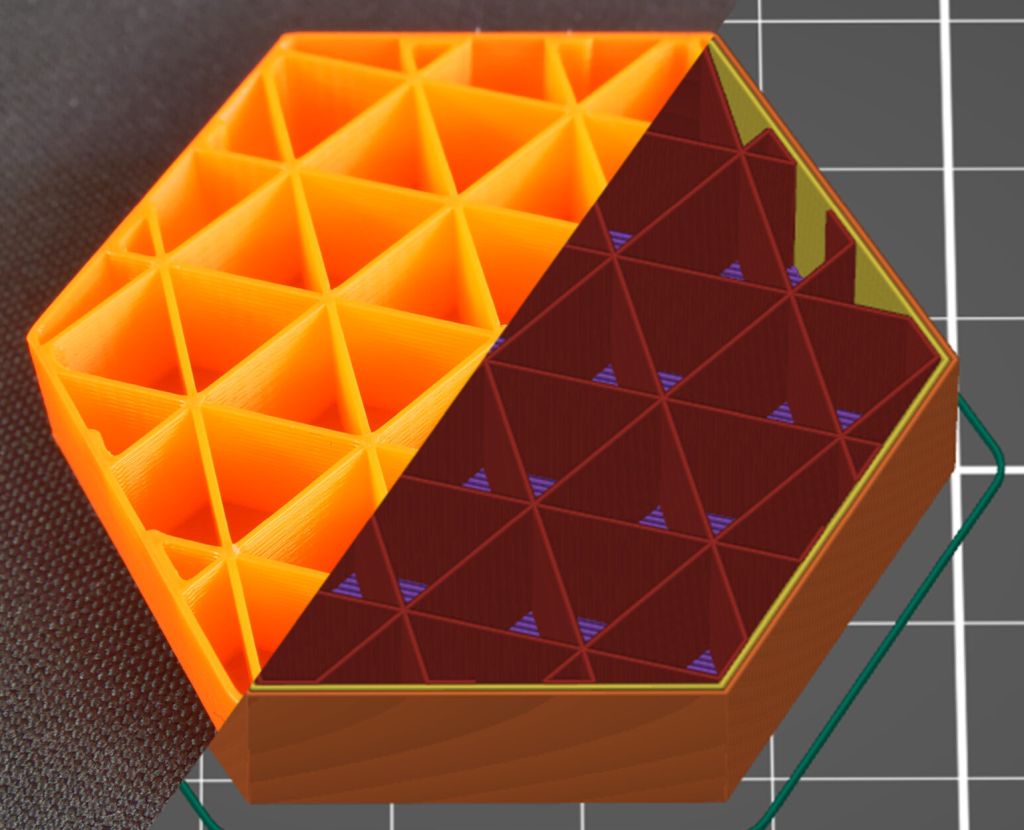
Such 3D printing patterns are based on lines that overlap to create triangular shapes in 3 directions in the plane containing the X- and Y-axes. Using this option, you can work on strong models even though you can achieve two-dimensional strength only.
Gyroid
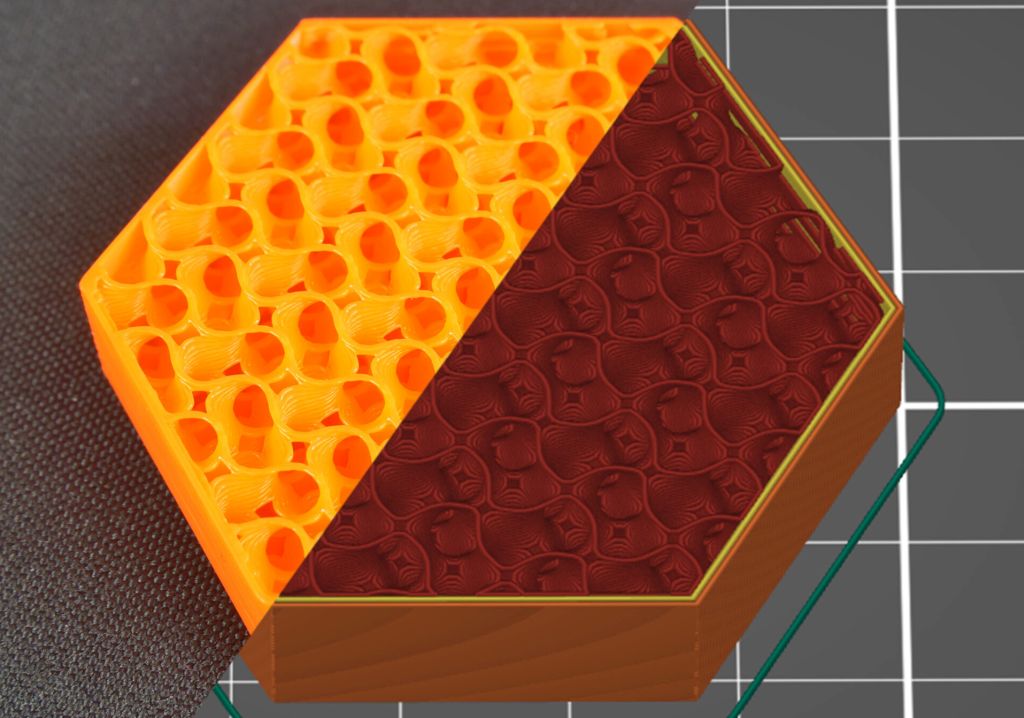
This option creates wavy lines that cross paths resulting in an eye-catching pattern that looks nothing like other infill patterns. Models printed with this infill should get the best balance between printing time, material consumption, and three-dimensional strength.
Read also: Best Free 3D Modeling Software
Cubic
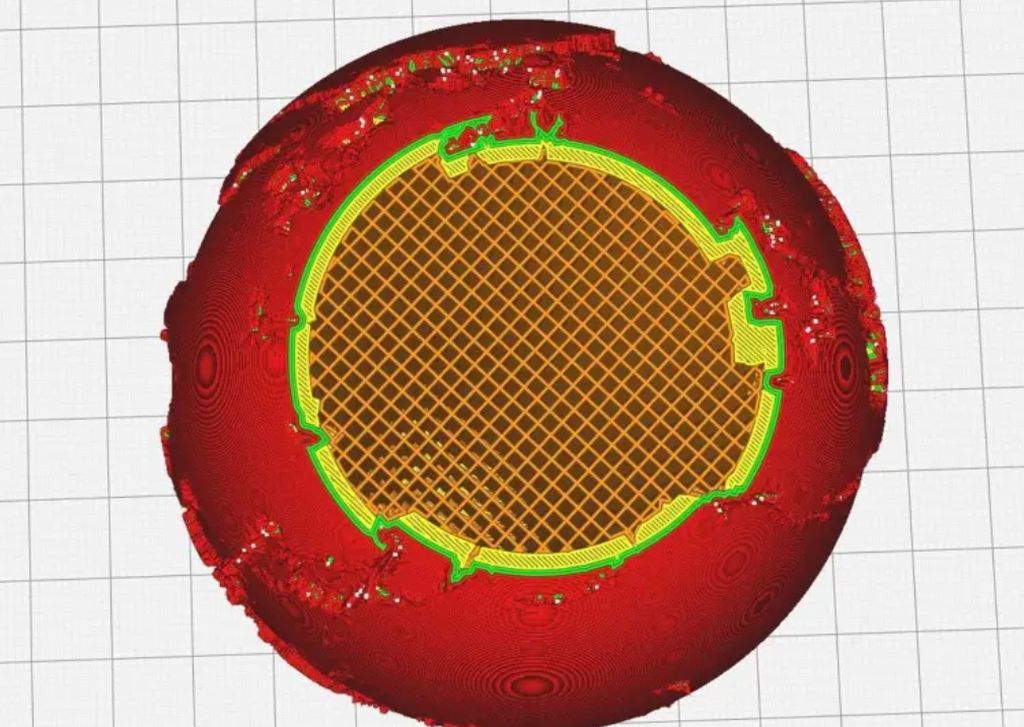
Users who need to create a 3D print, strong in 3 dimensions, can try the Cubic infill pattern. It helps to add cubes tipped by 45 degrees in the Y- and X-axes area. While you reach strength, your 3D printing time and amount of material also grow compared to simpler patterns.
Octet
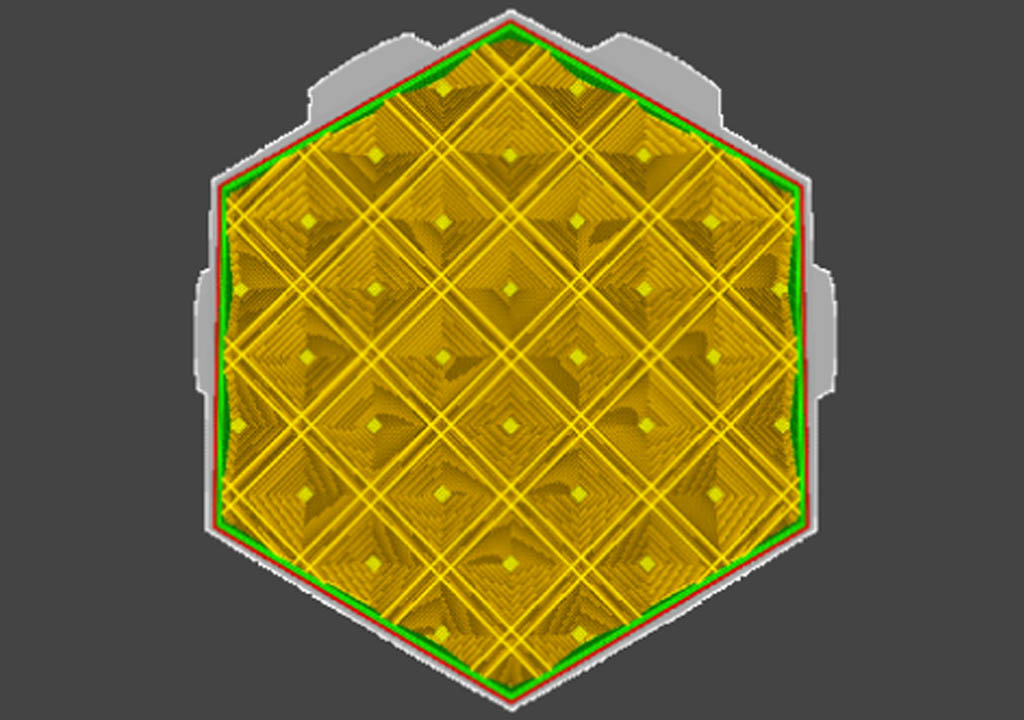
Similar to the Cubic option, the Octet pattern adds squares within the walls of a 3D printed model. The strength it offers to the 3D prints is also three-dimensional, so you can rely on this parameter when you wish to recreate a substantial project.
Concentric
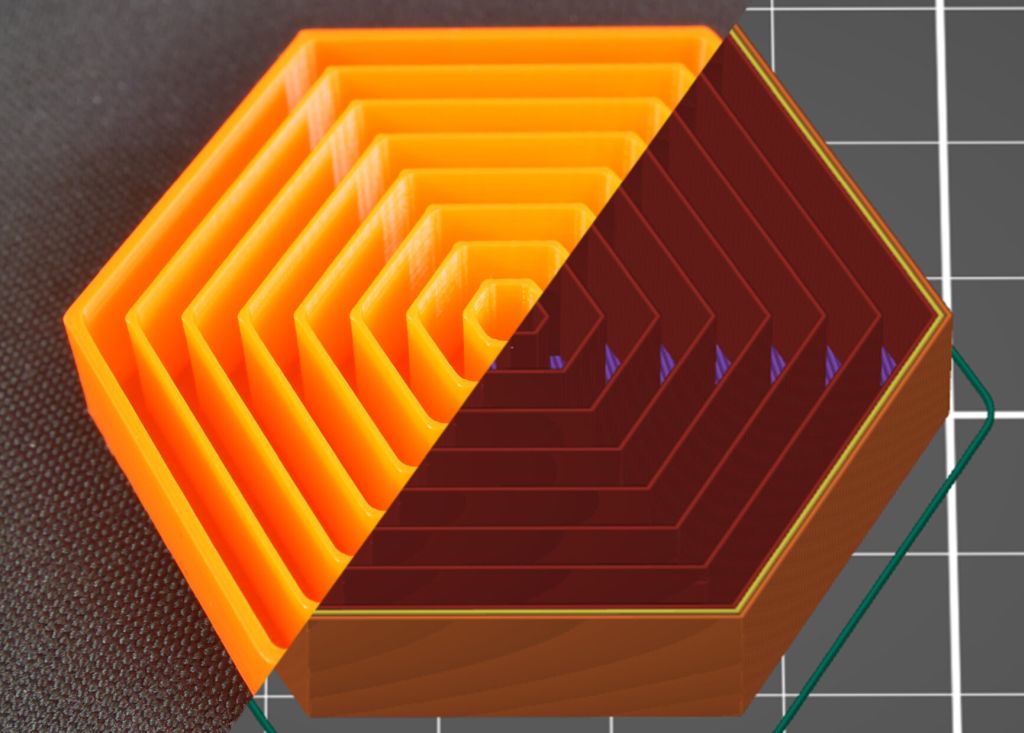
The best infill pattern, Concentric, uses lines matching the perimeters of your 3D model. It is a fast-printing method perfect for flexible projects that combines reliability with savings. You can use less 3D printing material by choosing a Concentric pattern than most other options.
Read also: Cleaning 3D Printer Nozzles at Home
Infilling Example
It is interesting to compare what infill patterns are offered by different slicers.
Prusa slicer infill patterns
The current Prusa infill patterns number is 17. This software is one of the most comprehended tools with settings you can adjust to make a 3D print just the way you want.
Prusa slicer comes with extras to the most common 3D printing infill settings. It offers Line, Grid, Triangles, Gyroid, Cubic, Adaptive/Support Cubic, Rectilinear, Aligned Rectilinear, Stars, Concentric, Honeycomb, 3D Honeycomb, Hilbert Curve, Archimedean Chords, Octagram Spiral, and Lightning.
Makerbot infill patterns
With Makerbot, you can choose your infill density, layer height, and print speed. By default, this software lets you use the Hexagonal pattern.
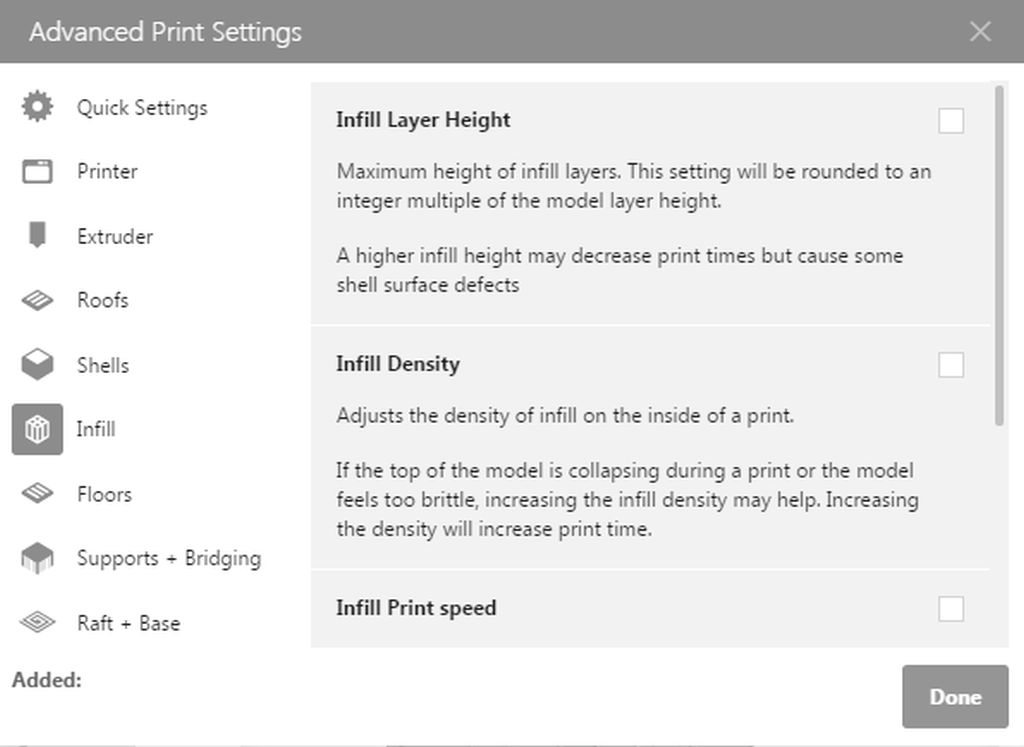
Still, the complete list of Makerbot infill patterns includes way more than Hexagonal. You will also find Cat Fill, Shark Fill, Linear, Moroccan Star Fill, Hilbert Fill, Sunglasses Fill, Diamond Fill, and Linear Interleaved pattern options.
Simplify3d infill patterns
The list of Simplify3D infill patterns is not too long. There are six options to test, but it can be enough for hobbyists who work on similar projects.
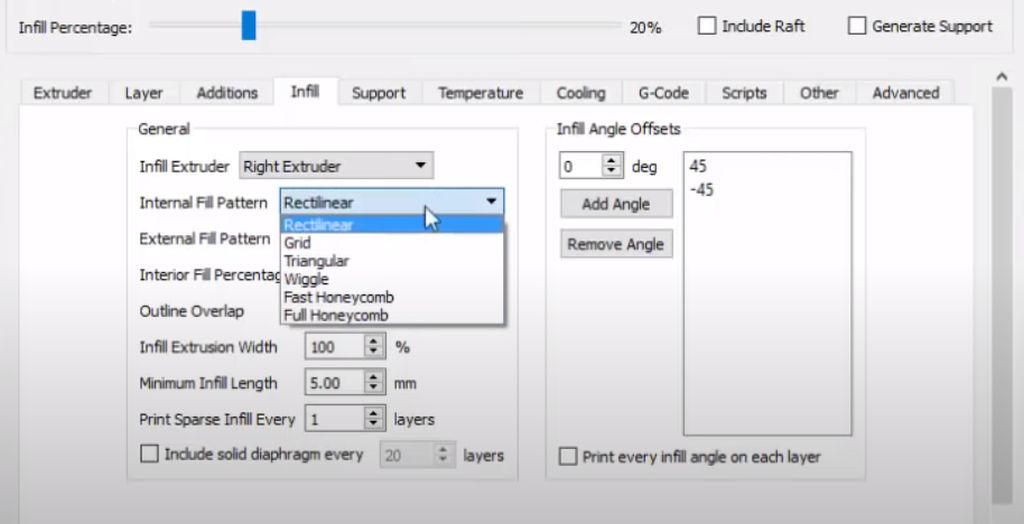
Simplify3D offers Grid, Rectilinear, Triangular, Wiggle, Full Honeycomb, and Fast Honeycomb settings.
Ultimaker Cura infill patterns
Cura offers 14 different 3D print infill pattern options. It’s not as much as provided by PrusaSlicer, but it’s way more than you can find in Simplify3D and other slicers.
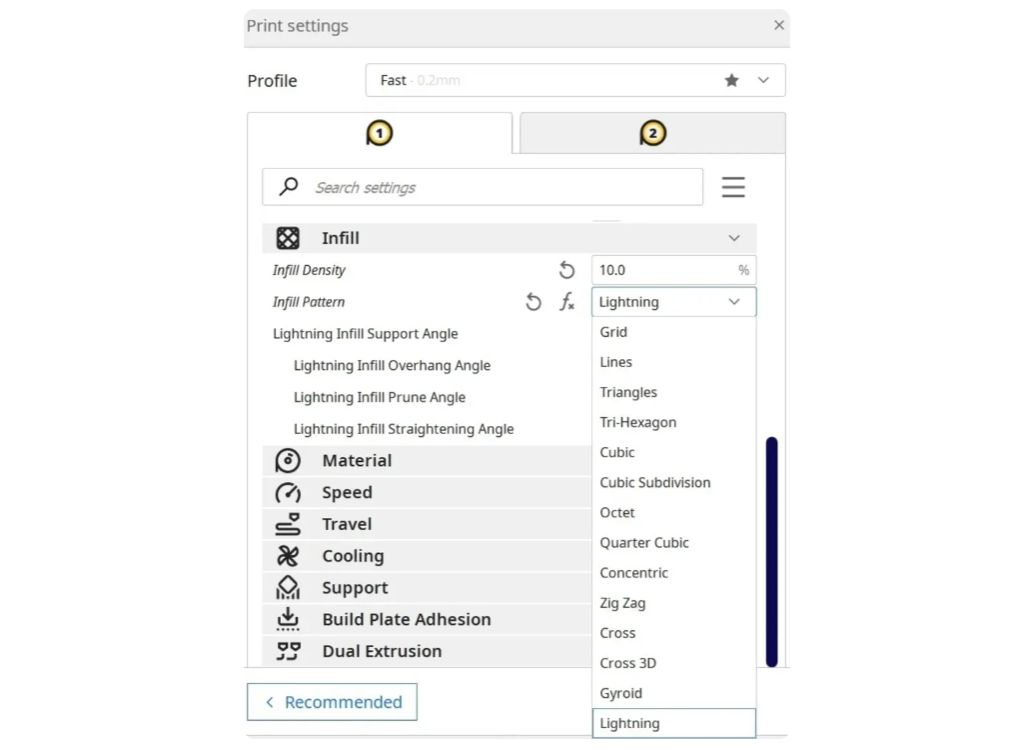
With Cura, you can use various 3D printing infills, including the most popular Lines, Triangles, Cubic, Octet, Concentric, Zig Zag, Lightning, Cross, and Gyroid.
Read also: Troubleshooting Guide to Fix 10 Common 3D Printer Problems
Other 3D Printing Infill Settings
Once you become familiar with 3D printing infills, density, and patterns, you should explore other features found in slicers. The software allows you to adjust variable settings and use art infills as your product decor.
Variables
Variable settings allow you to apply different infill percentages to different parts of the same model. For example, you can set up a 15% infill through layer #25, then increase the number to 45% infill, etc.
Some slicers easily set up the variables, but others might require you to add support blockers or use modifiers. Testing and acquaintance with settings can help you learn about all possible adjustments.
Infill as Art
Creative hobbyists and crafters can 3D print fantastic pieces using infill patterns as art.
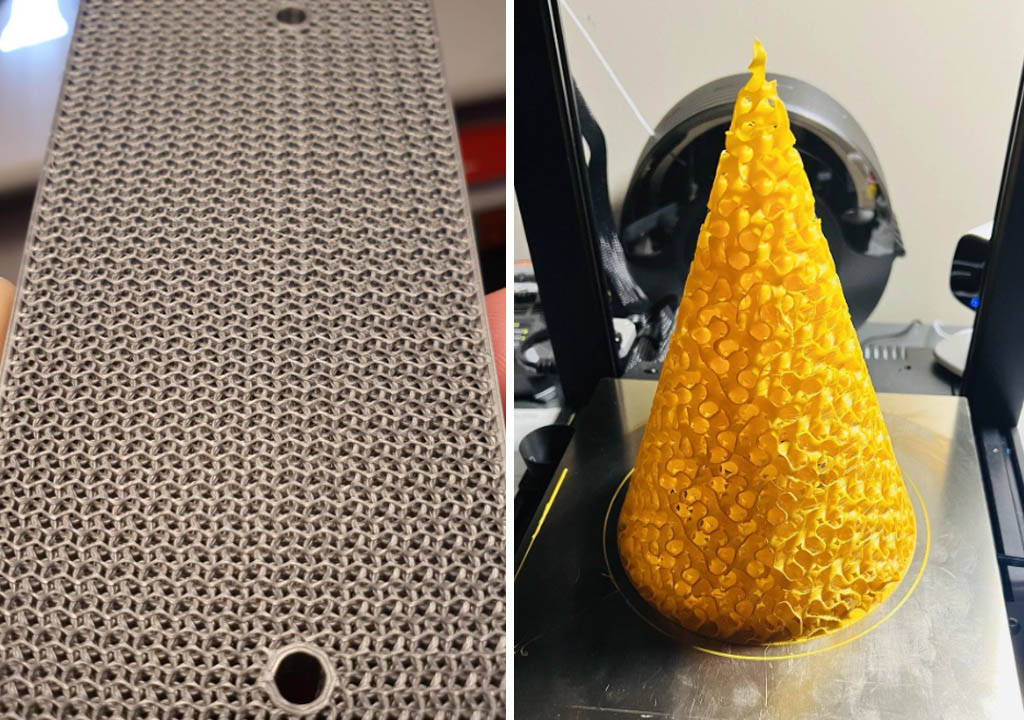
Since the pattern is enclosed within the model’s walls, it is necessary to cut the bottom and top parts to reveal the insides. Such a method is perfect for producing unique earrings, rings, charms, and headpieces and turning any creative ideas that might come to your mind into physical objects.
FAQ
What does infill mean in 3D printing?
The 3D printing infill is the internal pattern enclosed inside a 3D printed model or part, invisible to you unless you cut the top/bottom layers of the project or adjust the settings.
What is good infill density?
The printing time depends a lot on your 3D printing infills. So the excellent infill density is the one that helps you consume less filament and finish the model fast while still keeping it strong enough. It could be a good deal for you at 0-15% or 15-50% unless you need to make a heavy object.
If you 3D print with TPU or other flexible materials, you can select your desired infill density, as anything will work great. But remember that the model will be less flexible if you choose a higher density.
What infill percentage should I use?
The answer to the question, “How much infill do I need?” depends on what you are making right now. Usually, the slicer you choose will offer you several options for the infill density. And that percentage can vary for the different parts of your 3D model. But you can constantly adjust the settings manually from 0 to 100 percent, test your 3D prints and choose your desired numbers to avoid 3D printing fails.
If you are working on a miniature piece that can be light and not too strong, select your infill density between 0 and 15 percent. If you are printing a more significant thing, choose anything between 15 and 50 percent. But if you wish to create a strong and heavy part, you can increase the number from 50 to 100 percent.
What is the fastest infill pattern?
Lines, Zig Zag, and Lightning are considered some of the fastest infill patterns among the two-dimensional options that do not require much 3D printing material.
What is the best infill pattern?
A lot depends on what you are 3D printing. The best infill pattern for flexible projects is Concentric. Lines pattern is the best option for collectible figures, while most standard models are great with Triangles and Grid patterns. Users who work on making functional parts and accessories might choose between Gyroid, Cubic, and Octet infill patterns.
