Resin printing differs from FDM 3D printing, and some rules that apply to using 3D printing supports are also different. Gambody wants to discuss the essential practices of orienting model parts on your SLA/DLP/LCD 3D printer to achieve the best possible results.
Remembering several rules for successful resin printing of any model is a must. And they are all on how you position the parts on the 3D printer bed. Correct positioning eliminates many issues and leads to fantastic projects.
Read also: Over 100 Fun 3D Printer Projects
Resin Printing & SLA Support
You should master when to use supports in 3D printing and learn to orient the models correctly on the printer bed. There are some rules Gambody wants to share with you based on some of the fantastic 3D printing projects you can find on gambody.com marketplace.
Sometimes adding resin print supports and selecting the density is not enough. If you want to successfully use SLA support and create beautiful and smooth objects not ruined by post-processing work, look closely at the resin printing rules below.
Rule 1: Keeping a Uniform Cross-Sectional Area
It is a common rule to position 3D printing parts on the bed exclusively at a 30% to 45% angle and use SLA support structures. When you tilt the model at these angles and use enough resin printing supports, you can print nearly every project and make it look fantastic.
It’s necessary to maintain the uniform cross-sectional area of 3D printing layers. This way, you can avoid getting visible layer lines.
Besides, avoiding significant differences in the object areas would be best. If such things exist in the model, try to orient them at an angle. The variety of orientations can solve many issues and help you to take full advantage of 3D print supports.
Read also: Best Tips on How to 3D Print Without Supports
Ignoring the object positioning rules, you might experience the following situation. As you 3D print, the sudden appearance of a large cross-sectional area can cause a high suction force on the resin film. As a result, your model can easily tear off its SLA support.
Usually, hobbyists use additional rigid supports to hold the 3D printing object in place. And when creating a big model, it should be hollow inside. Thus, a significant cross-sectional volume does not necessarily equal a big area.
And when you are not sure, it is best to avoid abrupt transitions for better resin printing results. Here are a few examples.
Example 1: Tifa Lockhart
When resin printing Tifa Lockhart‘s legs, there was a problem with their total volume. Because of their large area, it was necessary to create a big adhesion area on the bed. The model did not rip off its support because it was positioned correctly for 3D printing.
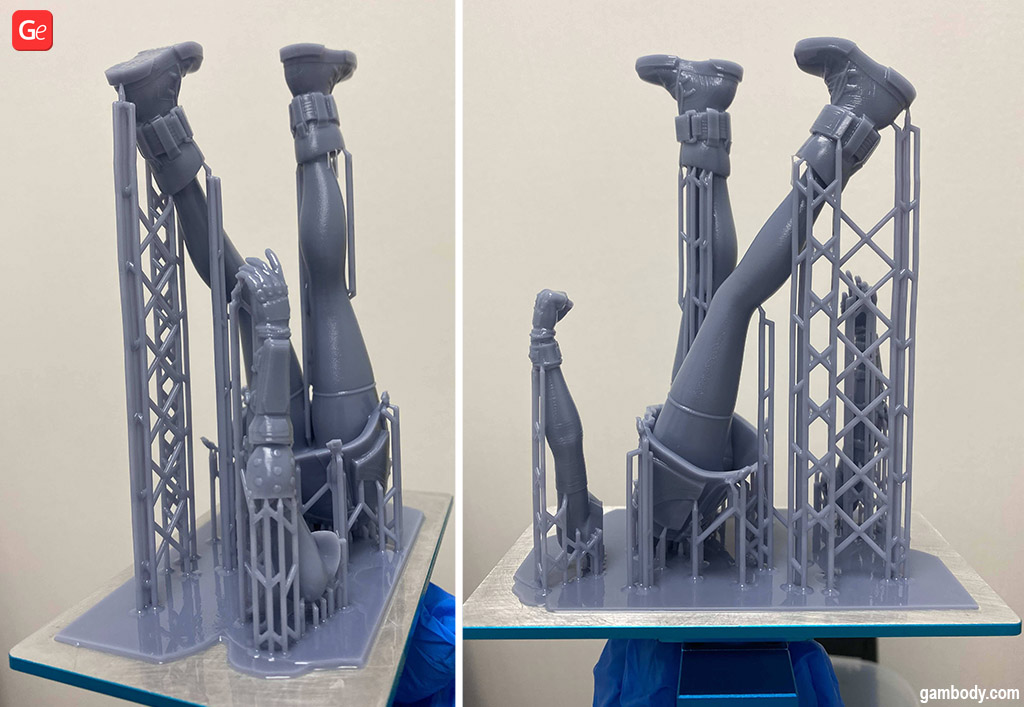
Pay attention to how Tifa’s model is positioned relative to the bed. You will notice that its lower portion is of more considerable volume compared to the top parts. Also, this object has no sharp changes in the cross-sectional area. The skirt can cause the only possible problem because it has a lot of volume. But the skirt is hollow and uses many SLA support structures, which helps it stay adhesive to the building platform.
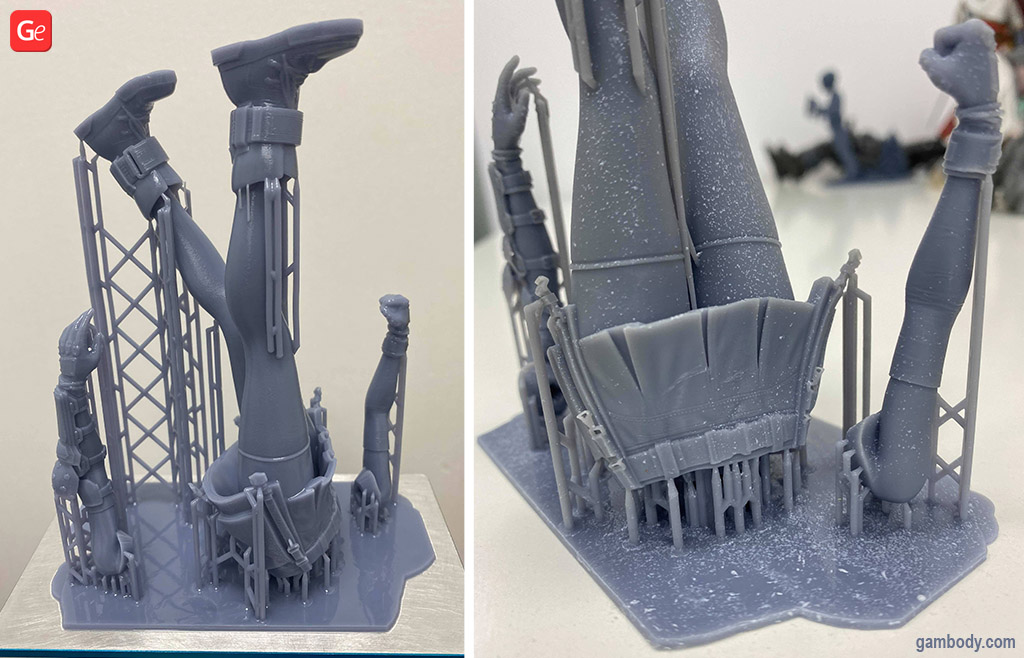
Tifa’s hands are way easier to make good. They have almost the same cross-section over the entire height. At the same time, they are positioned at a slight angle to reduce the pull-off load and have an even distribution of it over the bed area.
Example 2. Joker
You can orient the Joker model on the SLA/DLP/LCD 3D printer bed in almost the same position as it was sculpted. Tilt the head backward to avoid facial SLA support.
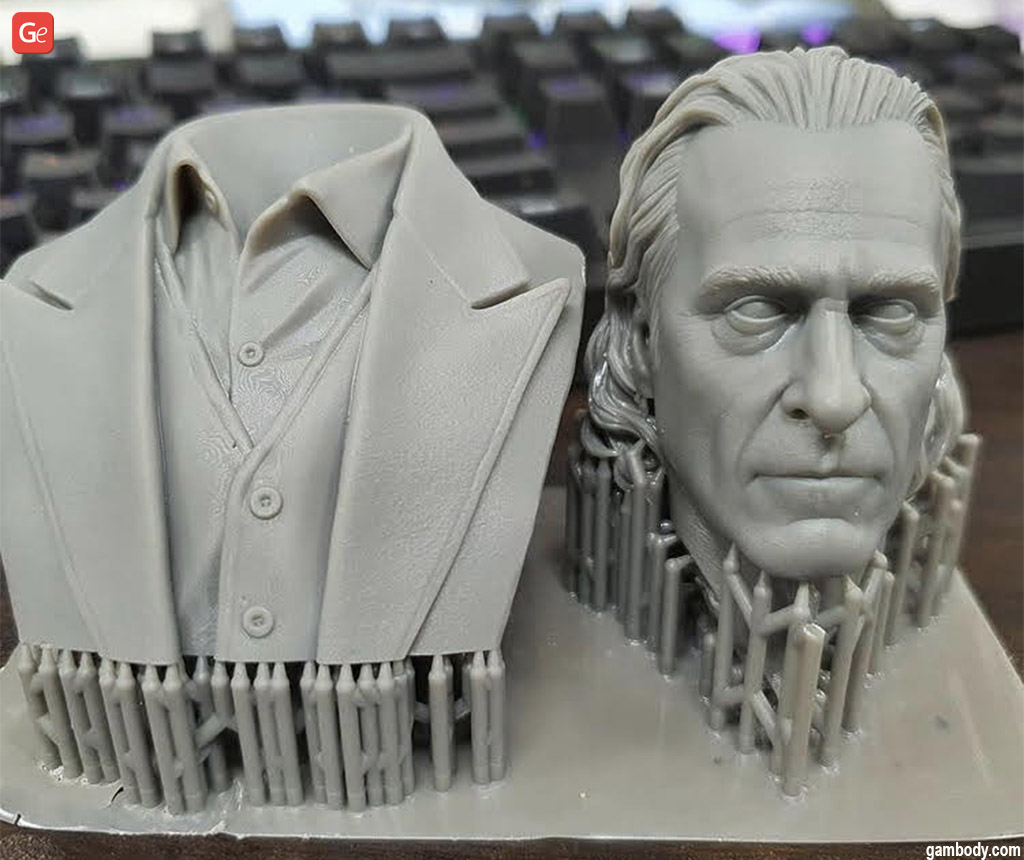
You can notice thick 3D print supports at the bottom and medium & thin SLA support structures closer to the edges. The fill volume transition is smooth throughout the project. It decreases toward the top, making it easy to 3D print with minimal support density.
Example 3: Odyssey Spartan Warrior
Please pay attention to how the parts are located on the bed while resin printing the Odyssey Spartan Warrior model. The torso has a transition in volume we discussed above, but this model is hollow and has thin walls. So, despite the tiny waist and broad shoulders, there are no significant changes across the print area.
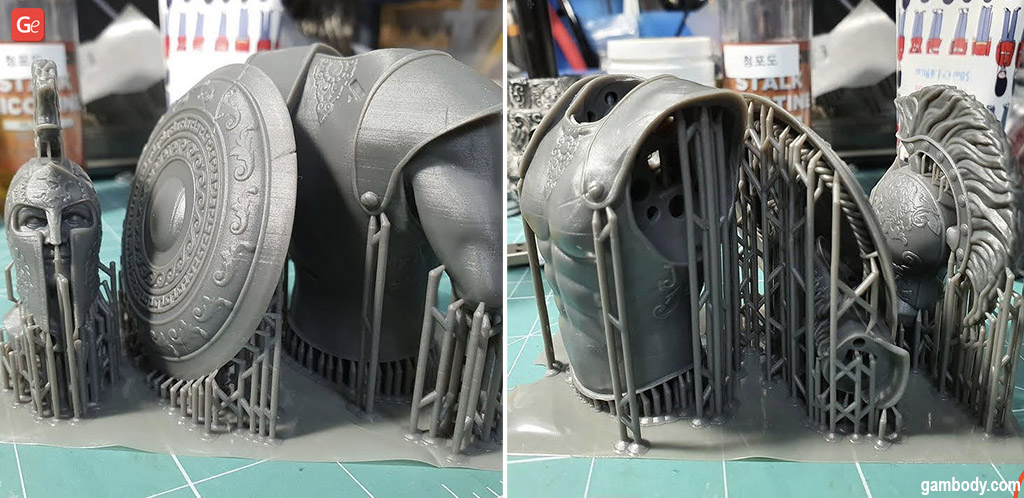
But the problems would be real if the model was solid. And it seems the author didn’t rotate the object to avoid SLA support structures in the most visible areas.
Hard surface elements, such as a flat disc (shield), a stand, or a wheel, must be oriented correctly on the bed to use 3D printer supports and achieve an outstanding 3D print. They must remain still throughout the SLA/DLP/LCD resin printing process, so 3D printer supports play a significant role.
Most parts are printed at an angle because it is easier to apply resin supports. You can notice the same thing about the Spartan head; it is slightly tilted back.
If we chose to orient the parts at a steeper or flatter angle, we would waste a lot of resin and consume more time on resin printing and post-processing.
Example 4: Racquet
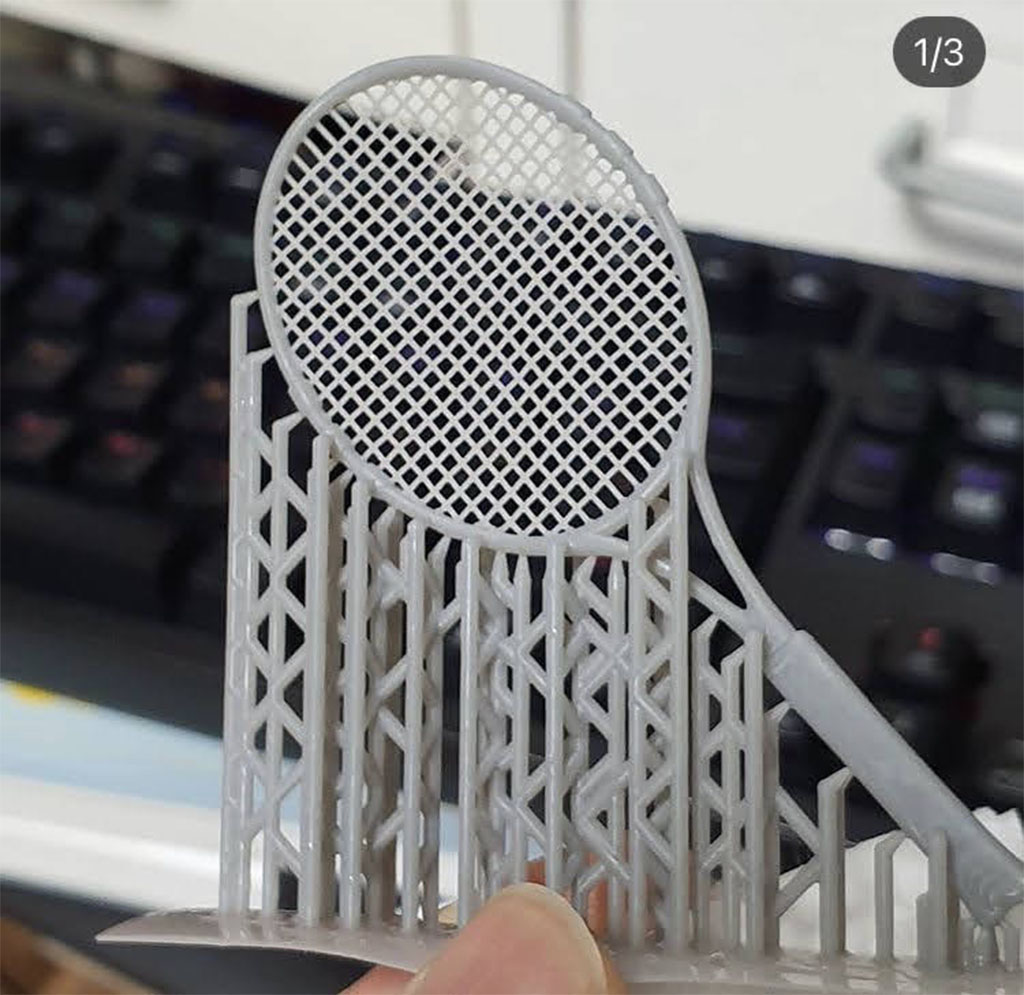
When resin printing a racquet, it is a good idea to tilt it so that the strings are printed to an angle to the bed. Such a slope helps print each string more smoothly and adds more SLA support structures.
Rule 2: Avoiding Flat Edges Relative to the Printer Bed
There is another problem you can experience during resin printing. Sometimes you need to print a model with flat faces, and they don’t turn out flat. It happens because the resin hasn’t completely dried out and because of the surface tension of the film. The high tear force deforms the object’s lowest part, bending it towards the center and flipping the edges.
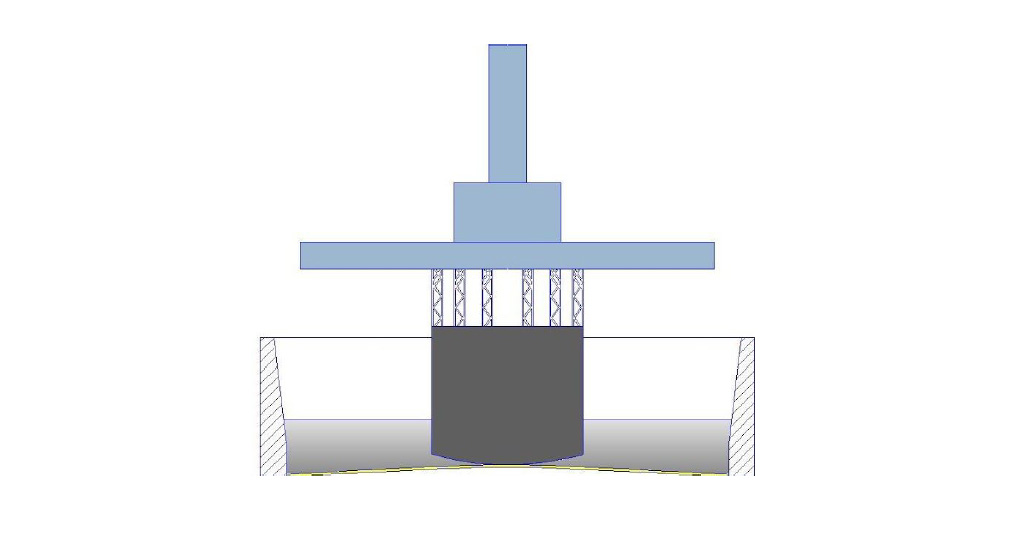
But if we tilt the cube by 30 to 60 degrees, we will avoid a sizeable bed-adhesive area. The resin printing will be even, leaving a thin line or a dot at the end.
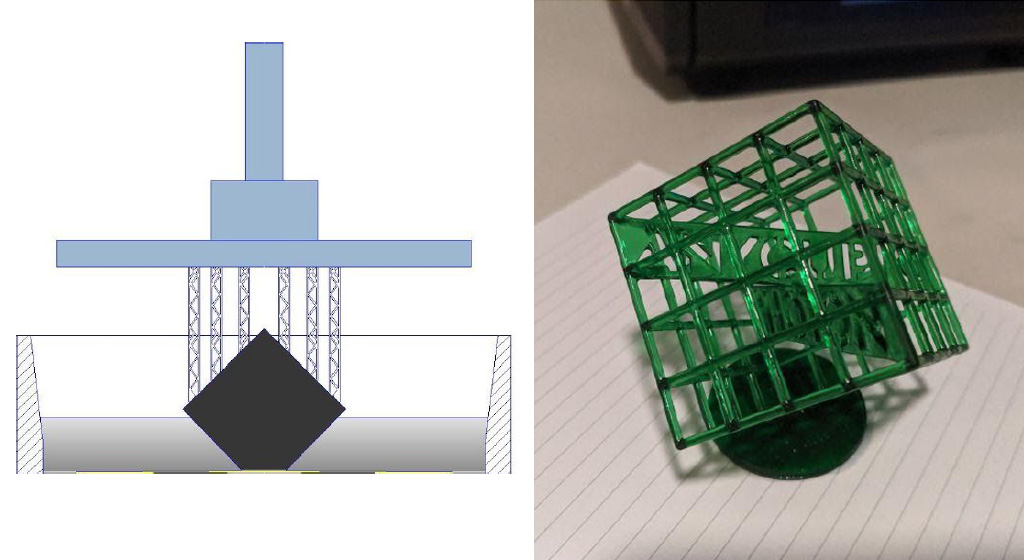
You can see how rotating the cube by 30 to 60 degrees in both faces goes on the example of the Photon model that comes with the flash drive along with a 3D printer.
Understanding the difference between FDM and photopolymer 3D printers (SLA/DLP/LCD) is a must. Resin 3D printers allow building the thinnest elements easily, but you can experience significant troubles when making flat and large edges.
Therefore, when you orient parts for resin printing, you must avoid putting flat edges parallel to the bed. Even tilting them to 10 to 15 degrees can fix the issues.
Another nuance is to support SLA (or DLP/LCD) correctly. Often, it makes sense to rotate the model by 180 degrees, which is better seen in the examples below.
Example 1: Changing the Angle for Battlestar Galactica
One of Gambody’s clients complained about getting uneven edges after printing the Battlestar Galactica model vertically. It was printed just as it was sold on gambody.com, and no adjustments were made for resin printing. The surface tension pulled the top down, deforming the model and ruining the project. Gambody advised to tilt the model and print it at an angle, which turned out perfectly well.
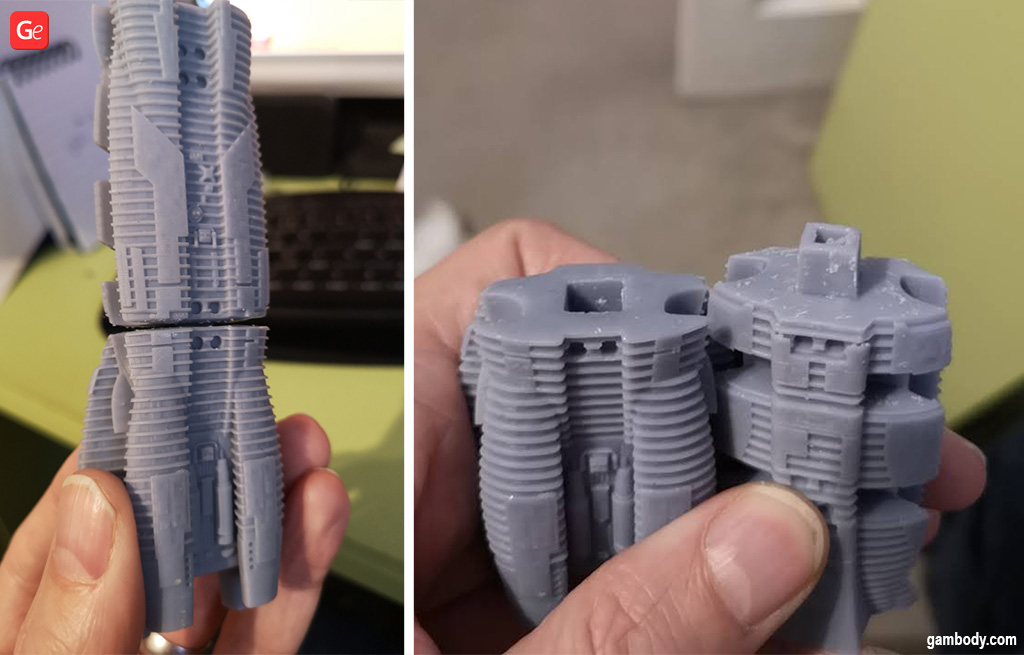
Example 2: Mech
When resin printing a Mech model, orienting all the parts to avoid having flat edges parallel to the 3D printer bed is essential. At the same time, turning some of the parts is a must to ensure that the volume goes from larger to smaller.
There is no need to rotate the legs upside down because their cross-sectional area doesn’t differ much from top to bottom, and there is no point in their rotation.
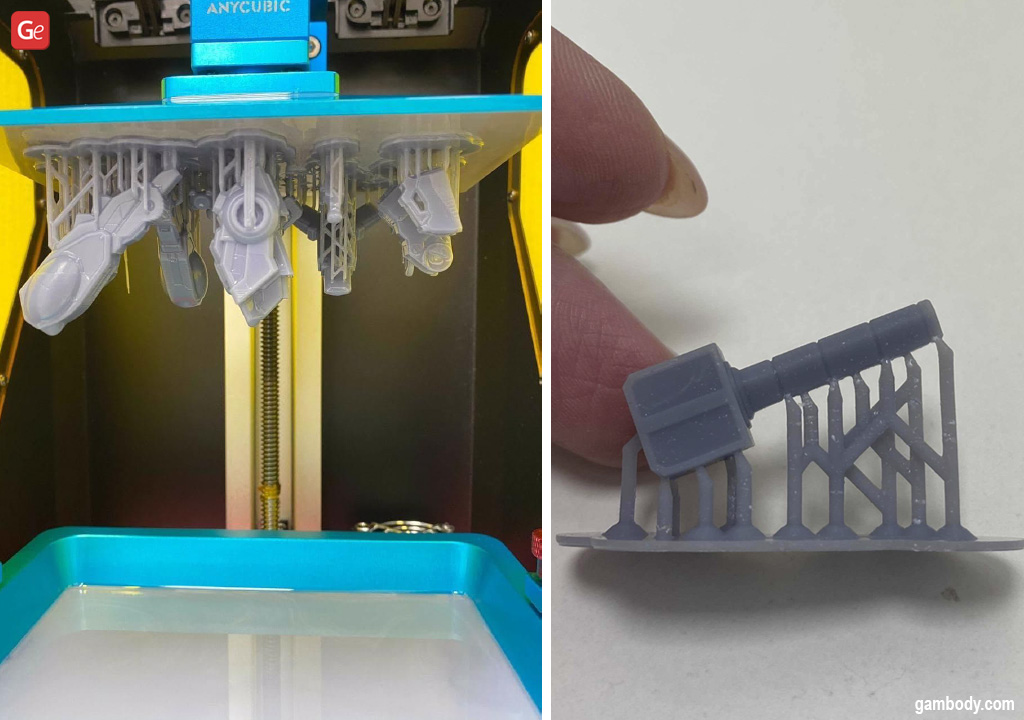
You can also pay attention to how the Mech weapon was printed in resin.
Read also: Fantastic MechWarrior 3D Print Collection
Rule 3: Vertical Resin Printing
Sometimes you must resin print vertically. It is the best orientation for recreating double-sided coins, tokens, badges, and other vertical models. You can also print thin single-sided objects vertically.
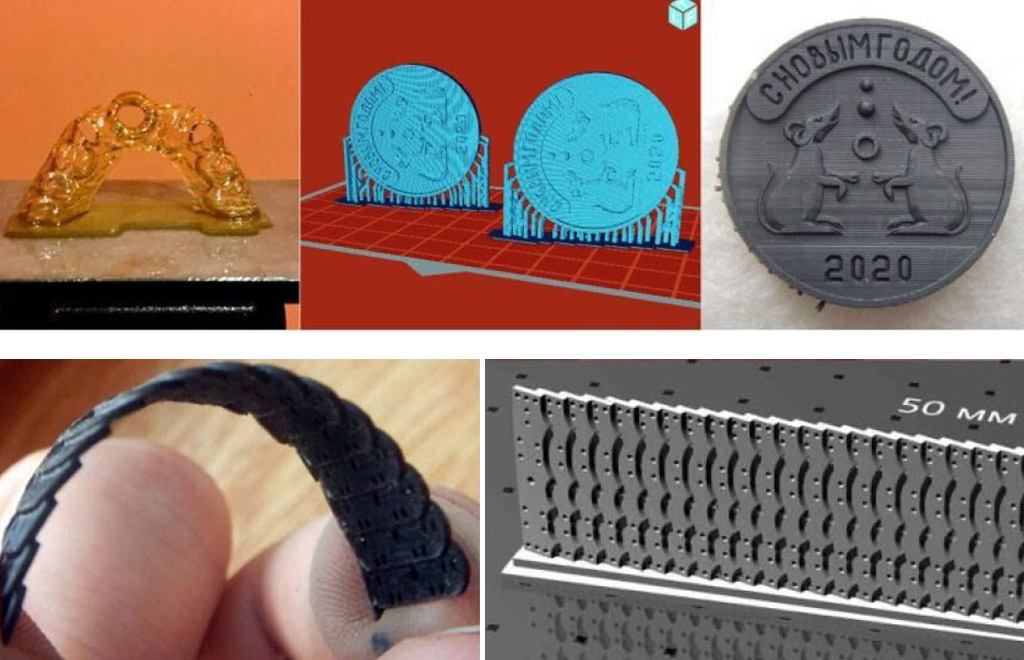
And while there can never be too many SLA support structures, it is best not to overrate while printing vertical projects.
Rule 4: Printing Flat Parts with SLA Support
It is dangerous to resin print flat objects “flat on the bed” because of the big rip-off area. But if you buy a high-quality resin and don’t care about wasting the 3D printing material, you can create fantastic projects this way. As a bonus, you can build a smooth top surface if your resin is smooth.
Example 1: Detailed Print
Here is an example of printing a flat object with low resin supports. Otherwise, printing such a complex and highly-detailed project would be impossible.
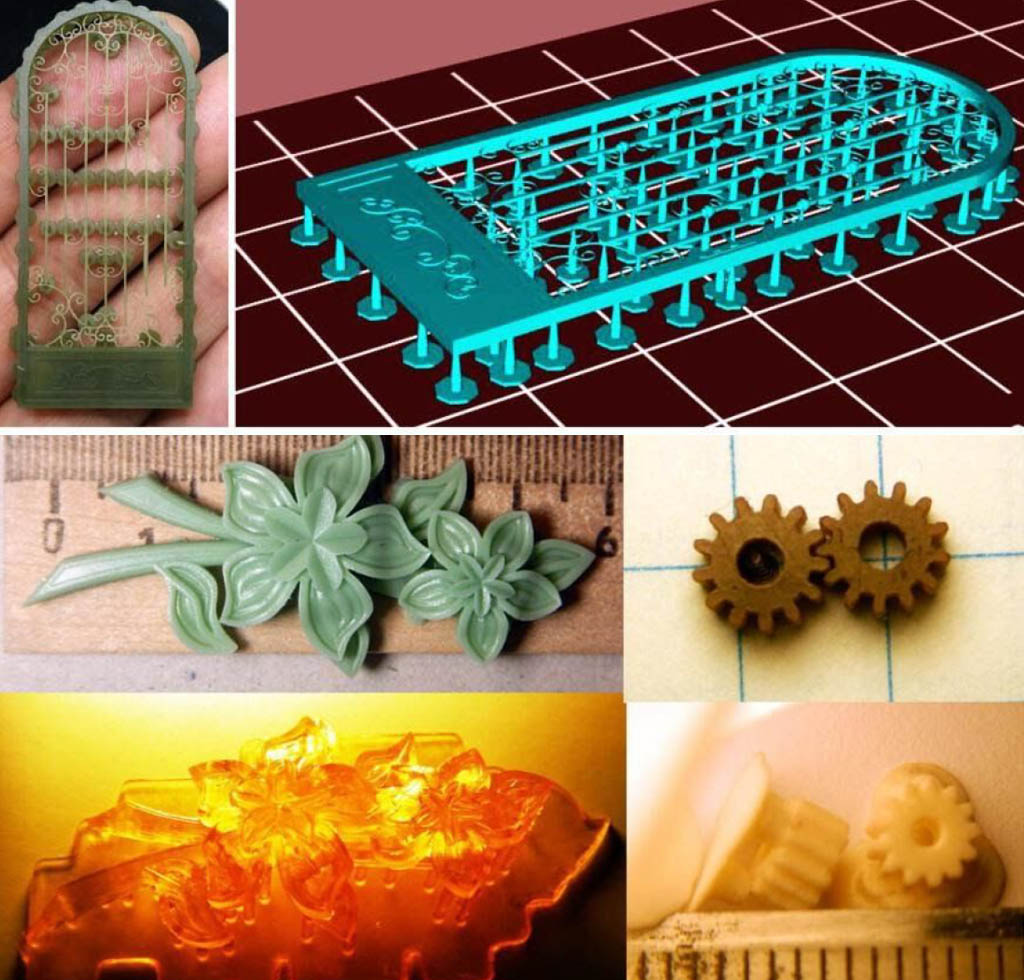
Example 2: Brooch
Look at another sample of flat resin printing using low SLA support. The brooch was printed flat because it has a hole for attaching the brooch pin.
As for the gears, they could have been printed right on the bed with no 3D printer supports if they had a smaller base to compensate for the expansion of the first layers.
Such an orientation has its disadvantages for resin printing. We are talking about the quality-specific side of the model from where SLA support structures are used. This reverse side can be ok, even smooth, but a lot depends on the print model, 3D printing material, resin film, support density, etc.
Rule 5: Upside-Down Prints
Usually, animal and character models have many details lowered down that require resin supports. It’s often enough to rotate the object upside down and add SLA support for the head or neck to simplify the printing.
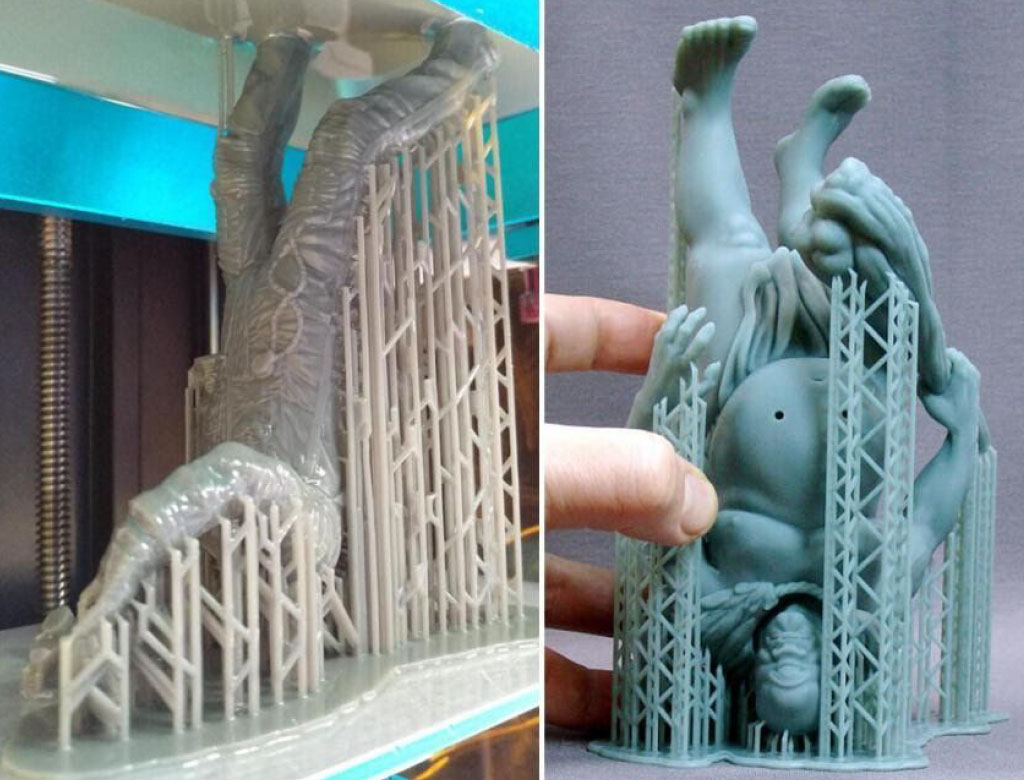
When you print a character head with hair, it’s best to position it with hair strands facing up. When you print character hands, orient them with fingers facing up. When you print clothes, make sure the bottom hem is facing up.
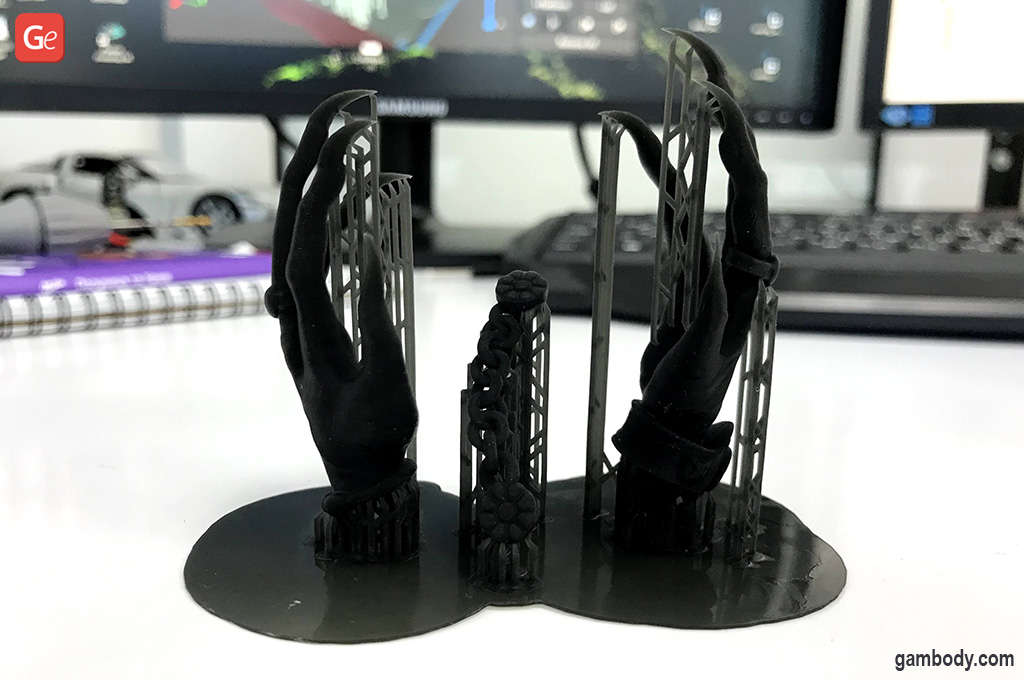
These are certainly not all secrets of model orientation for resin printing on SLA/DLP/LCD 3D printers. A lot depends on your experience and tests. We hope this was helpful to you, and good luck on breathing life into new Gambody models!
