Japanese have given the world countless incredible cartoon, film, and anime characters. They are known for their passion for adventure, action, and creatures that threaten the entire humankind with wiping it off the surface of the Earth. How many times have humans faced peril that was way beyond their powers to deal with at the hands of Japanese artists? Don’t bother counting.
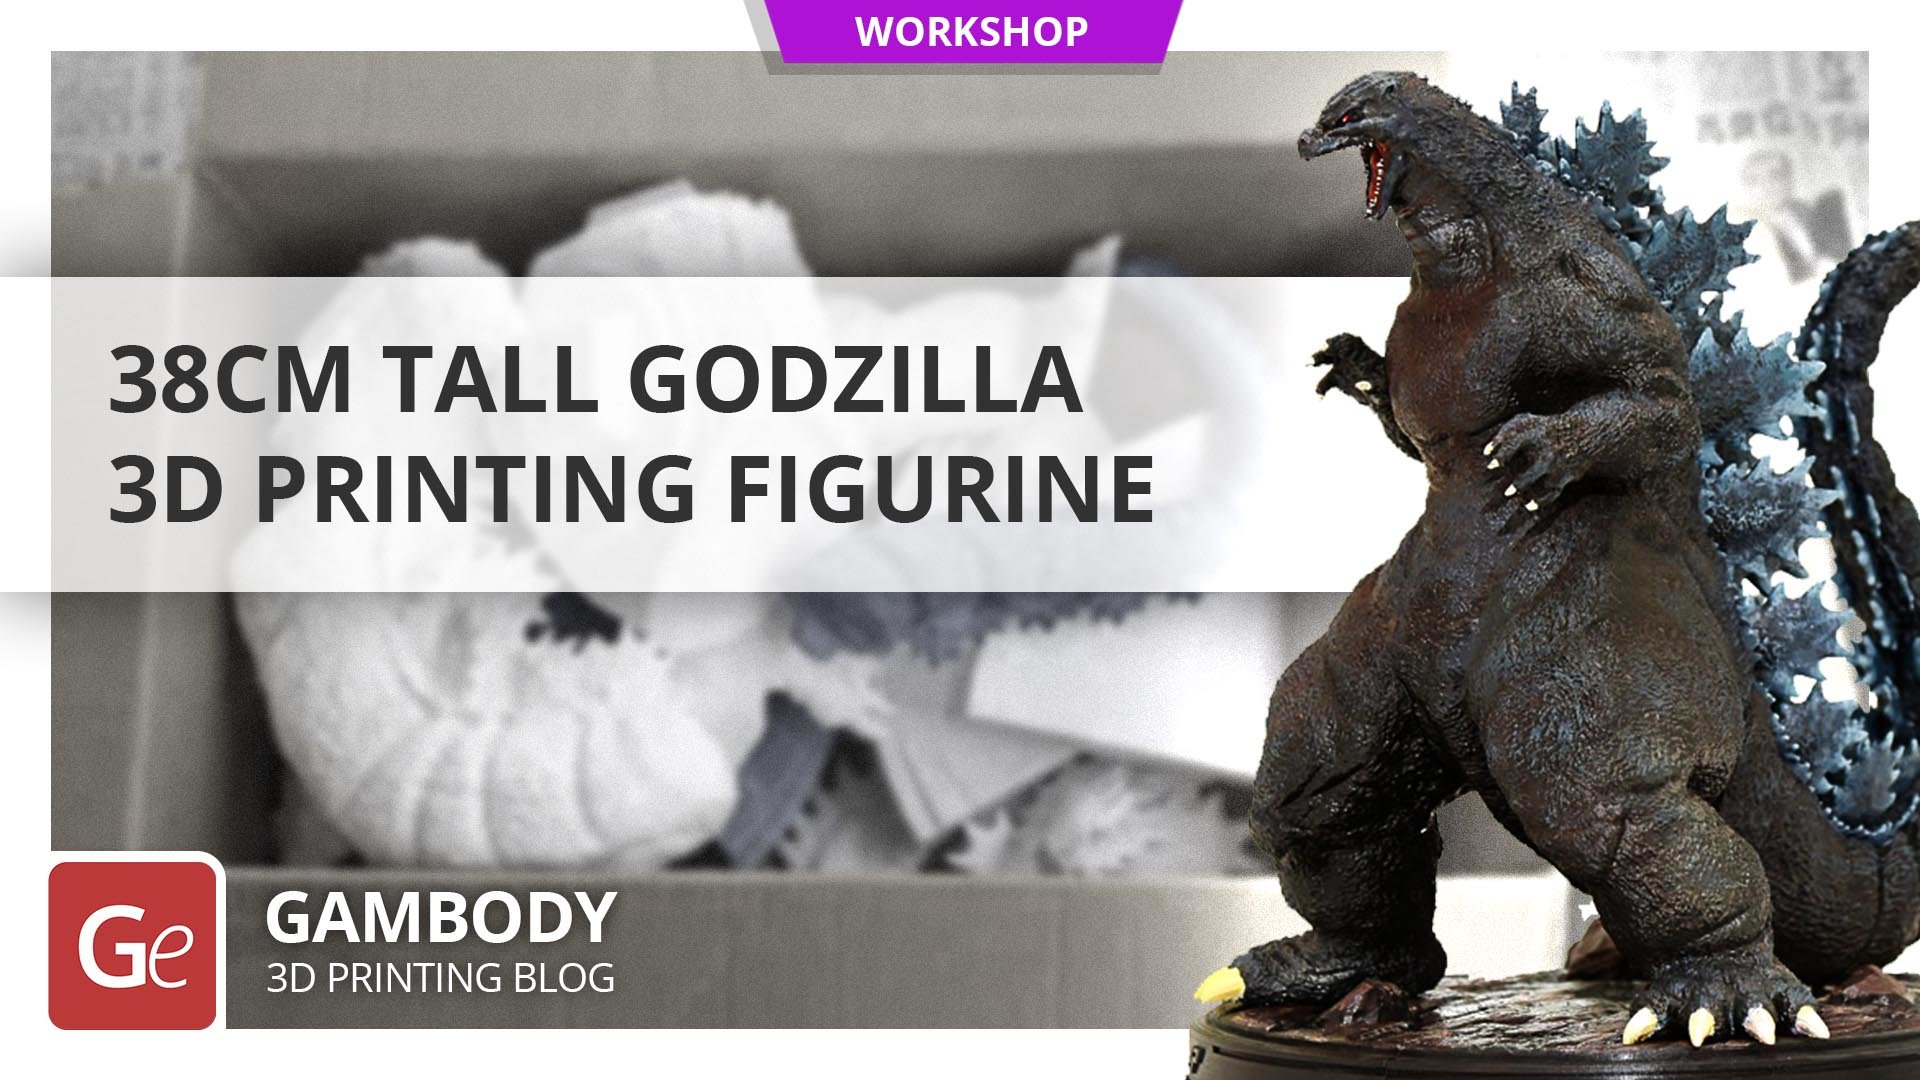
Anyway, we’re here because there’s a cool reason. Godzilla, one of the most recognized monsters in popular culture, just got a 3D printed replica that stands no less than 38 cm tall.
Who is Godzilla?
Godzilla is a monster movie. It depicts dinosaur-type monster, Godzilla, up to 50 meters tall awakened by nuclear radiation. Godzilla became a monster prototype of similar movies, animations and comics in Japan, and has a profound influence on the image of monsters in Japanese anime works.
Along the years, Godzilla image has undergone changes and upgrades.
The replica miniature you will find at Gambody Premium 3D Printing Marketplace is the one representing the monster as was depicted by artists 50 years ago.
By the way, do you know that Godzilla has a star on Hollywood Walk of Fame? It was awarded in 2004 to celebrate the character’s 50th-anniversary movie premiere “Godzilla: Final Wars”.
Why choose a Godzilla 3D printing Figurine?
As you probably know, 3D printing is the technology that builds 3D objects by successively adding material layer by layer. It’s the easiest and fastest way to recreate objects that one cannot find in regular shops. It also involves artistry and customization. There are different 3D printers, from amateur to professional ones used in medicine, and even construction.
While you can find a Godzilla toy in the stores, 3D printing gives you the freedom to customize it according to your preferences.
Big, small, roaring, in attack pose or with its legs crossed – it is all up to you how you decide to design it. ‘But I don’t have 3D modelling skills’, you will say. No worries. There are numerous online 3D printing files repositories where you can buy, download and 3D print the files either using a 3D printing service or on your home 3D printer.
One such 3D printing file repository is Gambody, a premium 3D printing marketplace focusing on entertainment 3D printing content. You can find 3D printing files for your favourite video game, anime, movie, and comic books characters. There is a wide variety of 3D printing bust and even dioramas. And of course, you can find Godzilla 3D printing files here too. In fact, Gambody has 7 different Godzilla 3D printing figurines and you can find them all here.
However, today we will focus on Heisei Godzilla 3D printing figurine which has been 3D printed by Ying-Chia Su.
The main 3D printing equipment and materials used are Infinity X1, Anycubic i3 Mega, oil paint, acrylic paint, etc., plus PLA printing material.
He printed Godzilla at a layer thickness of 0.12mm, infill of 15%, printing speed of 30, and the total time took about 400 hours.
Ying-Chia Su chose to 3D print the FDM version of Godzilla STL files. This version is split into 11 separate parts to ensure an easier printing experience and to avoid supports.
Gambody has an SLS version of the same Godzilla figurine for 3D printing that comes into a single file, it stands about 19 cm tall, and thus involves low printing costs.
If you print the FDM version, you will need to assemble it. The process is straightforward and you can even refer to the video below for guidance.
What does it take to paint your own Godzilla 3D printing figurine?
It takes several spray cans of black, some acrylic navy, dark green, rusty red and some paint brushes of different sizes. Depending on the size of the Godzilla, since as you know you can scale the miniature up or down, you may choose to use an airbrush that is lauded for its versatility, speed and finishes.
Start by applying 1-2 coats of the base paint. For Godzilla, since the colour palette is dark, we suggest applying coats of black on all the parts, from all sides to give the model a uniform colour. Depending on the colour of the material your Godzilla 3D printing figurine is printed from, you might use more or less spray paint.
The base coats also smooth out the surface of the parts, covering the layers from printing and giving the model a final levelled-out finish. Leave the parts to dry for a couple of hours or better overnight.
When you see that the parts are completely dry, you can assemble your Godzilla 3D printing figurine.
Apply the dark green on the dorsal part of Godzilla as a first layer. Be careful when spraying the emerald green on the dorsal area of the miniature. Make sure you do not overuse the colour but only create the effect of brush strokes.
Then use navy on the dorsal area to recreate a gradual ombre effect (this terminology may be better known to your girlfriend, so you can always ask her for more details. In short, though, this is a colouring technique when a dark colour is gradually brought to a lighter hue). The dark green and the navy colours will overlap with the black base colour and will create this gradual ombre effect.
Finally, use rusty red to paint the mouth, to add some brush strokes on the chest and legs for special effect.
Apply brush strokes of navy and green across the miniature as highlights.
Mix navy with white and green to get different blue shades to add more highlights to the entire surface of the model. Let your creativity guide you. There is no painting standard for DIY 3D printing miniatures which makes this activity cool.
The support base colour is a mixture of rusty red and green colours.
The overall painting time took about five hours. You can see below a time-lapse video of the entire process.
And you’re done. You can take pictures of the final painted Godzilla 3D printing figurine and share them on your Instagram, Better yet is to share them in Gambody 3D Printing Gaming Community Facebook Group and get the chance to claim up to 50% money back reward for your hard work.
We have shared the painting tutorial for 3D printed Lick King miniature and some of the Group’s members have already used it as guidelines for their painting experiment.
Stay tuned because we’re preparing some more tutorial material based on another famous movie character.


