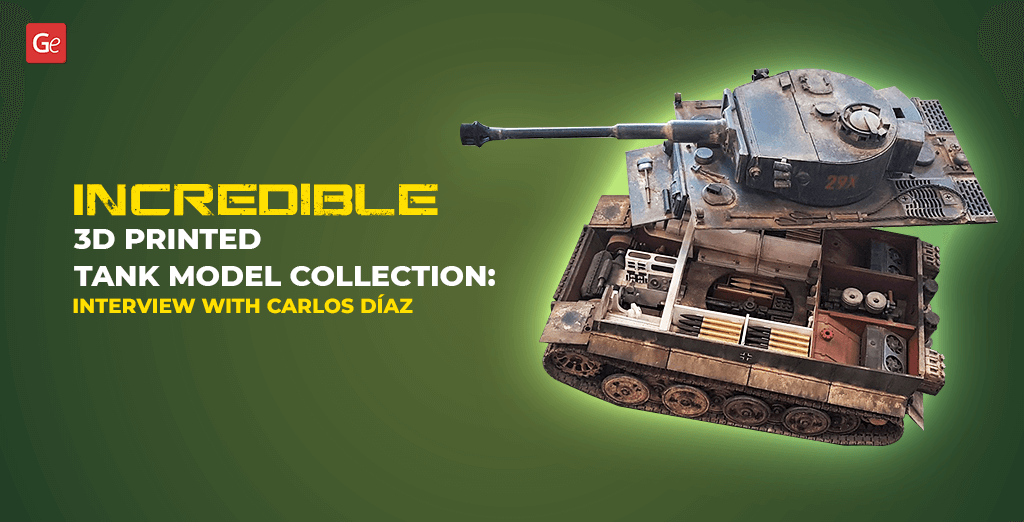
It is difficult to find a man who would not respect weapons and would not be interested in military affairs. What can please the eye of a true man if not a 3D printed tank model which combines the unrestrained power, war beauty and deadly grace?
Tanks allow men to touch military equipment, feel the power of military affairs and fantasize about the deeds on the battlefields. Also, a 3D printed tank is filled with history. It allows learning more about the real battles of the past, discovering the deeds of the brave commanders and exploring wars that took place many years ago.
Tank 3D Model
Do you remember the good old console game Super Tank or Battle City from the 1990s? It used to be a fun game for kids which transformed into a big hobby for many adult men after the release of a popular MMO game World of Tanks. Today there are many tank-related games for true fans of team-based and action games, but one of the most exciting hobbies of the 21st century allows way more than just playing on the virtual battlefield. 3D printing makes it possible to make replicas of many stunning tanks.
Gambody – Premium 3D printing marketplace has several tank 3D model STL files for printing to download and make, including T-62, Tiger I and Merkava 2:
- Download T-62 tank 3D model STL files;
- Get Tiger tank STL files for 3D printing;
- Download Merkava tank 3D model STL files to 3D print it.
These three 3D printed tank models are the jewels of Carlos Díaz’s collection. This talented man created many 3D prints, and each of his masterpieces deserves special attention due to the maker’s love for the most delicate details and beautiful painting work.
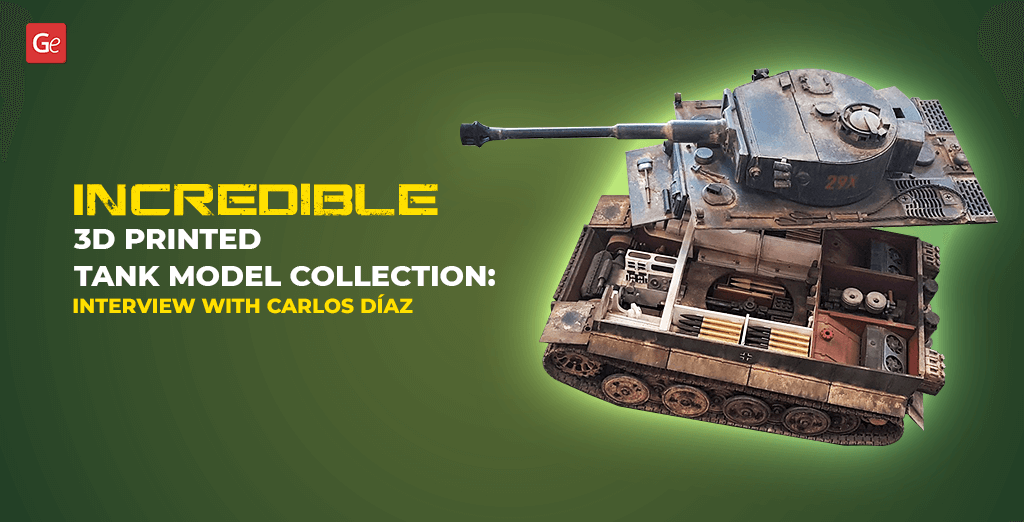
3D Printed Tanks and More: Interview with Carlos Díaz
Carlos was kind to answer Gambody’s questions and share some great tips and tricks on painting his 3D printed tank model collection as well as other impressive projects.
1. Hello Carlos, please introduce yourself. Can you tell us more about your hobbies and, mostly, your love for 3D printing?
Hi, I’m Carlos Díaz, and I started this wonderful adventure of 3D printing and postprocessing a few years ago.
At first, I just wanted a 3D printer, as another tool at home, to repair items that might be damaged.
Like most of us, as soon as I had the printer, I started burning plastic to make all kinds of objects, and the repairs went to the background. I focused on the construction of scale models, began to post-process and paint them. I was never good at painting. Since childhood, I was very clumsy, but I kept practising and learning.
It has been from the hand of Gambody that I was perfecting myself since there are many pages with high-quality 3D printing models on this marketplace. Other sites usually offer low-quality models or projects that are little prepared for 3D printing. Through increasingly complex models, I did my best to improve more and more in 3D printing and postprocessing.
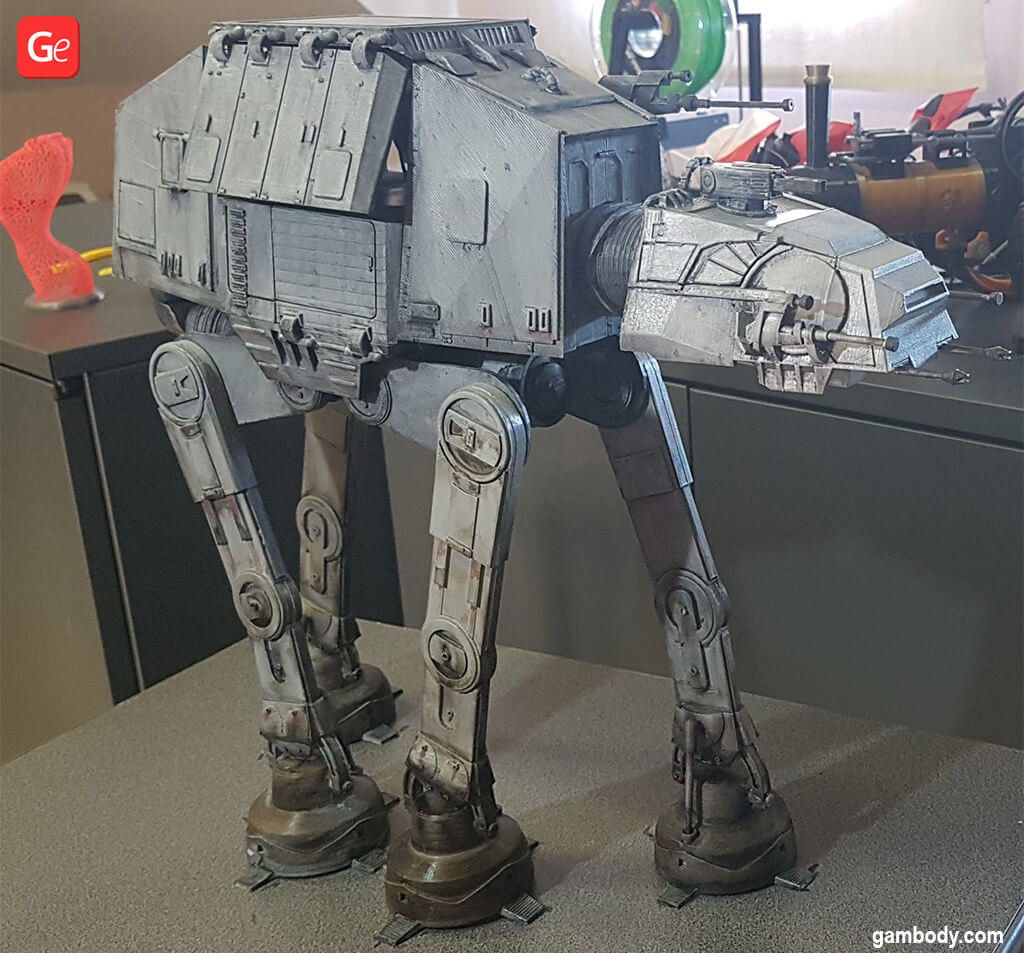
I started this adventure of working out the printed models and not delivering only plastic with the Star Wars model, AT-AT Walker, which STL files you can download on Gambody.com.
While working on the AT-AT 3D printing model, I started to split some 3D pieces in half to avoid supports while 3D printing. I did not sand the pieces and painted them with grey spray. Then I applied very diluted smoke oil colour to the entire model. And finally, with a brush, I added rust colour to some areas. As you can see, it has a straightforward finish.
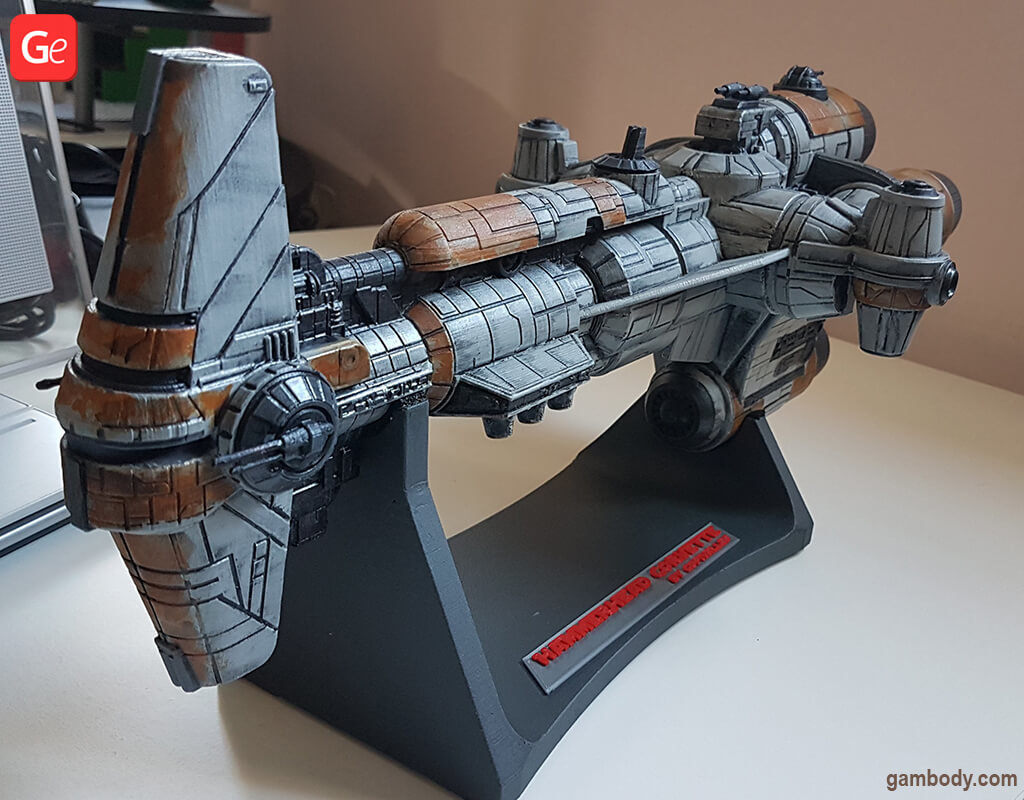
Seeing the result by applying only a little time to the painting, I was encouraged to try a bit more in the next model, which was the Hammerhead Corvette 3D printing ship. In this 3D printing model, there is already a little more postprocessing work, but still not too much.
2. Your 3D printed tank model collection amazes. What are the stories and motives behind crafting your three jewels?
I believe that the tank 3D model is more difficult to 3D print and assemble than other 3D printing projects. Making everything fit as it should be is a challenge, and that’s why I decided to print tanks.
But which one to choose? It is a tough question since each tank 3D model has its peculiarities.
I decided after I watched a video with the painting process of Gambody T-62 tank 3D printing model:
I still didn’t know how to paint correctly and had to follow the guide on how to do it. It was great, so that’s why I decided to start with this project.
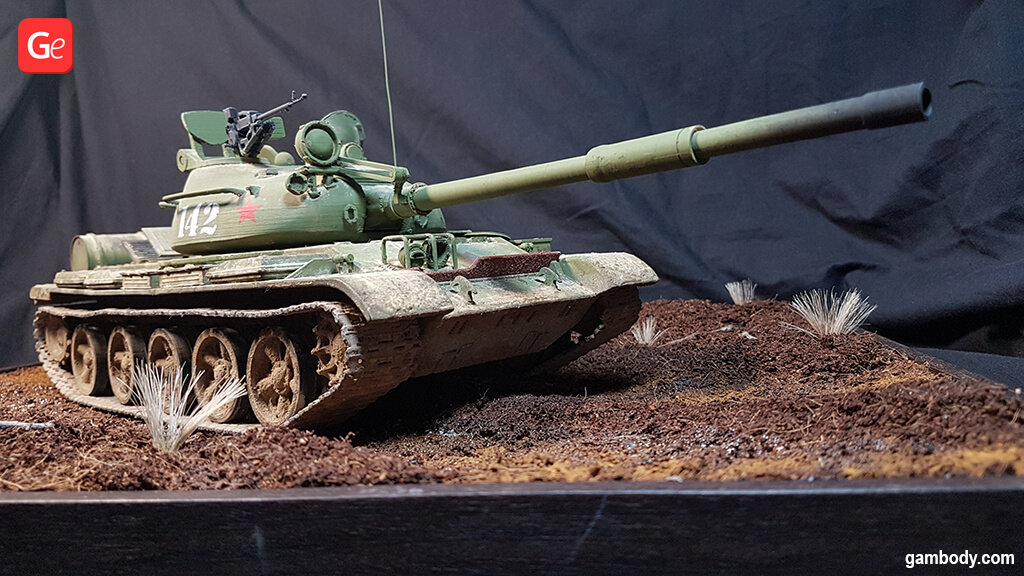
After finishing the T-62 model, I still did not feel safe to start the great adventure that the Tiger tank 3D model for printing supposed.
One of the models offered on Gambody marketplace and which I liked the most was the Merkava tank 3D model.
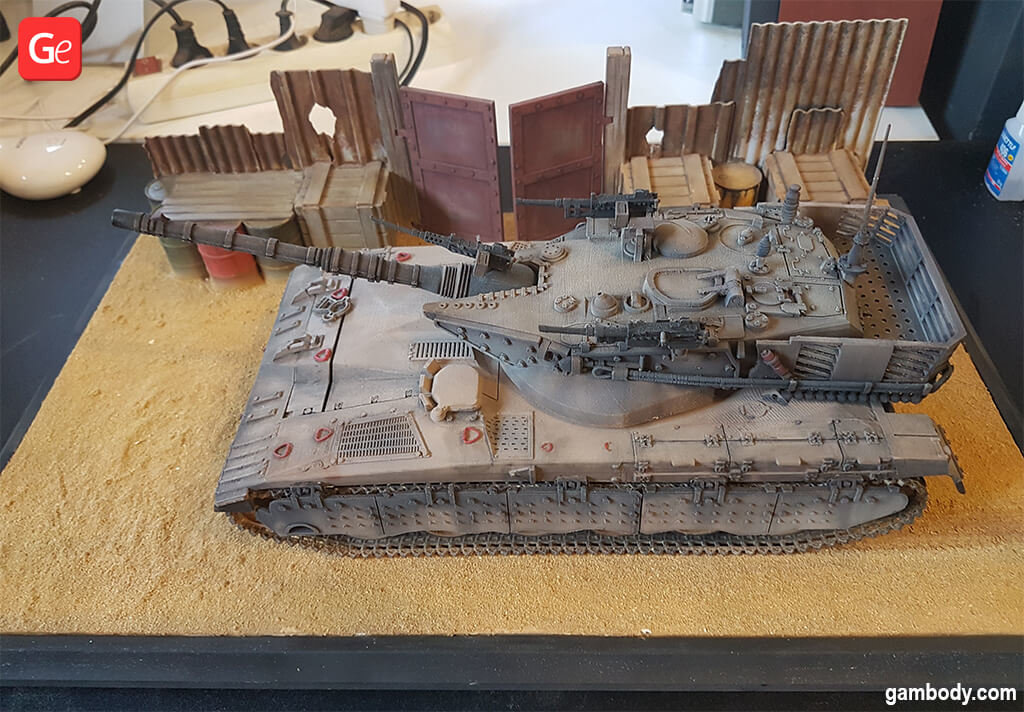
So Merkava tank 3D model was the next project I chose to do.
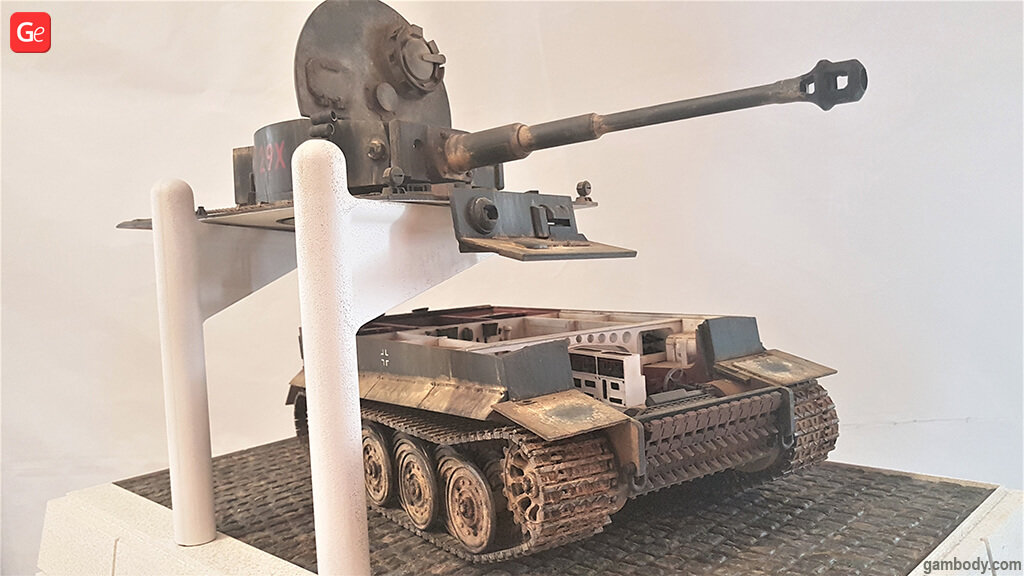
Finally, the one I liked the most and the one that I would spend the most time on was the Tiger tank 3D printing model:
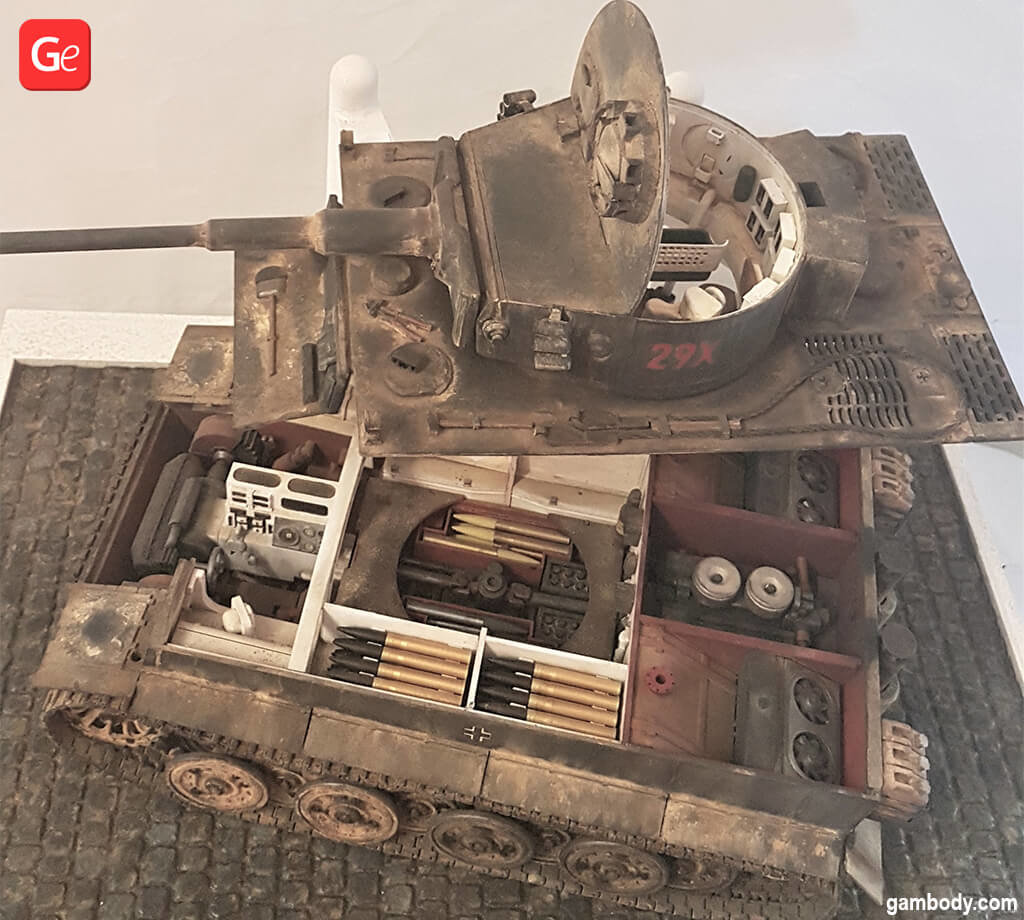
3. Where do you display your 3D printed Tiger Tank, T-62 and Merkava tanks?
It is a good question. All the models I 3D printed are large. I scaled some of them to be even larger than the original tank 3D model STL files. With the years of 3D printing, I begin to fall short of the space where to display everything.
Luckily, I have a store copivalles.es. So I decided to exhibit some of the 3D printed tank models there due to lack of space at home.
It made many customers interested in 3D printing to the point that it is now a store service. I do not want to create false expectations for anyone. These printed and painted tanks are not meant for sale since making them took so many hours of dedication and love.
The 3D printed tank model collection shows the possibilities of 3D printing. The T-62 tank model is exposed in the store while I keep the rest of the projects at home.
4. You mentioned that you added about 90% changes to the Tiger Tank 3D model for printing downloaded on Gambody marketplace. Can you recollect those changes, and describe your unique project?
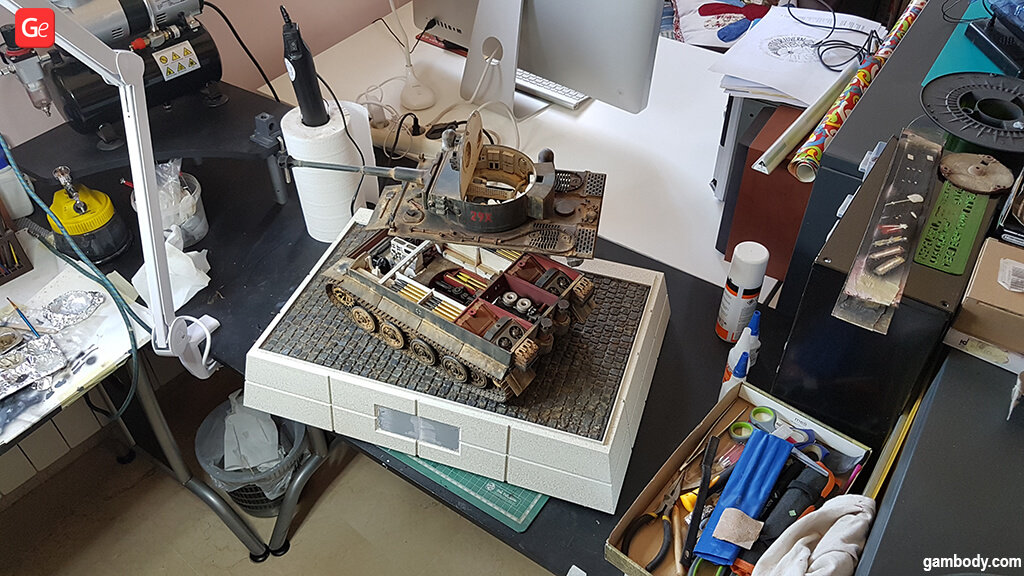
The Tiger tank 3D printing model is the most complex project I have finished.
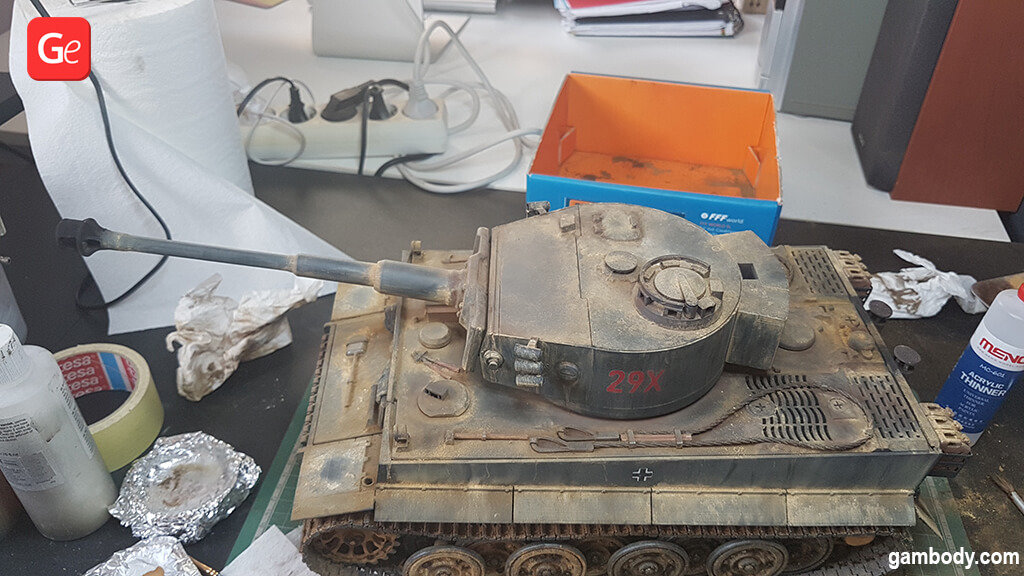
To make it, I collected a lot of information and photographs of the real tanks, learned where these vehicles operated as I was going to present them, etc.
I have gone from a 1/35 scale to a 1/18 scale. Besides, I wished to add more details and change much of the tank 3D model design to present it to my liking. I had to do a lot of 3D design job in Autodesk Fusion 360 and a great 3D print job since I used a 0.25 nozzle. There was also a lot of postprocessing work.
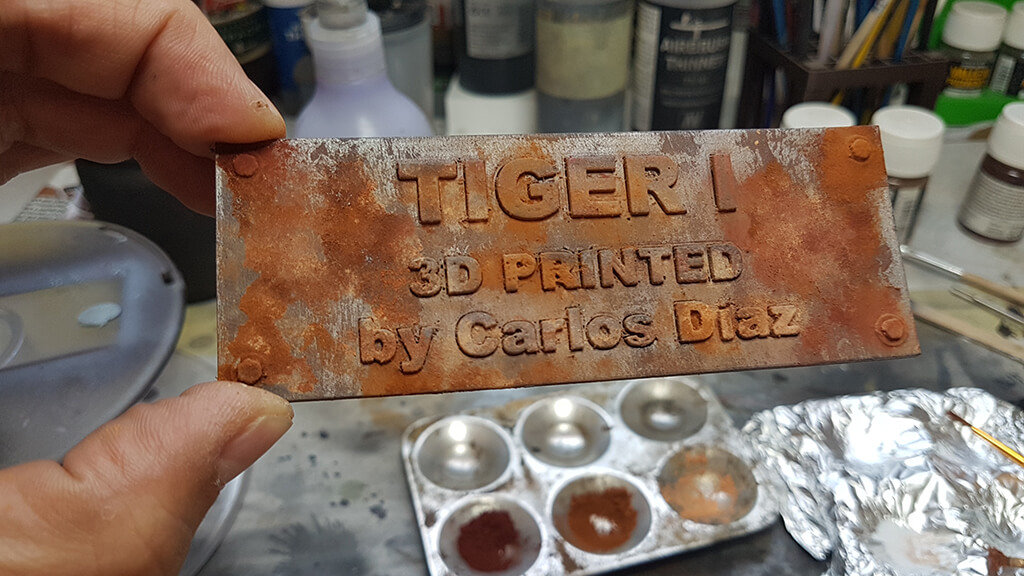
Before starting the project, I already saw it finished in my head. I just had to start with the design and print everything based on the original tank model that is the basis of my 3D printed tank model.
Things never go as imagined. Throughout the process, I added new elements and changed some parts. Sometimes I had to repeat some impressions or change the design, but the result is very similar to what I had in my head before starting to 3D print the Tiger tank.
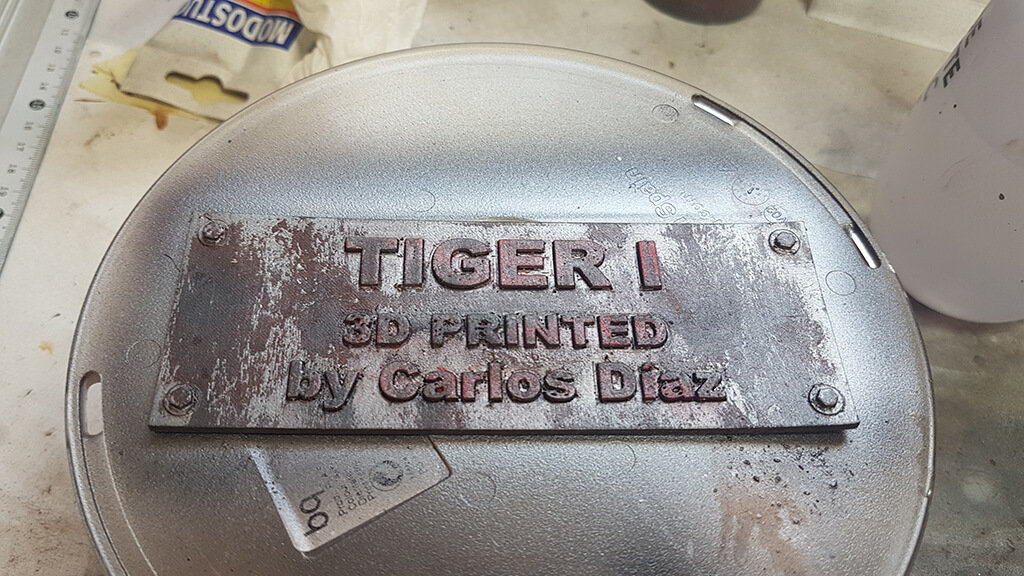
5. Did Tiger Tank participate in Smart Materials contest? Was the entry successful?
No. I regret having participated. I do not know how to reward the best 3D printed model. The likes were the rewards, and I do not have many “friends” who would “like” my project. The project that won in the contest did not have much dedication, but it did get more “likes” than other entries.
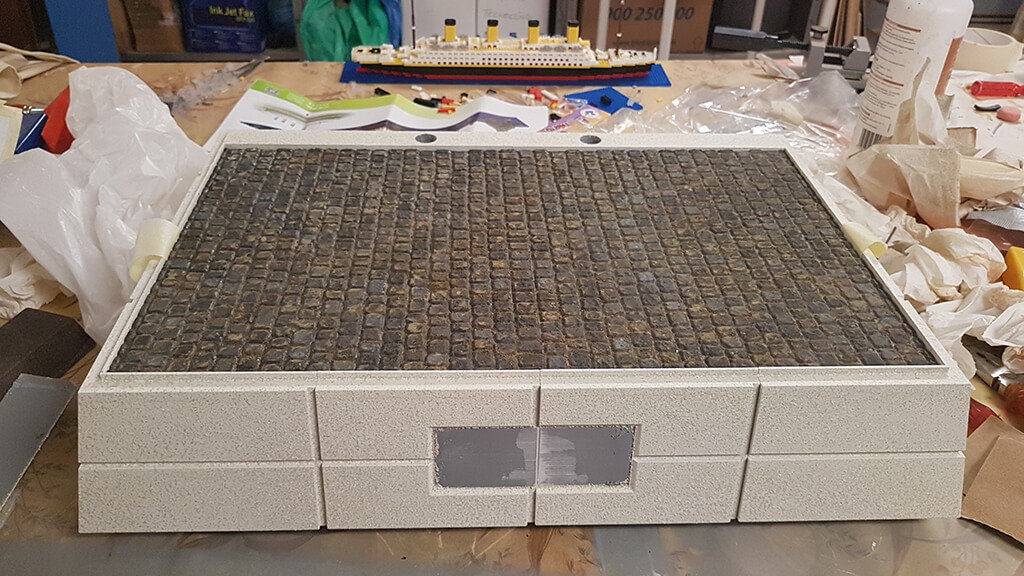
6. You shared some stunning photos of the 3D printed Merkava tank in a unique scenery. Do you create exclusive landscapes for every new photoshoot?
Typically when I make a 3D printed tank model, I already think about how to expose and present it.
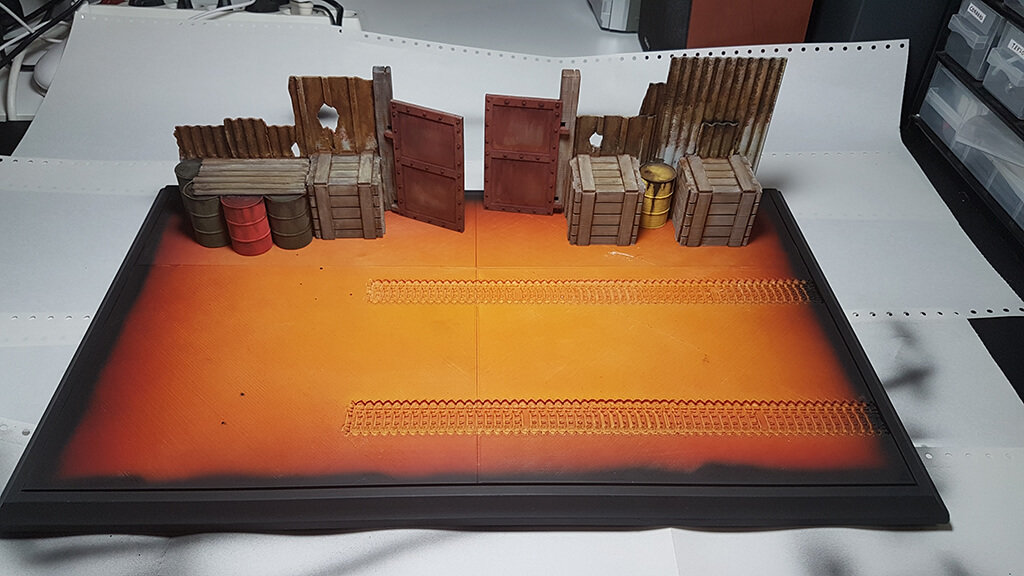
As with impressions, the scenarios have also been advancing and improving with the experience.
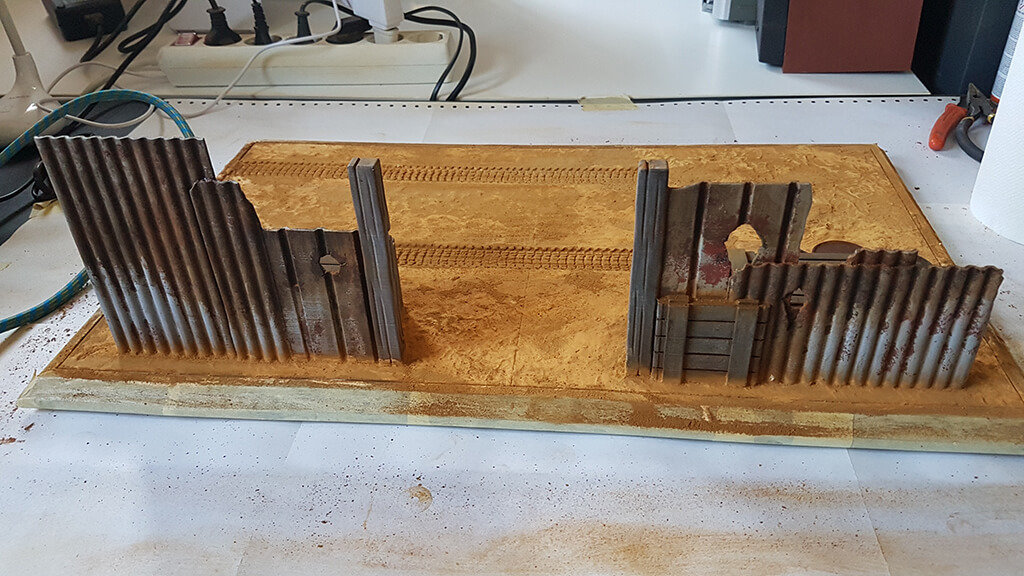
After printing and painting the T-62 tank 3D model, I looked for a terrain close to the effects of mud that I used in the 3D printed tank.
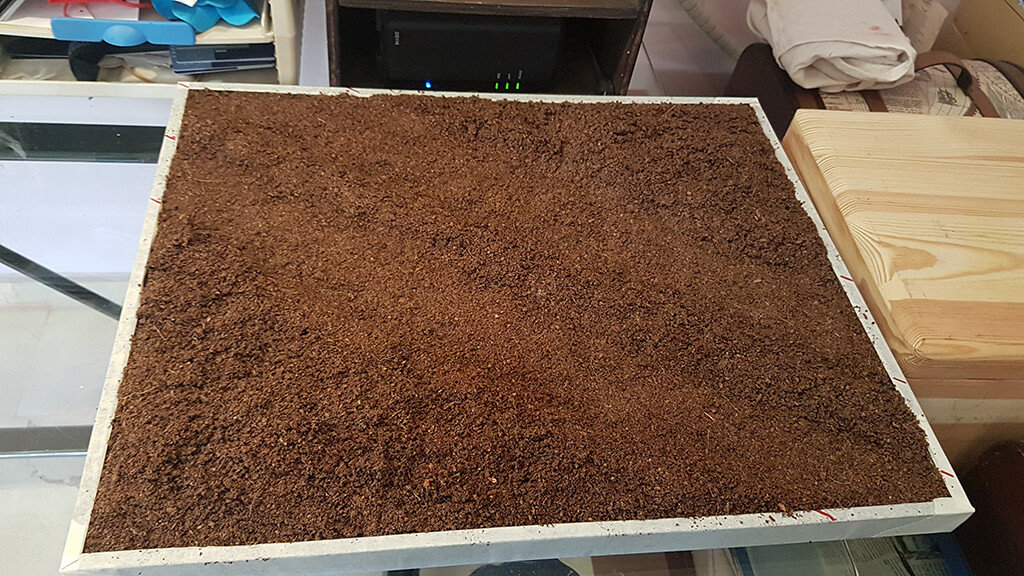
When I turned the Merkava 3D model into a 3D print, I located it in a desert area with an added printed barricade.
When I was making the Tiger tank 3D printing model, I looked for a specific tank and its location.
7. Are tanks complex objects to 3D print? How challenging is it to craft such war masterpieces?
Yes, they are quite tricky not only to 3D print but also to process and paint.
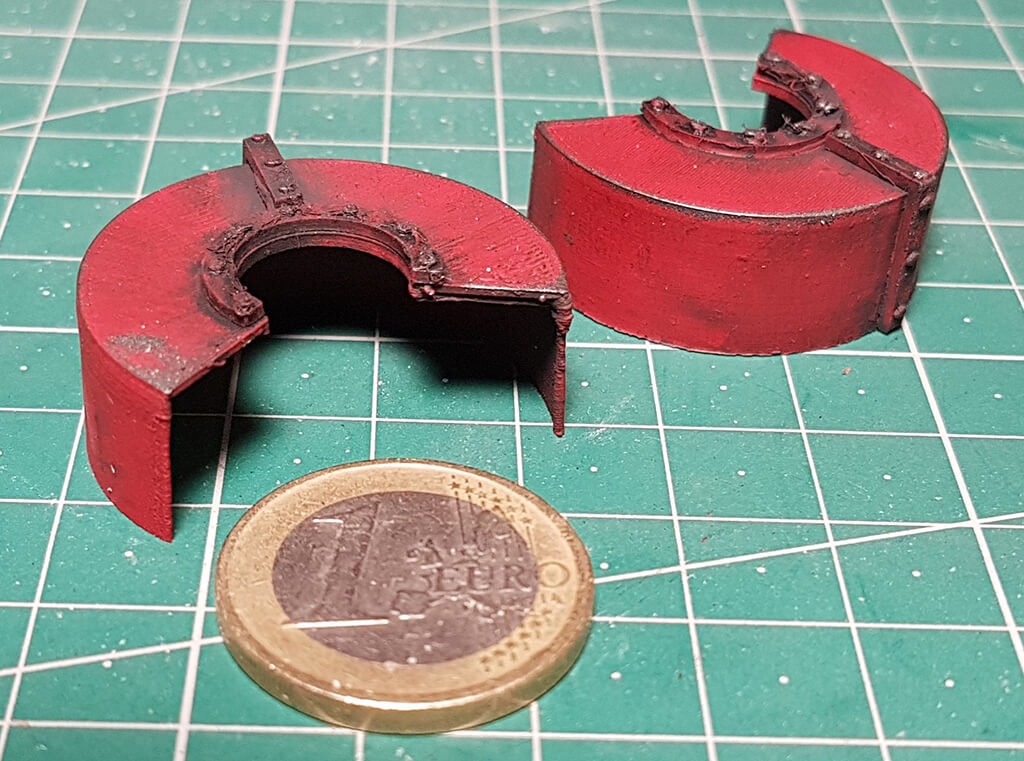
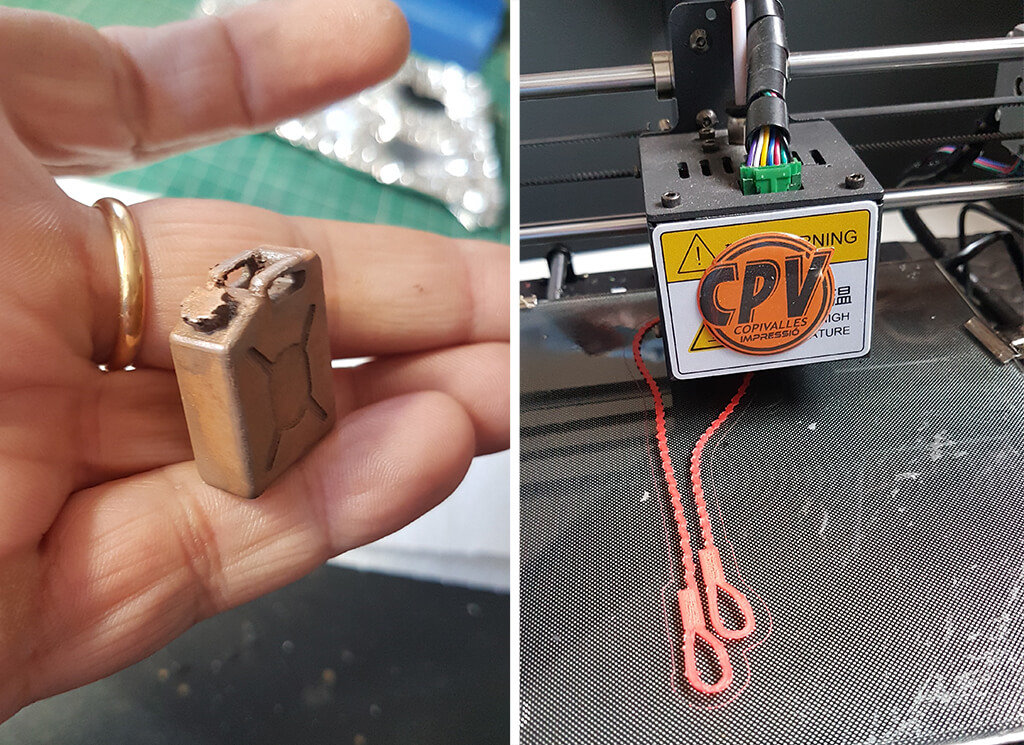
There are some challenging elements such as chains, ropes and weaponry that require well-adjusted machines and good knowledge of slicer software.
8. Are tank interior details or exterior parts more complicated to 3D print and paint? Why?
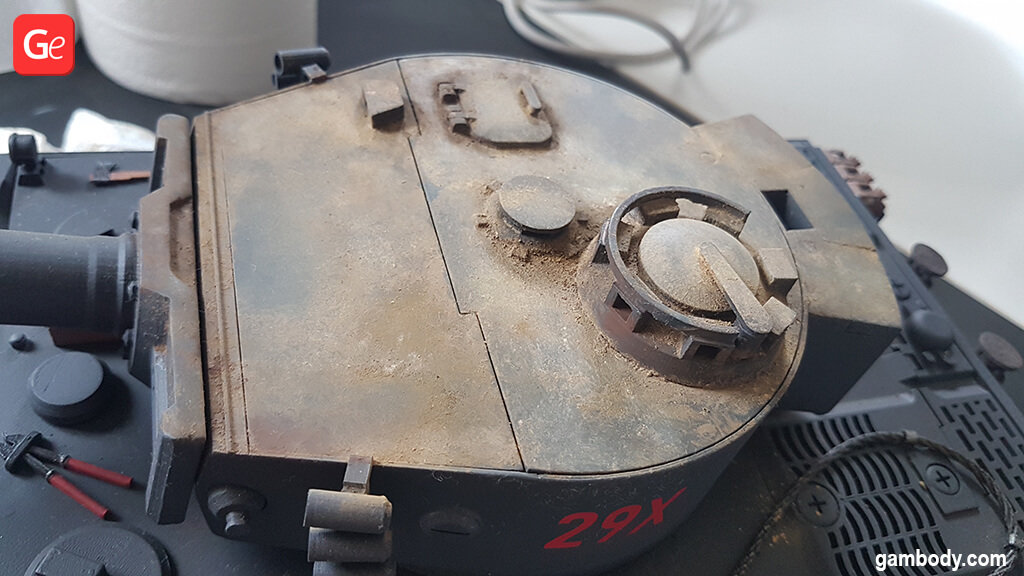
When you make the exterior, it is enough to give a few details to make it look like a good model.
While working on the 3D printed tank interior, it is necessary to work on many details if you want to see a good result.
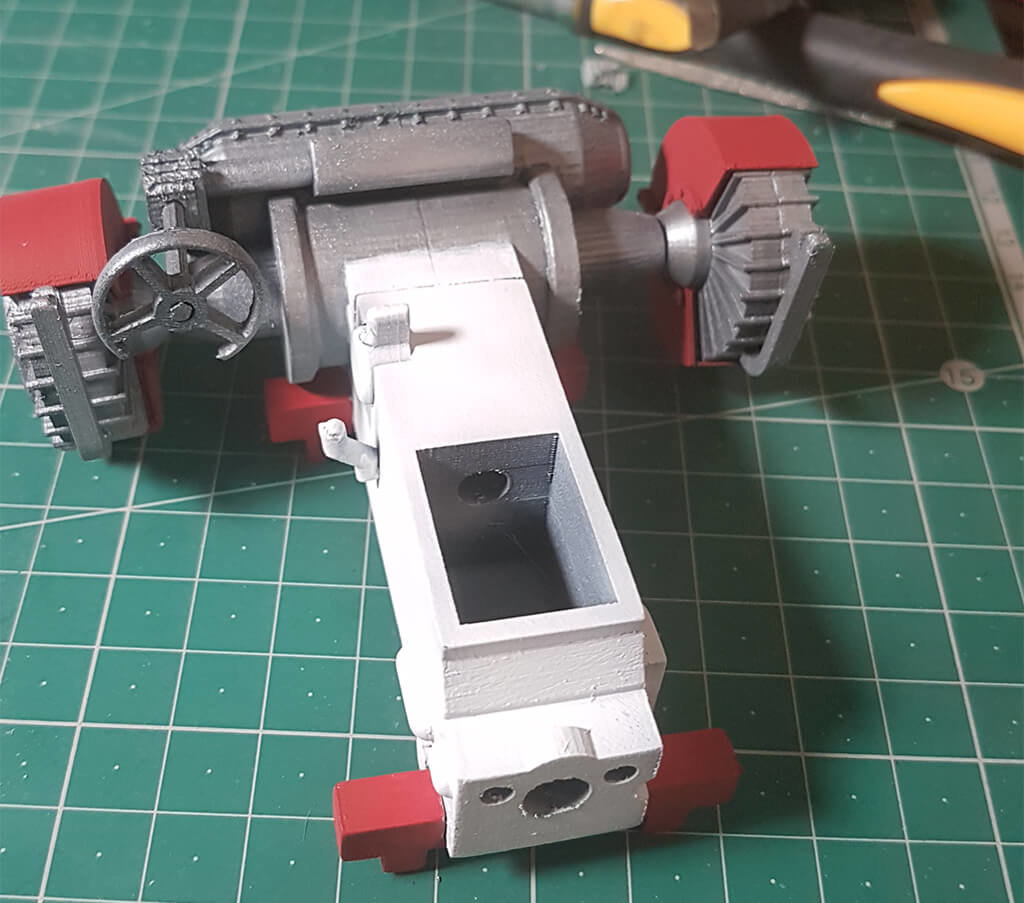
These details are also smaller, so the 3D printed interiors are the ones that need more work and are more complicated.
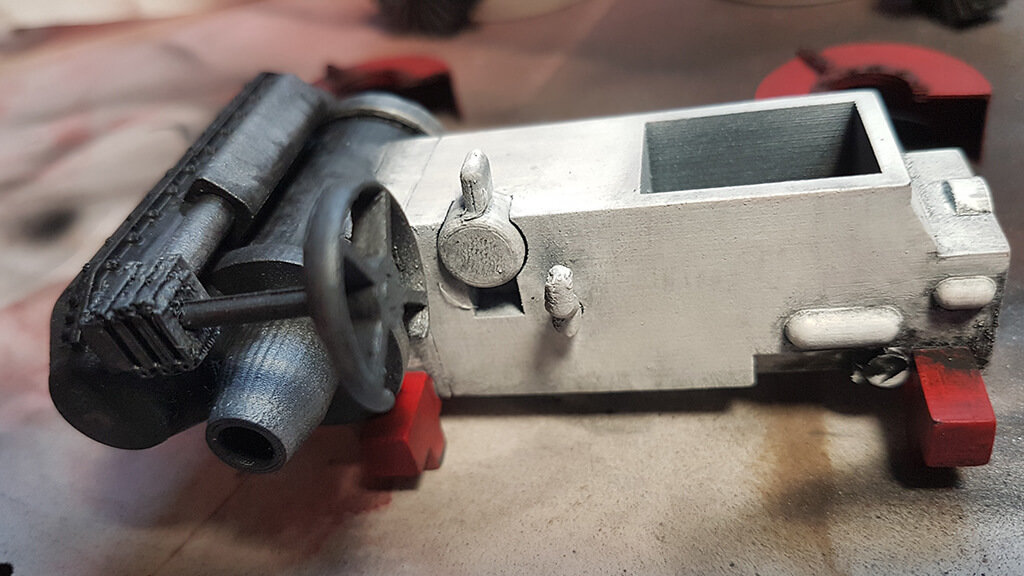
9. How many hours do you usually spend on crafting one tank 3D model, from the moment you download STL files and start 3D printing and to the point you finish painting the 3D printed tank?
The time depends on the level of finish that you want to obtain and whether you have to design additional pieces in a 3D program or not.
With T-62 and Merkava tanks 3D printing models, I spent three months making each one.
The Tiger tank 3D model for printing was very complex throughout the process, and I dedicated more than six months to make it.
10. Do you airbrush 3D printed tanks or paint them manually with a regular brush?
I usually use an airbrush to give the base colours. The details, effects and other nuances are always painted with brushes.
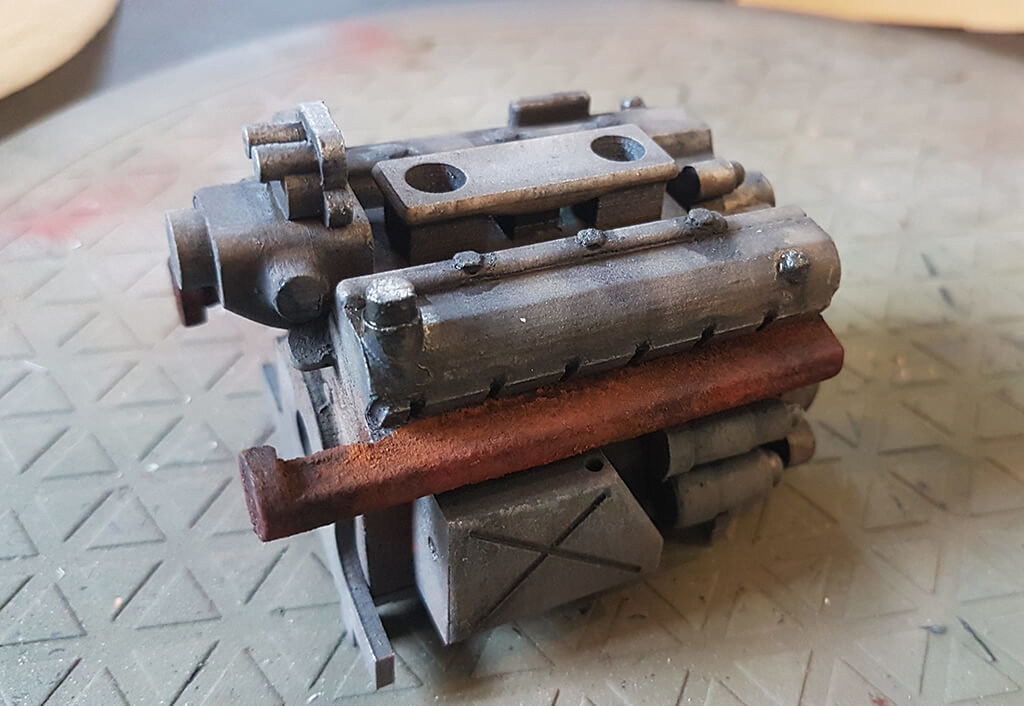
I like to paint all the 3D printed pieces, even if they are not going to be seen, such as the engine crankshaft. I know that it is there and has the right colour.
11. How do you manage to create a metal-like structure for your 3D printed tank models? Did you study such a painting technique? Do you use reference images in your work?
I learned to paint 3D printed tank models by watching videos from the Internet and by practising and making mistakes. Today there are guides on painting of all kinds with explanations on how to apply base colours, glazes, shading, effects, etc.
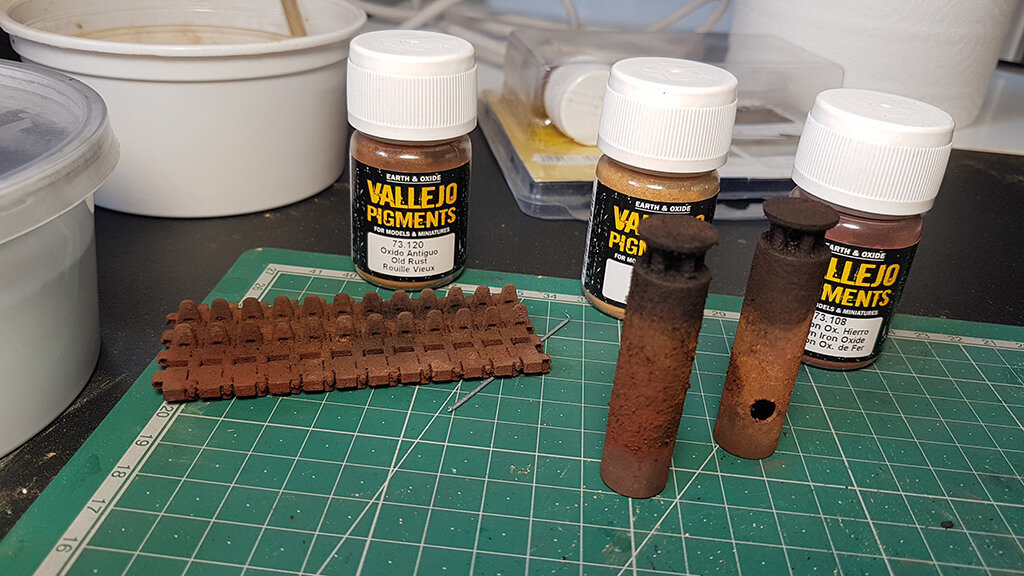
To achieve the colour of the metal, I use the acrylic paint of steel colour.
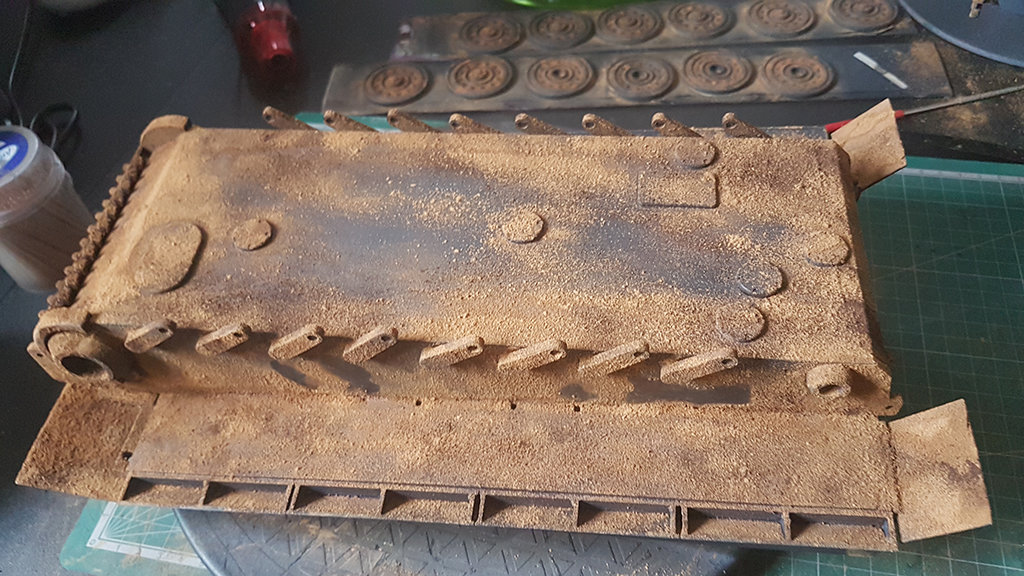
Also, I always find out how the tanks were painted in reality and use this knowledge to paint 3D printed tank models. For example, when I was painting the Tiger tank model, its engine part, I figured out that there was no need to paint it at all. I just left it as it was after applying the primer directly.
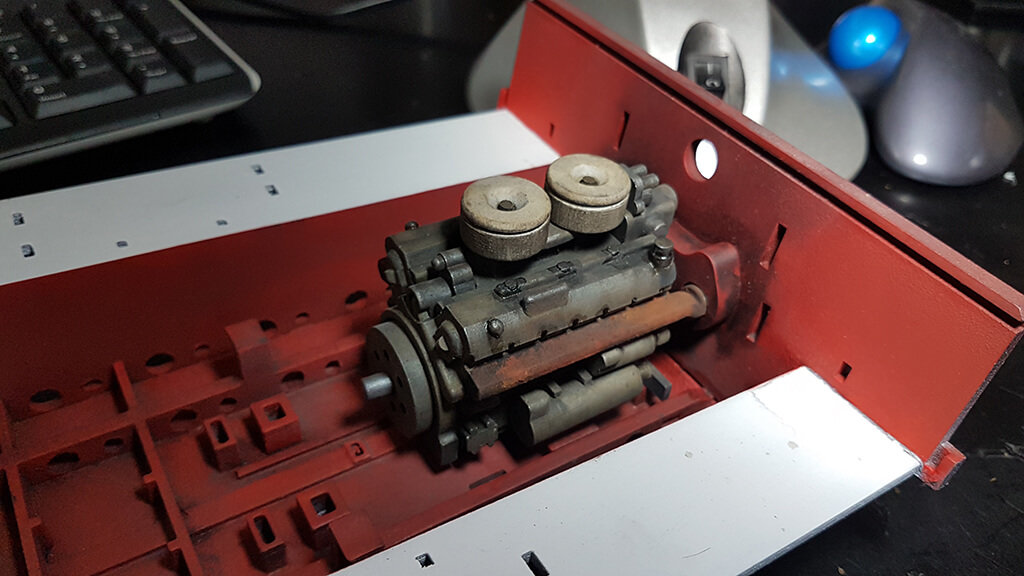
The same thing was with painting the cabin. Since almost no exterior light came in, leaving it as it was after priming gave it more luminosity.
12. How is it possible to add “muddy” details and “scratches” to the “metal” parts of the 3D printed tank while painting it?
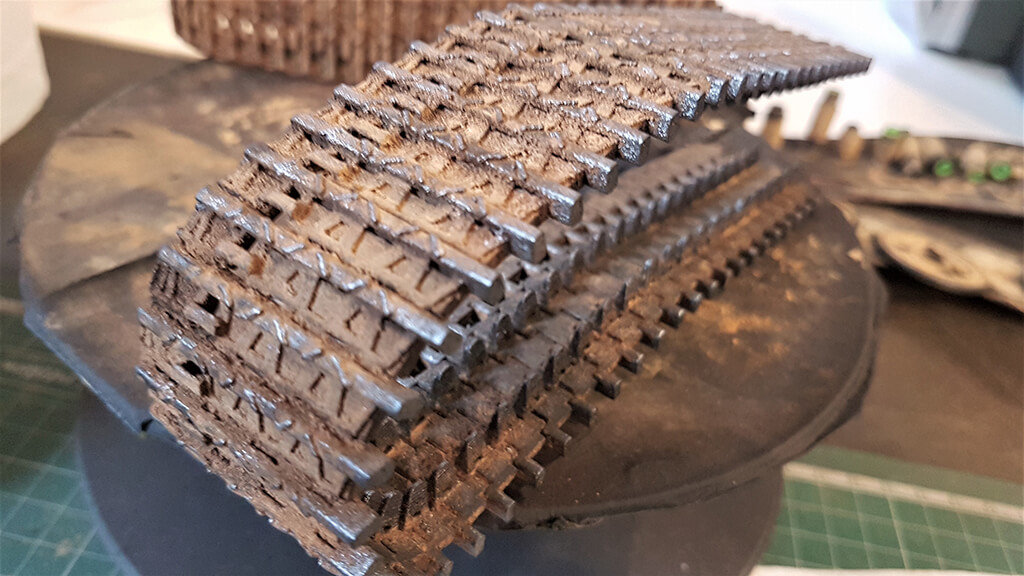
If you want to achieve the effect of chipped paint with rust underneath, it is necessary to paint everything with the rust colour using various shades of it.
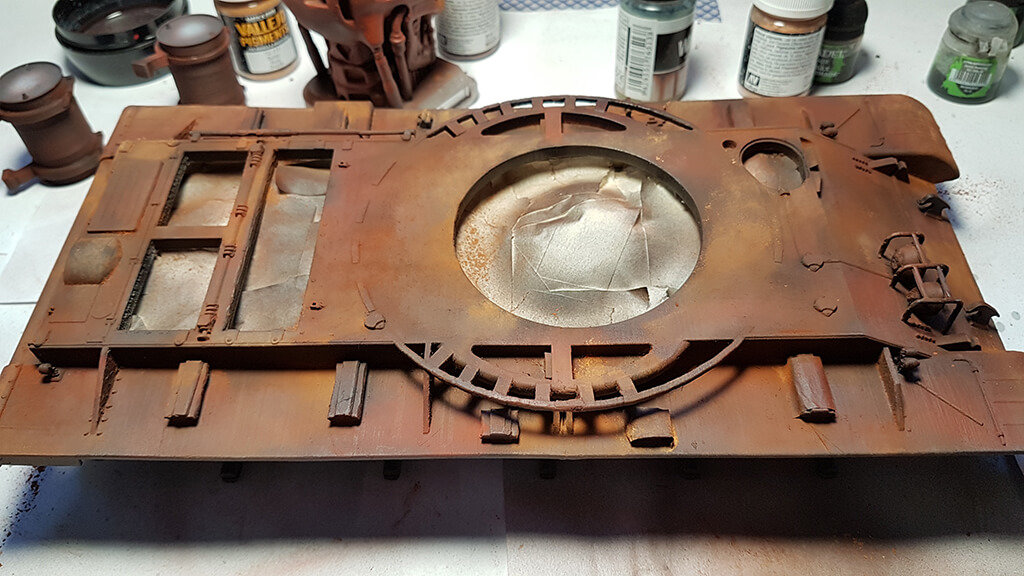
Then you can apply a special product (chipping). It prevents subsequent paint from sticking too much. Thus, when we apply the final layer of paint, we can remove parts of it with a moistened brush and show the background oxide.
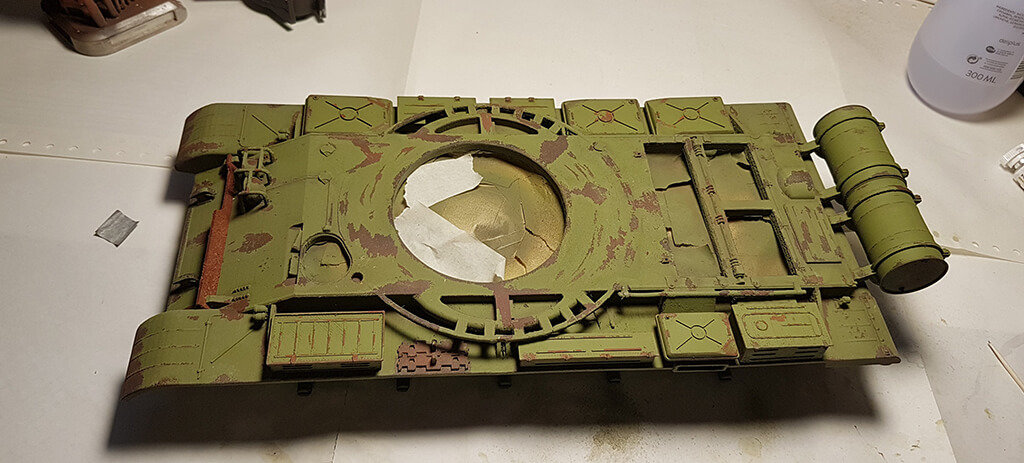
To achieve the effect of dust and mud, I use pigments mixed with thinner or apply the paint.
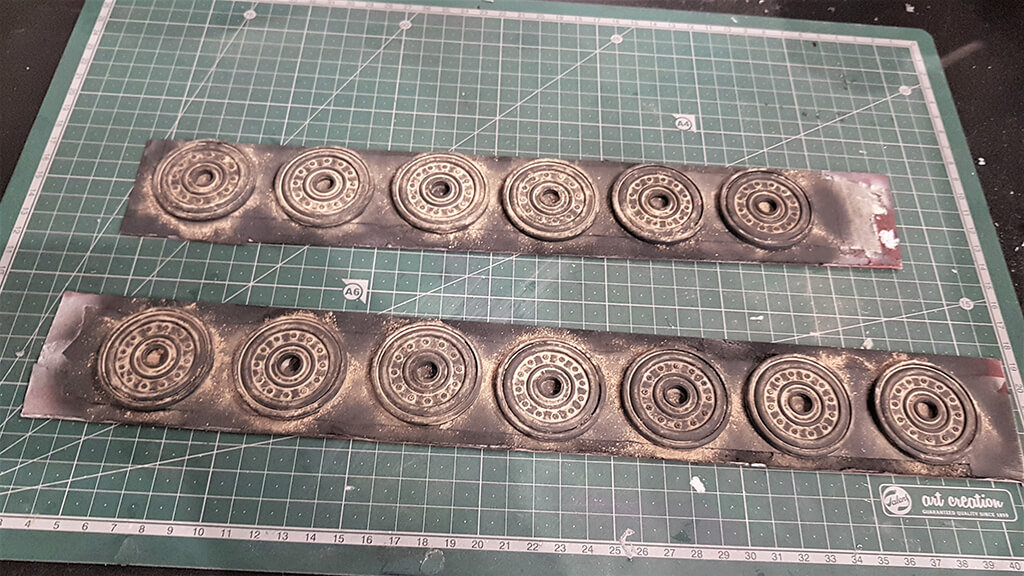
Just as I said, I like to leave everything painted even if the part is invisible from the outside, so in many cases, I apply the paint and add effects before assembling the 3D printed tank pieces.
13. Do you read the story about the particular tank before downloading the tank 3D model STL files and working on the project?
I did so with the Tiger tank 3D model for printing.
I wanted to replicate a specific tank, that of Captain Michael Wittmann, in the epic battle of Kursk. I believed this would give more life to the 3D printed model. In such a situation, the surroundings, one of the streets of Kursk, matter a lot.
14. Which 3D printer do you use to work on the tank 3D model for printing?
I have never used an SLA printer. I always 3D print on the FDM machine. Many people have the false belief that the tank models I made were printed with resin because almost no print stripes were noticed.
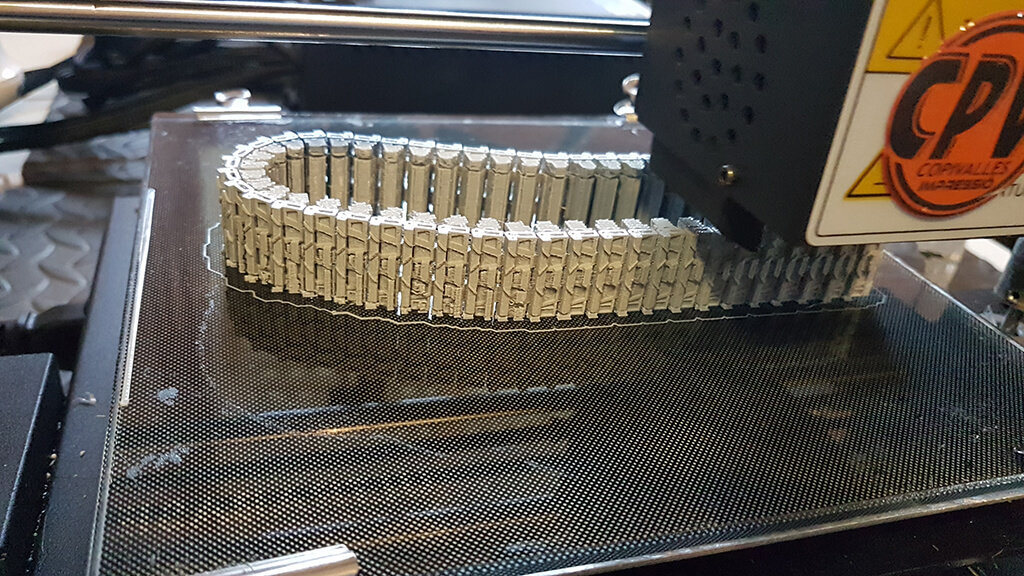
If you want to achieve such results, it is only necessary to have the machine very well adjusted mechanically, all the axes including extrusion to have well-calibrated and to know the software thoroughly to generate an optimal G-code.
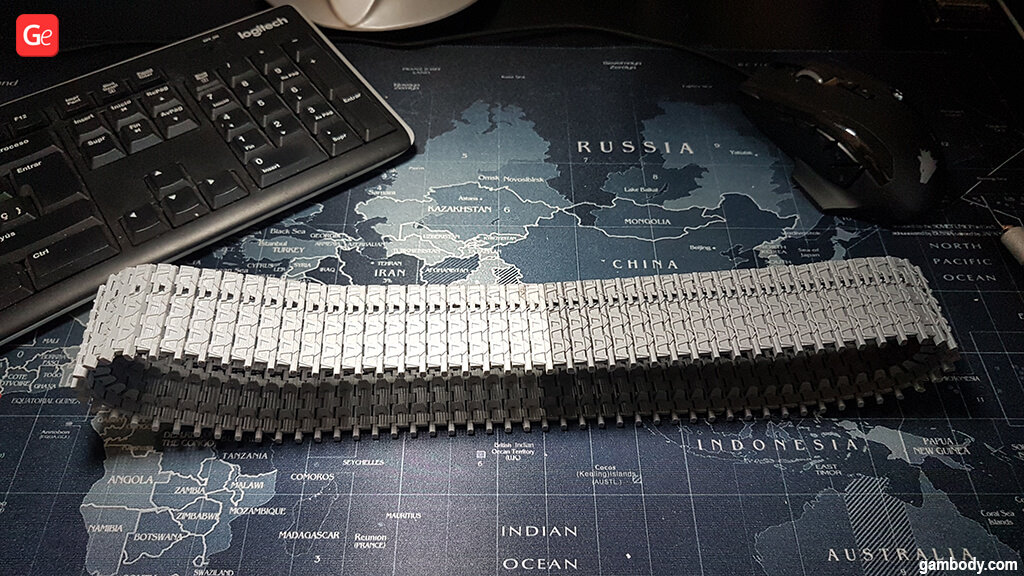
While printing the Tiger tank 3D model, I used a 0.25 nozzle, and in many cases, I printed in 0.05 layers.
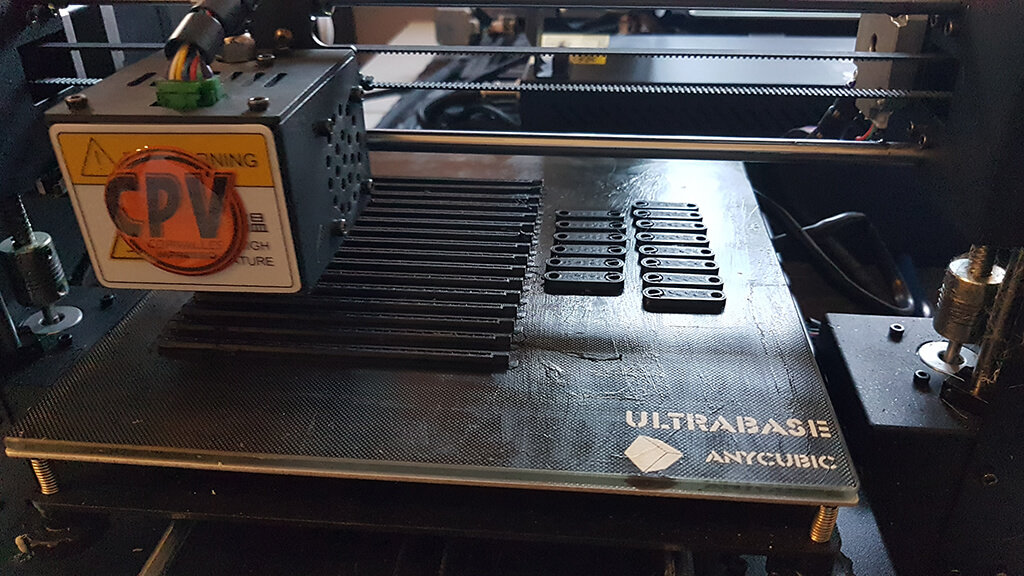
I also use different materials, ABS, PETG, Hips, based on the part I am working on at the moment. For example, the wheel torsion axes were printed with PETG material because it has a certain degree of flexibility. If I see that a part is small and can be fragile, I print it with ABS, etc.
In short, when you wish to achieve a great result, better use a well-adjusted and calibrated 3D printer, high-quality plastic (this is very important) and the best-suited material for each 3D printed tank piece.
15. Which of the three 3D printed tanks, Tiger, T-62 or Merkava, is your favourite model and why?
It is a complicated question. They are all my children, hehe.
If I have to choose one, it would be the 3D printed T-62 tank. I learned a lot while making it, and I enjoyed it very much. I consider it my first 3D printed model.
16. T-62 was the first tank 3D printed by you. How challenging was it compared to the Merkava Tank and customized Tiger model that followed?
With the T-62 tank 3D model for printing, all the postprocessing work was new to me. I had to learn about oxides, mud, dust, etc. I tested each new painting technique on various scrap pieces until I mastered it to apply to the primary 3D printed tank model. I kept learning something new every other day, and I discovered many impressive things.
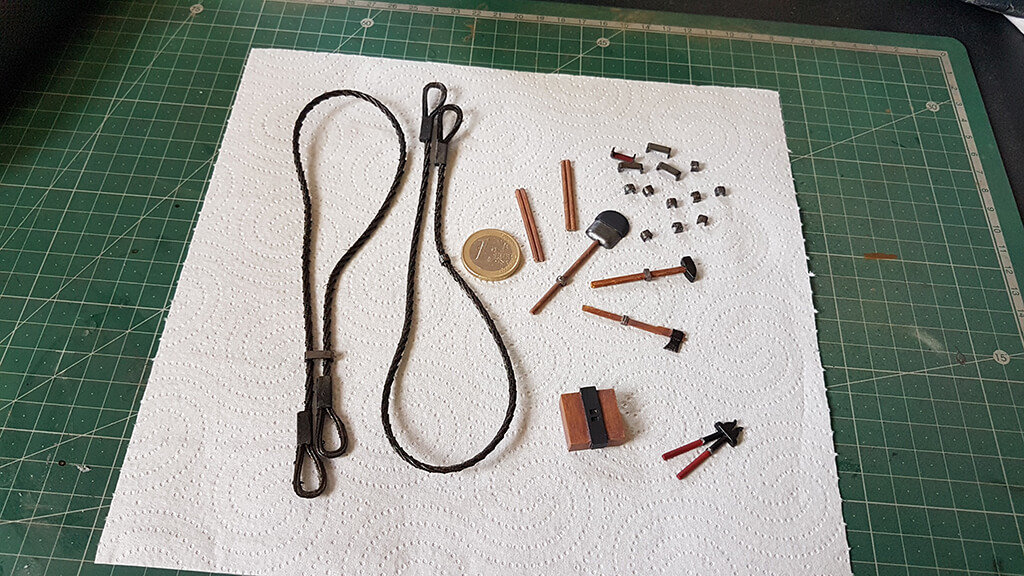
When I was making the Merkava tank 3D print, everything was a “more of the same” thing. It was not a challenge beyond the complexity of 3D printing.
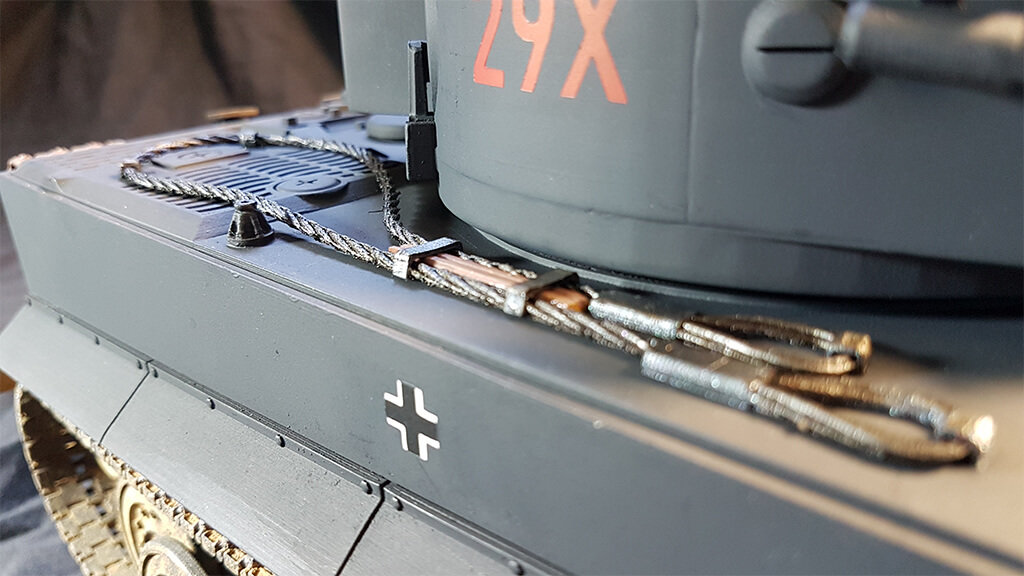
The Tiger tank 3D model was a personal design and creativity challenge. I searched for detailed information for each part of that 3D printing project. I designed, printed and painted it paying much attention to all the details.
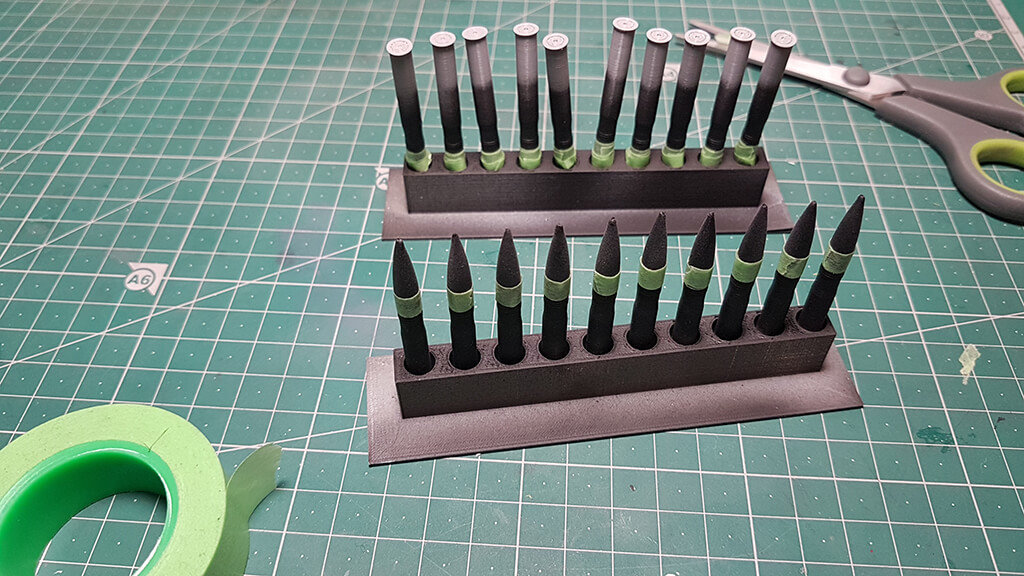
To paste or paint some pieces well, I even had to design an additional tool. I 3D printed it and found it useful. You can see it in the photo below.
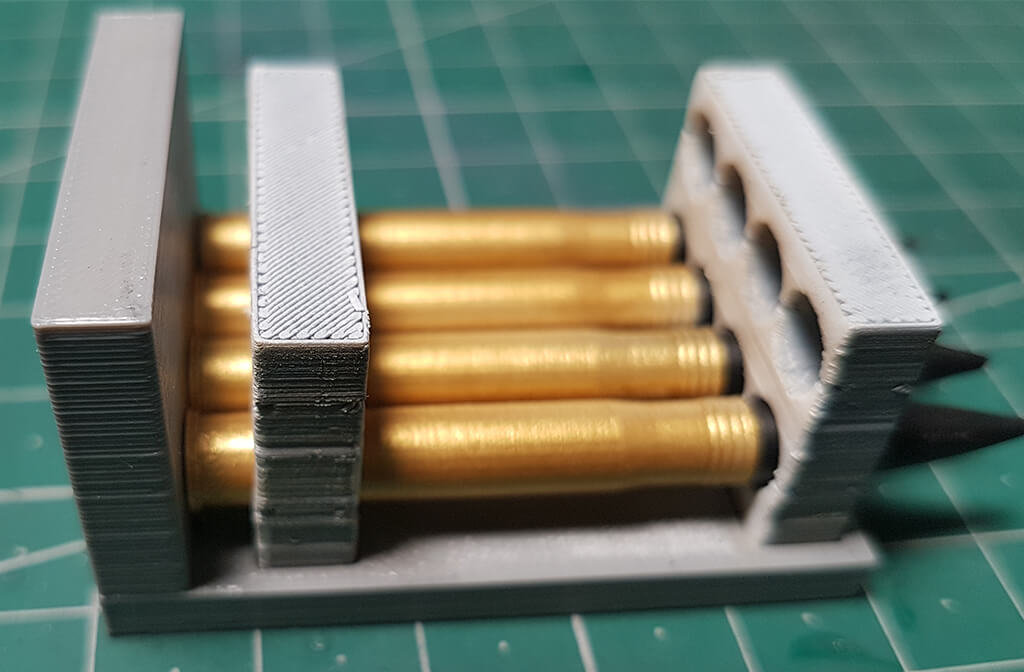
I made this tool to paste the projectiles in the same position.
17. Which is the next tank 3D model you are planning to 3D print? Could it happen soon?
Maybe I will start a project and turn it into a radio control tank model. It is something that I have been thinking about for a while, although I do not know if I can finish it any time soon.
18. Anything else you would like to add regarding 3D printing a stunning tank 3D model?
I would like to encourage people to 3D print one of these tanks. It is something enjoyable to do, and you learn a lot while taking this challenge.
The fantastic 3D printed tank collection created by Carlos Díaz might inspire you to make tanks for display or your board wargames. It will be great if you can share photos of your new 3D prints in Gambody Facebook group to motivate other hobbyists, share your painting tips & tricks and learn from their experience.
