In my previous part I shared my own experience in 3D printing. I have already tell you about Model Positioning and first three Slicer parameters.
In this part I would like to describe one of the most important Slicer’s parameter.
So…
• Let’s move to “Skirt and brim” parameter
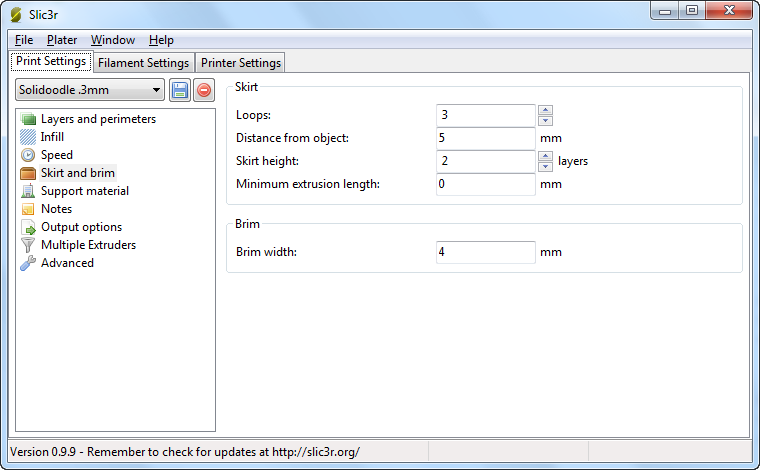
Skirt is actually borders around the model, before you print the model itself. With the help of the printed borders, you can immediately see the boundaries of the printed model.
“Loops” – the number of loops (borders) round the model. The printing of fringing allows you to see how well your table’s calibration is – the calibration of the printable object’s placement- before printing the first layer. If the layers of the skirt are distributed evenly along the platform this means the platform is calibrated correctly.
If the layers of the skirts are filled in unevenly, you can stop printing and check the table’s calibration.
I advise you to wait for several loops to be made to make sure that the extruder puts clear layer one upon other.
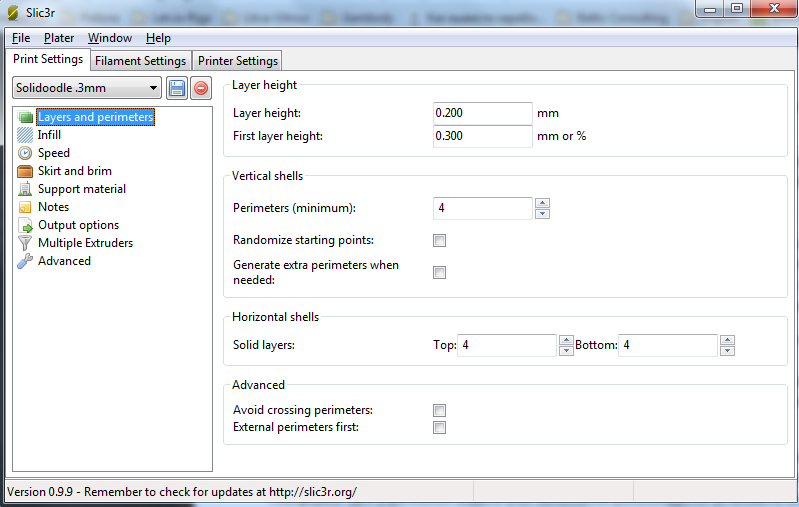
I put the value – 3.
“Distance from object” – the distance from the border to the object. If you want to print the model at the maximum scale allowed by your print bed size, then I advise you to do the minimum distance. Well, make sure that in this case you have some place left for borders at your print bed, as you can actually put “0” loops parameter, and the loops may be “printed in air” as there won’t be any place for them left at the print.
“Skirt height” – the number of printed edging (border) layers. I advise you to use 1-2 layers for heated print bed and not more than 2-3 layers if a printer is without heated print bed. Wherein the first layer will be used to stick to the print bed (the same for both types of printer with and without heated print bed), and the subsequent layer will form a tight raft for better model’s adhesion during the whole process of printing.
If you are using stl model file which has a raft already (as I do), then the number of printed edging (border) layers is not so important, and in this case you can use even 1 value. If there is no raft, then use from 2 to 3 value.
One more parameter which should be paid attention to is “Brim width” – the width of the lower layers of the model. Note, that this parameter must be of smaller value than “Distance from object”. Brim width parameter is designed to increase the contact patch. This parameter increase it is very important for models with a small contact area ( contact with the platform) which is very important when printing with ABS-plastic. Therefore, it is extremely important when printing Axe’s legs!
Well, now we move to “Support material” parameters. This is one of the most important settings, in case a model needs support structures, so be careful, and pay much attention to it.
Support structures – are printable plastic constructions, they are not part of a 3D-model and serve as removable support structure that are applied to support protruding or hanging elements (parts) of a printing model.
“Generate support material” – this option is used to choose whether any support structures needed or not. Enable this option when printing a model with some protruding or hanging in the air parts.
If speaking about Axe, in whatever position we are going to print it, we cannot do without any support structures.
“Overhang threshold” – this option is used to set up overhang angles of a model’s threshold, the limit when support structures start to be printed when exceeded; the angle is set up relative to the vertical axis. I’ll give you several examples and some pieces of advice based on my experience.
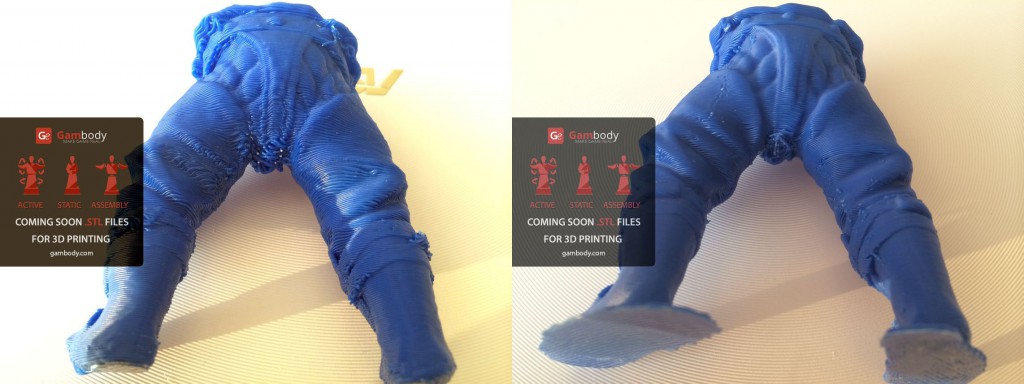
First, I tried to print out Axe’s legs, in a standing position, without supports structures, with the layer height 0.3mm. (picture 1). Then I printed Axe’s legs ( the same part), in a standing position, with support structures, and put overhang threshold of 90 degrees, with a layer height 0.2mm. (picture 2).
1. FEET – LAYER HEIGHT 0.2ММ 2. FEET – LAYER HEIGHT 0.3ММ
I have to say that the main quality difference, as you can see in the picture, is caused more by layer height decrease, but not only by 90 degree supports structures. Actually, I didn’t guess (was not confident) the angle degree, and it had to be a little bit lower, I needed to decrease it up to 80-85 degrees, this would have allowed to have more support structures and they would have been more stronger, and evidently the bunt would have been much better and smoother. Therefore, if you want to print Axe’s leg in a standing position, I advise you to put an angle of 85 degrees or even less, but do not make it too small (the reasons are described below).
It would be much better if you print Axe’s leg in a lying position. On my own experience it is always better when support structures are printed on a raft from the very beginning to the end to maintain quality of the model. Please note, that it is not very good when support structures start to be created on the outer part of the model. For example, when printing Axe’s legs in a standing position all the support structures will be created on its feet to support the knee hereinafter. Evidently the smaller is angle, the more support structures will be created on the model itself.
Therefore, when printing Axe’s legs in a lying position, you won’t have such problems, as all the constructions will be built not on a model itself but tightly placed under a model and only in this case you can put 45 degrees without a doubt.
