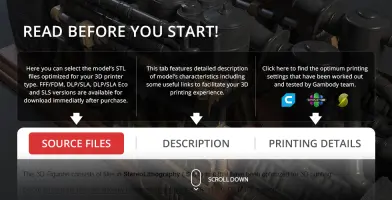
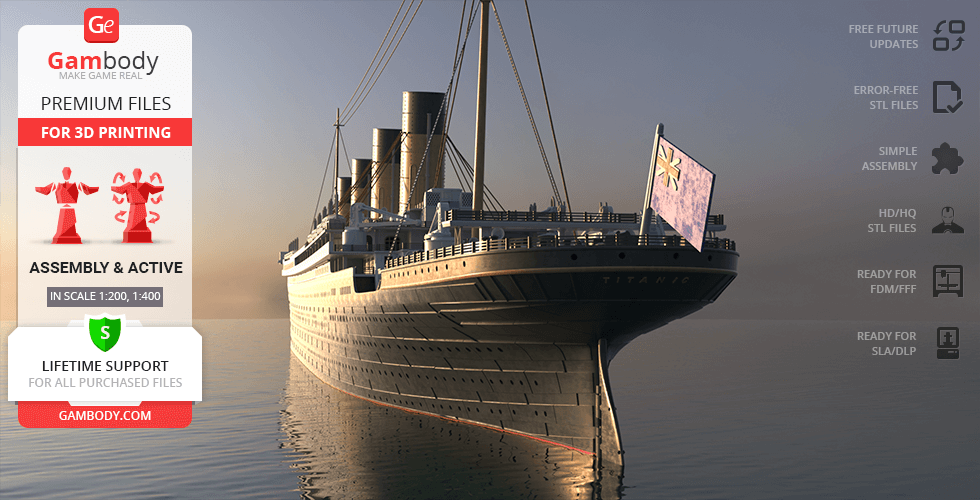
This Olympic Class Steam Engine model for 3D Printing consists of files in StereoLithography (.Stl) format that is optimized for 3D printing.
Before printing the files, we strongly recommend reading the PRINTING DETAILS section.
WHAT WILL YOU GET AFTER PURCHASE?
- 2 versions of files of Steam Engine model for FFF/FDM and DLP/SLA printers;
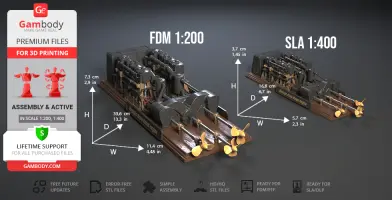
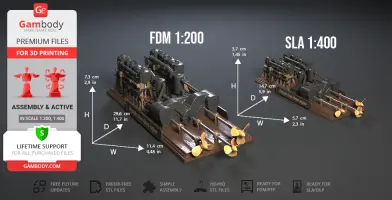
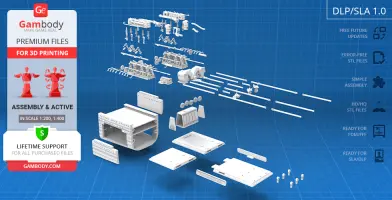
- STL files of Olympic Class Steam Engine for 3D Printing which consist of 124 parts;
- Sizes:
- A printed FFF/FDM version is 73 mm tall, 114 mm wide, 296 mm deep;
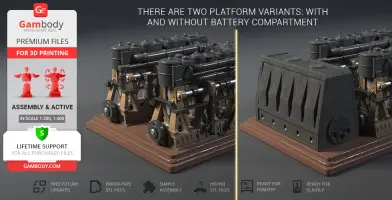
- A printed FFF/FDM version with the battery compartment is 73 mm tall, 114 mm wide, 336 mm deep;
- A printed DLP/SLA version is 37 mm tall, 57 mm wide, 147 mm deep;
- A printed DLP/SLA version with the battery compartment is 37 mm tall, 57 mm wide, 168 mm deep;
- High-poly detailed model of Olympic Class Steam Engine;
- Assembly Manual for FFF/FDM 1.0 and DLP/SLA 1.0 versions in PDF and video formats;
- Detailed settings that we provide as a recommendation for Cura, Simplify3D, Slic3r and PrusaSlicer for the best print;
- Full technical support from the Gambody Support Team.
Detailed information about this 3D printing model is available in the DESCRIPTION section.
ABOUT THIS 3D MODEL
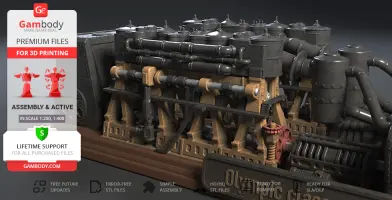
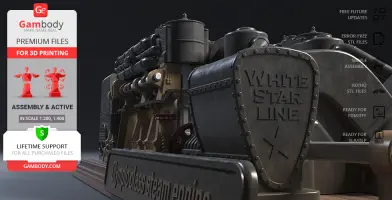
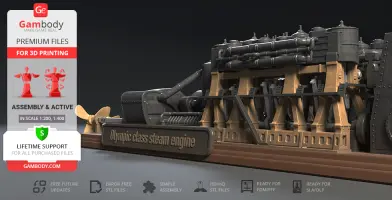
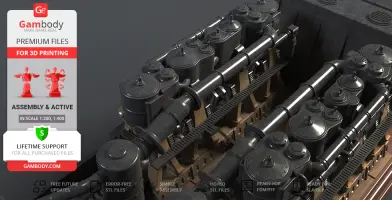
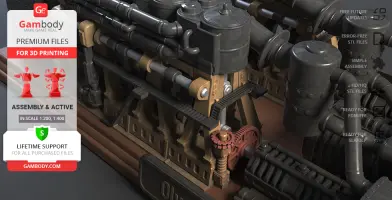
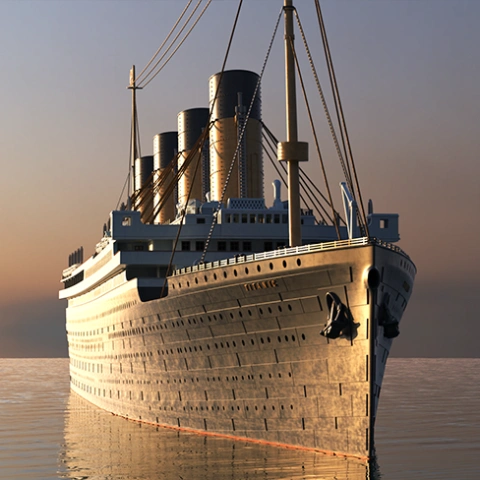
Olympic class ocean liners were designed as the largest and the most deluxe passenger ships for transatlantic voyages. Royal Mail Ships (RMS) Olympic, Titanic and Britannic were of huge size and could accommodate more than 3000 people (passengers and crew). The scale of the ships allowed the provision of such sporting and relaxation facilities as veranda cafes, restaurants, reading and writing rooms, squash court, swimming pool, barber, Turkish baths, massage rooms, gymnasium, etc. All RMS vessels were equipped with powerful steam engines that provided propulsion along the sea routes. The triple-expansion steam engines ran on steam from the burning of coal in the ship’s boilers. The steam traveled through the steam lines toward the triple-expansion steam engines and set the cylinders that moved the pistons up and down in motion. Exhaust steam powered Parson’s turbine to drive propellers and caused the crafts to move.
Inspired by the unique and effective combination of engines of Royal Mail Ships, our contributing 3D artist created this model for 3D printing. The Olympic Class Steam Engine can be assembled as a part of the Titanic 3D printing model and can be displayed as a separate exhibit. The model comes with a hangar that is compatible with the files of the hull of Titanic and gives the option to combine the parts and build the engine in the liner. There are two options for the display of the starboard propellers, shortened and extended to place beneath the stern section of Titanic. The pistons have active mechanisms that allow movement. The gear structure synchronizes the action of the engine cylinders. With its extensive features and installation options this outstanding model for 3D printing will bring you a lot of joy and unforgettable impressions!
ADAPTATION FOR 3D PRINTING
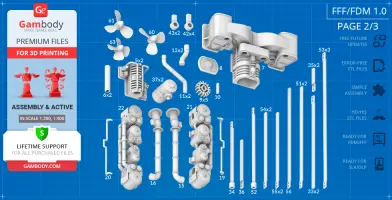
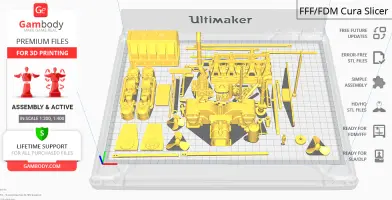
For you to receive the cleanest 3D printing result possible and minimize the amount of filament needed for generated support, the Steam Engine model was divided into convenient assembly parts. All assembly parts in the FFF/FDM 1.0 version are provided in STL files in recommended positions that were worked out in order to ensure the smoothness of the details’ surfaces after printing and that the 3D printing beginners won't face difficulties when placing the parts on a build plate. After downloading any model's file you will also receive "Assembly Manual" for FFF/FDM 1.0 and DLP/SLA 1.0 versions in PDF format. We highly recommend that you get acquainted with the “Assembly Video” and "Assembly Manual" before getting down to the assembly.
The model is saved in STL files, a format supported by most 3D printers. All STL files for 3D printing have been checked in Netfabb and no errors were shown. The Olympic Class Steam Engine was designed to match the default scales of the Titanic 3D printing model.
VERSIONS' SPECIFICATIONS
FFF/FDM & DLP/SLA 1.0 version features:
- Contain 63 parts and 61 parts respectively;
- There is an option to install a compartment for the battery;
- A printed FFF/FDM version is 73 mm tall, 114 mm wide, 296 mm deep;
- A printed FFF/FDM version with the battery compartment is 73 mm tall, 114 mm wide, 336 mm deep;
- A printed DLP/SLA version is 37 mm tall, 57 mm wide, 147 mm deep;
- A printed DLP/SLA version with the battery compartment is 37 mm tall, 57 mm wide, 168 mm deep;
- Steam Engine can be assembled as a part of the Titanic 3D printing model or displayed separately;
- The pistons have active mechanisms;
- The gear structure synchronizes the action of the engine cylinders;
- Two options for the display of starboard propellers;
- There is an option to set up the engine to make the system operating;
- All parts are provided in STL files in recommended positions that were worked out in order to ensure the smoothness of the details’ surfaces after printing.
You can get an Olympic Class Steam Engine for 3D Printing immediately after the purchase! Just click the green Buy button in the top-right corner of the model’s page. You can pay with PayPal or your credit card.
Watch the tutorial on how to assemble Olympic Class Steam Engine for 3D Printing on Gambody YouTube channel.
Also, you may like other Vessel 3D Printing Models.
_______
FAQ:
Generic
Below you can find printing recommendations for Cura, Simplify3D, Slic3r and PrusaSlicer software.
Disclaimer: The following printing settings are a recommendation, not an obligation. The parameters can vary depending on the peculiarities of your 3D printer, the material you use, and especially the particular assembly part you are working with. Each part that any model comprises often needs preliminary review, and you are free to tweak the settings the way you find suitable.
Note:
- You can scale up the model (downscaling for FFF/FDM 3D printers is not recommended!);
- All connectors should be printed at 100% Infill.
Cura printing recommendations:
These are averaged settings which were tested in the Cura 5.2.1 slicer. Test models were printed on Anycubic Vyper, Creality Ender 3 Pro with PLA filament.
To avoid printing problems, we recommend the following settings: download
Simplify3D printing recommendations:
These are averaged settings which were tested in the Simplify3D 5.0.0 slicer. Test models were printed on Anycubic Vyper, FLSUN v400, Ender3 S1 with PLA filament.
To avoid printing problems, we recommend the following settings: download
Slic3r printing recommendations:
These basic 3D printing settings recommendations for beginners were tested in Slic3r 1.3.0 software. Test models were printed on Ultimaker 2, Creality Ender 3, Creality Cr-10S pro v2, Anycubic I3 Mega, Anycubic I3 MegaS, Anycubic Vyper with PLA and PetG filaments.
To avoid printing problems, we recommend the following settings: download
PrusaSlicer printing recommendations:
These basic 3D printing settings recommendations for beginners were tested in PrusaSlicer 2.3.1. Test models were printed on Ultimaker 2, Creality Ender 3, Creality Cr-10S pro v2, Anycubic I3 Mega, Anycubic I3 MegaS, Anycubic Vyper with PLA and PETG filaments.
To avoid printing problems, we recommend the following settings: download


Comments