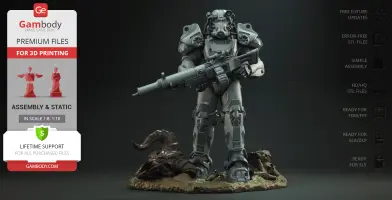
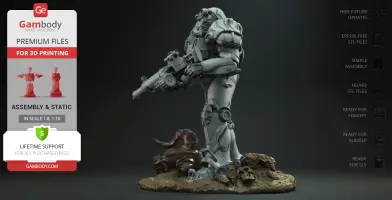
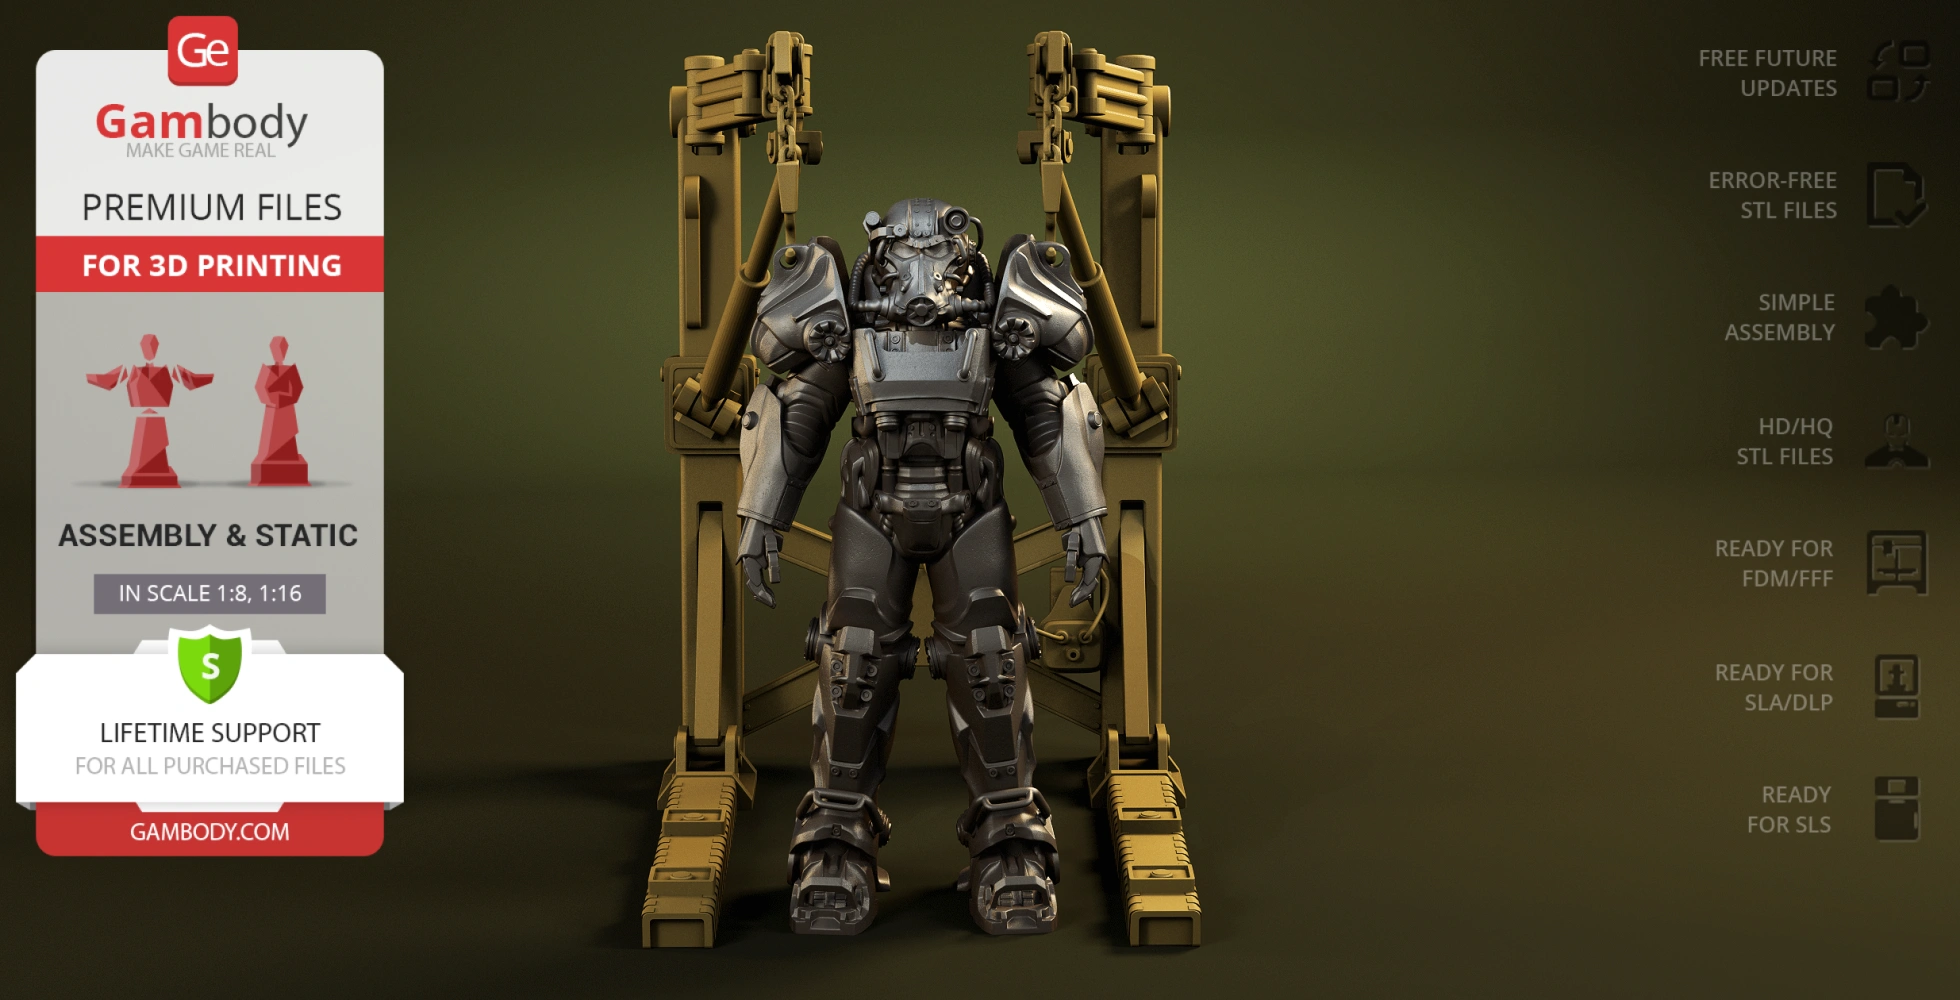
This 3D printing design of T-60 Power Armor consists of files in StereoLithography (.Stl) format that is optimized for 3D printing.
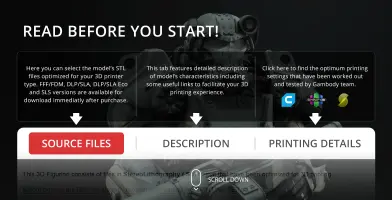
Before printing the files, we strongly recommend reading the PRINTING DETAILS section.
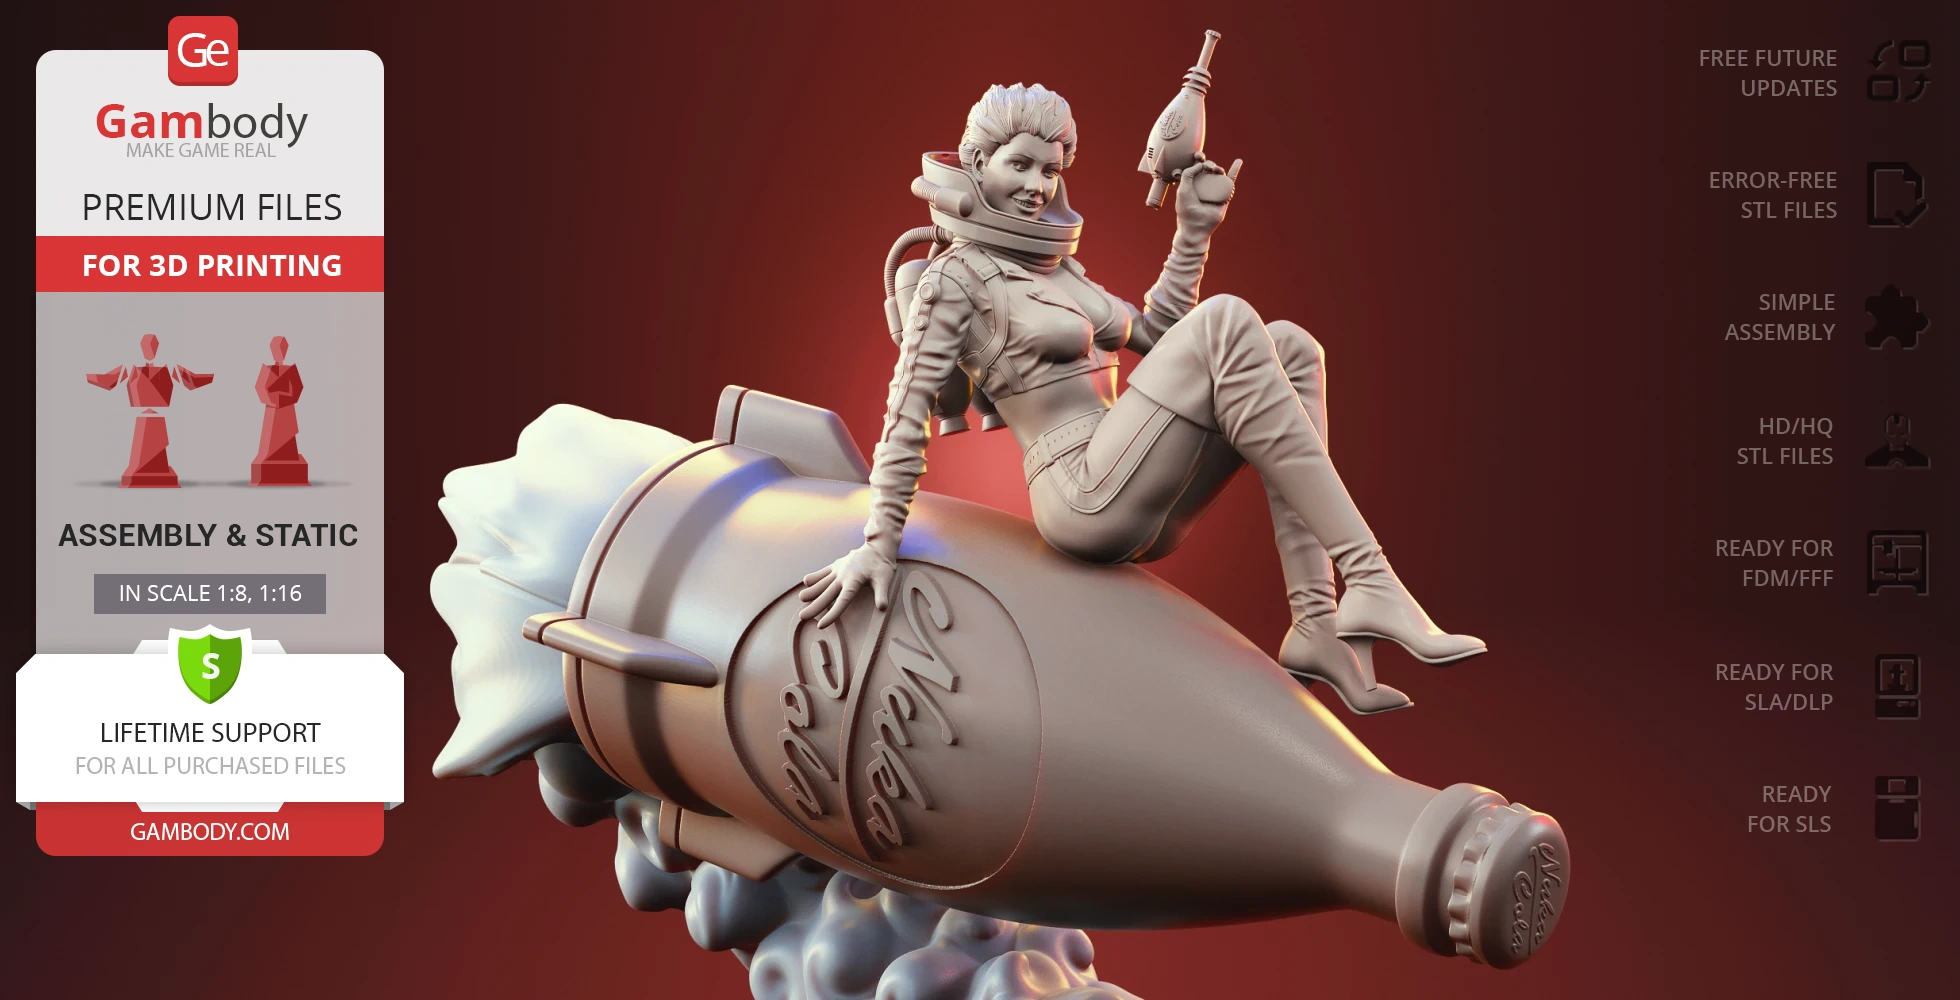
WHAT WILL YOU GET AFTER PURCHASE?
- 4 versions of T-60 Power Armor STL files for FFF/FDM, DLP/SLA, DLP/SLA Eco, SLS — files for all versions are available for download after the purchase;
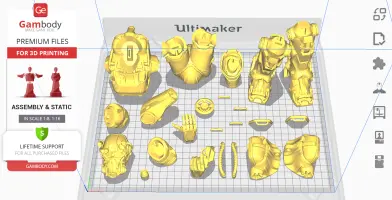
- STL files of high-poly T-60 Power Armor model for 3D printing consist of 56 files;
- Sizes for:
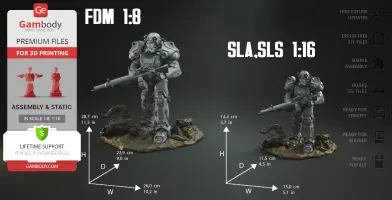
- FFF/FDM: 287 mm tall, 260 mm wide, 229 mm deep;
- DLP/SLA/SLS: 144 mm tall, 130 mm wide, 115 mm deep;
- Assembly Manual for FFF/FDM 1.0 and DLP/SLA 1.0 versions in PDF and video formats;
- Detailed settings that we provide as a recommendation for Cura, Bambu Studio, Simplify3D, Slic3r and PrusaSlicer for the best print;
- Full technical support from the Gambody Support Team.
Detailed information about these 3D printer STL files is available in the DESCRIPTION section.
ABOUT THIS 3D MODEL
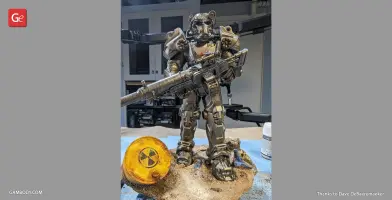
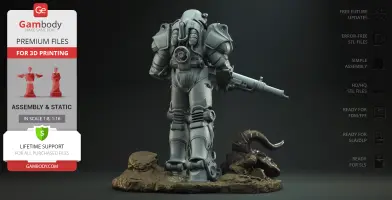
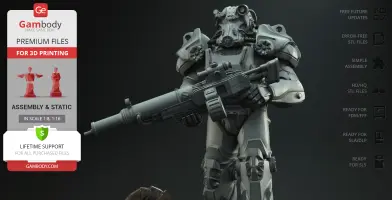
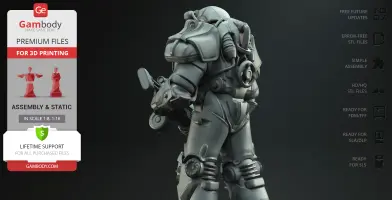
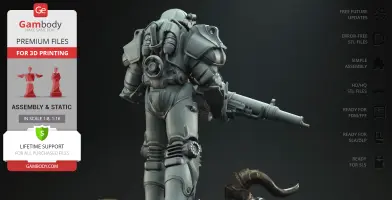
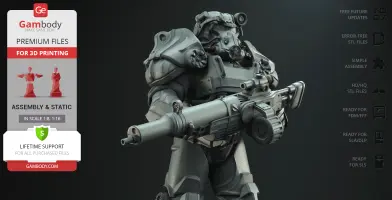
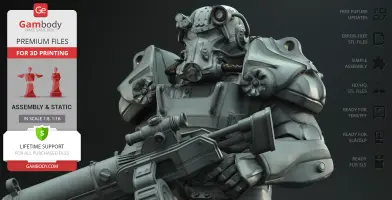
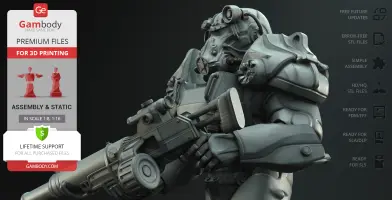
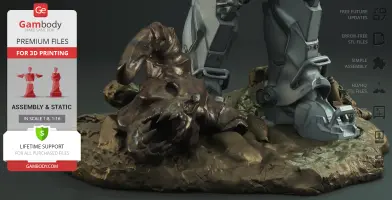
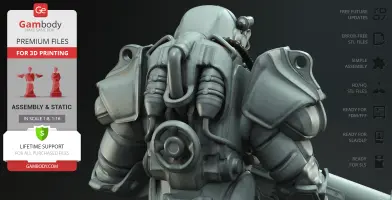
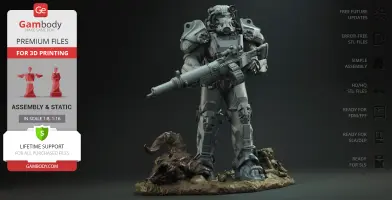
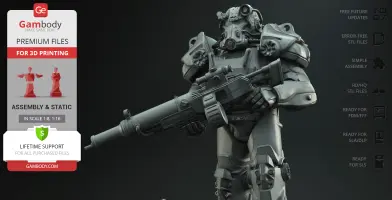
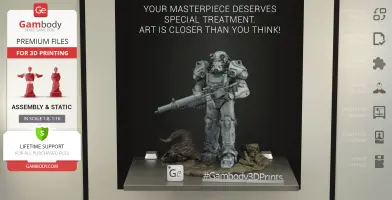
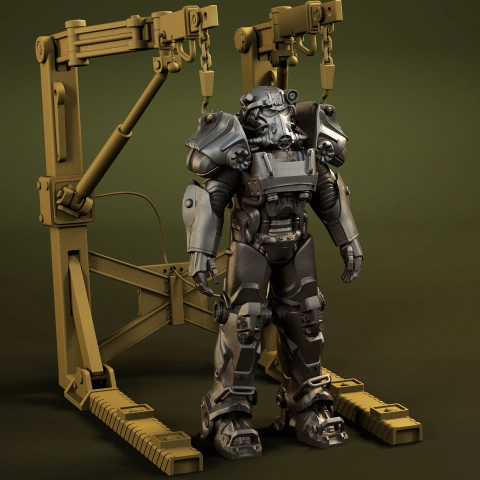
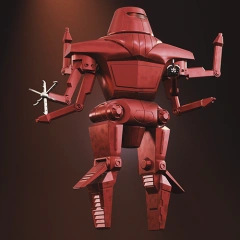
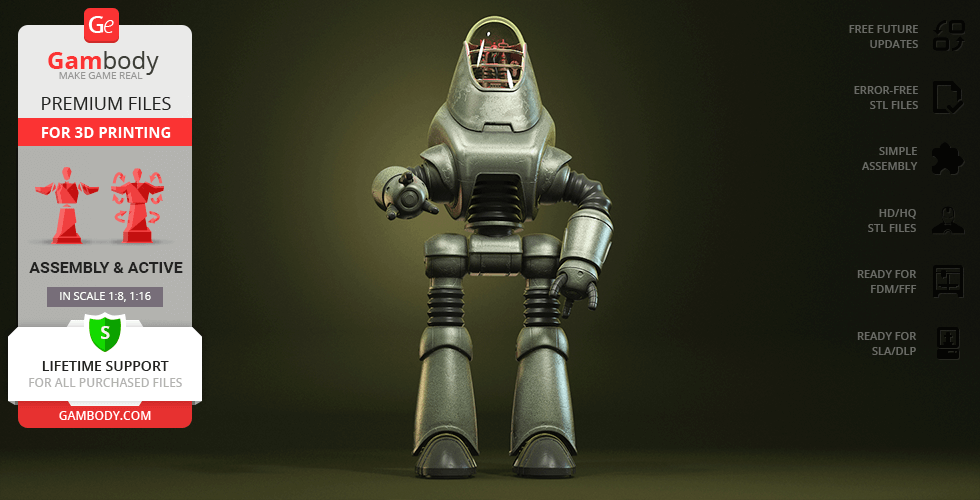
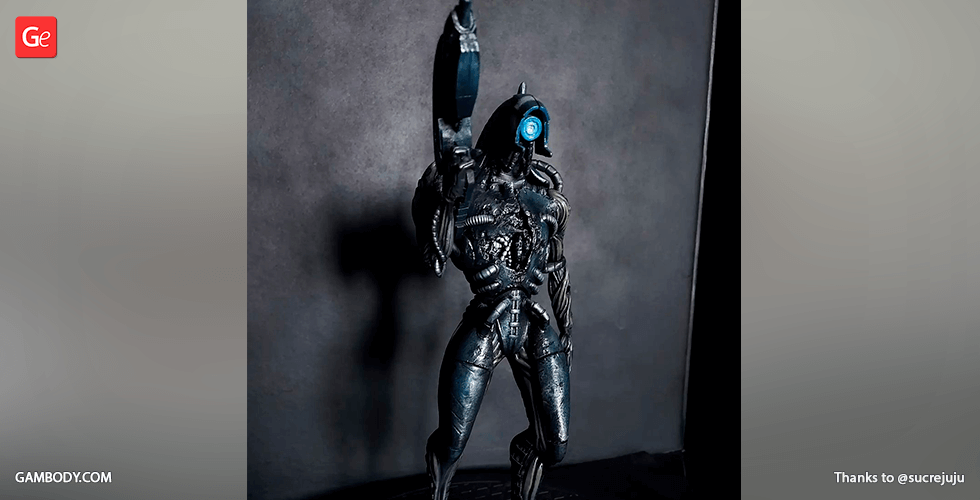
Fallout 4 is considered one of the most popular RPG games and it is not surprising since the game gives the players the possibility to explore, combat, craft, use power armor, and have alive and fleshed-out companions in the atmosphere of a post-apocalyptic environment. T-60 Power Armor is an exoskeleton that the Sole Survivor can either find or craft in the course of the Fallout 4 video game. Once completed, Power Armor guarantees high radiation resistance, increases strength, and retains the mobility of the playable character at the same time.
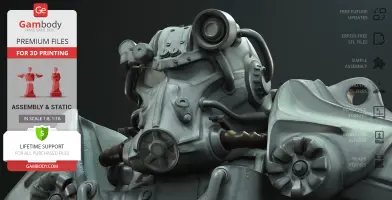
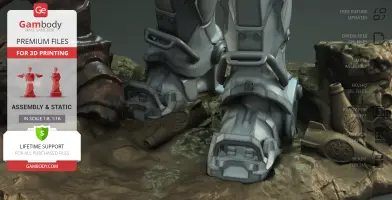
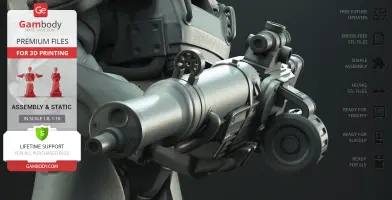
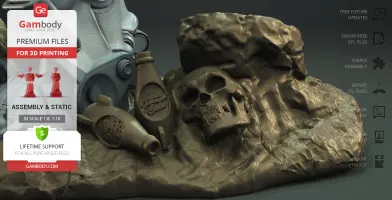
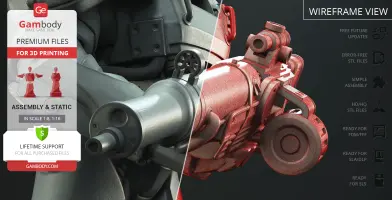
The depiction of T-60 Power Armor Suit in the upcoming Fallout TV show inspired our contributing 3D artist to create this remarkable 3D print model. The massive construction of the suit does not make us doubt the protective features of T-60 Power Armor: the head of the Sole Survivor is protected with a helmet equipped with a thermal imager, a headlamp, and a gas mask; the arms are covered with special bracers and knuckle-dusters; the reactive torso plates are perfect for inflicting attacks while the jet pack allows the wearer to “propel into the air”; the build of the legs enables good sprint speed. The semi-automatic assault rifle looks no less impressive adding bigger belligerence to the appearance of T-60 Power Armor Suit. The elaborate design of the model and its authenticity will give you indescribable emotions when 3D printing the project, believe us!
ADAPTATION FOR 3D PRINTING
T-60 Power Armor Suit 3D printing design is a static assembly model and its moderation and adaptation for different types of 3D printers took the Gambody team 60 hours in total. The model's anatomy and proportions were thoroughly reviewed during the moderation process for the set to be depicted harmoniously in the intended posture.
The model's cutting was chosen by our team to minimise the amount of generated support and some of the parts were hollowed out for you to save resin in the Eco version. In order to conceal the places where the assembly parts of the model are connected, T-60 Power Armor Suit was divided into convenient assembly parts.
All assembly parts in the FFF/FDM 1.0 version are provided in STL files in recommended positions that were worked out in order to ensure the smoothness of the details’ surfaces after printing and that the 3D printing beginners won't face difficulties when placing the parts on a build plate. When downloading any model's file you will also receive "Assembly Manual" for FFF/FDM 1.0 and DLP/SLA 1.0 versions in PDF format. We highly recommend that you get acquainted with the “Assembly Video” and "Assembly Manual" before getting down to the T-60 Power Armor Suit.
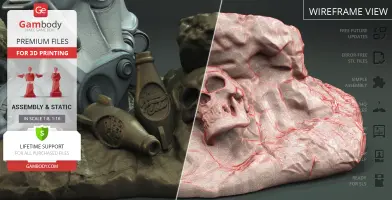
The design is saved in STL files, a format supported by most 3D printers. All STL files for 3D printing have been checked in Netfabb and no errors were shown.
The model's scale was calculated from the height of the T-60 Power Armor Suit which is 2200 mm. The 3D printing design's chosen scales are 1:8 for the FFF/FDM version and 1:16 for the DLP/SLA/SLS versions.
VERSIONS’ SPECIFICATIONS
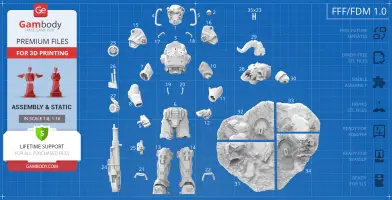
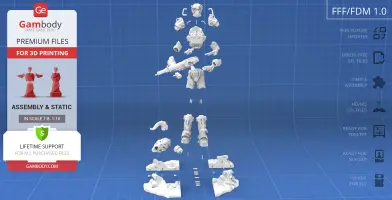
FFF/FDM 1.0 versions features:
- Contains 35 parts;
- A printed model is 287 mm tall, 260 mm wide, 229 mm deep;
- All parts are divided in such a way that you will print them with the smallest number of support structures.
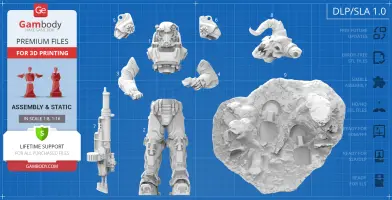
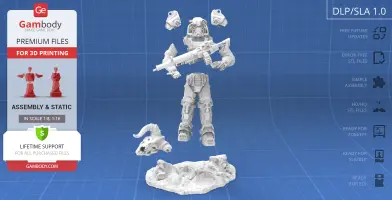
DLP/SLA 1.0 versions features:
- Contains 9 parts;
- A printed model is 144 mm tall, 130 mm wide, 115 mm deep;
- All parts are divided in such a way to fit the build plates and to ensure that support structures are generated where needed.
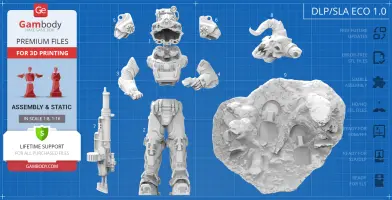
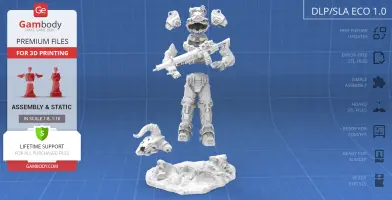
DLP/SLA Eco 1.0 versions features:
- Contains 9 parts;
- A printed model is 144 mm tall, 130 mm wide, 115 mm deep;
- Some parts are manually hollowed out to save resin.
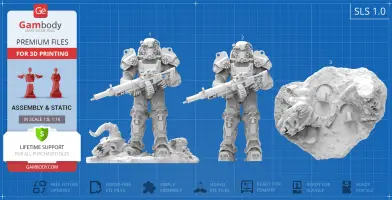
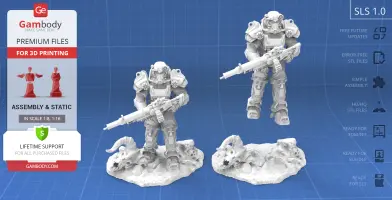
SLS 1.0 versions features:
- Contains 3 parts - a solid T-60 Power Armor Suit model on and separately from the stand.
You can get the STL Files of T-60 Power Armor Suit immediately after the purchase! Just click the green Buy button in the top-right corner of the model’s page. You can pay with PayPal or your credit card.
Watch the tutorial on how to assemble the 3D Printed T-60 Power Armor Suit model from the provided 3D Print Files on Gambody YouTube channel.
Also, you may like other Video Game 3D Printing Models.
_______
FAQ:
Generic
Below you can find printing recommendations for Cura, Bambu Studio, Simplify3D, Slic3r and PrusaSlicer software.
Disclaimer: The following printing settings are a recommendation, not an obligation. The parameters can vary depending on the peculiarities of your 3D printer, the material you use, and especially the particular assembly part you are working with. Each part that any model comprises often needs preliminary review, and you are free to tweak the settings the way you find suitable.
Note:
You can scale up the model (downscaling for FFF/FDM 3D printers is not recommended!);
All connectors should be printed at 100% Infill.
Bambu Lab printing recommendations:
These basic 3D printing settings recommendations for beginners were tested in Bambu Studio 1.9.1. Test models were printed on the Bambu Lab A1, Bambu Lab A1 Mini, Creality Ender 3 S1, Anycubic Kobra 2, and Anycubic Vyper using PLA and PETG filaments.
To avoid printing problems, we recommend the following settings: download
Cura printing recommendations:
These are averaged settings which were tested in the Cura 5.2.1 slicer. Test models were printed on Anycubic Vyper, Creality Ender 3 Pro with PLA filament.
To avoid printing problems, we recommend the following settings: download
Simplify3D printing recommendations:
These are averaged settings which were tested in the Simplify3D 5.0.0 slicer. Test models were printed on Anycubic Vyper, FLSUN v400, Ender3 S1 with PLA filament.
To avoid printing problems, we recommend the following settings: download
Slic3r printing recommendations:
These basic 3D printing settings recommendations for beginners were tested in Slic3r 1.3.0 software. Test models were printed on Ultimaker 2, Creality Ender 3, Creality Cr-10S pro v2, Anycubic I3 Mega, Anycubic I3 MegaS, Anycubic Vyper with PLA and PetG filaments.
To avoid printing problems, we recommend the following settings: download
PrusaSlicer printing recommendations:
These basic 3D printing settings recommendations for beginners were tested in PrusaSlicer 2.3.1. Test models were printed on Ultimaker 2, Creality Ender 3, Creality Cr-10S pro v2, Anycubic I3 Mega, Anycubic I3 MegaS, Anycubic Vyper with PLA and PETG filaments.
To avoid printing problems, we recommend the following settings: download


Comments